How to Dye a Lacrosse Head: Step-by-Step Guide for Beginners
Dyeing a lacrosse head can give your gear a unique look. It’s a fun and creative way to stand out on the field.
Whether you’re new to lacrosse or an experienced player, dyeing your lacrosse head can be a rewarding project. The process involves a few simple steps and some basic supplies. You’ll need dye, water, and a container, among other things. Not only does dyeing allow you to customize your gear, but it also lets you express your personal style.
This guide will walk you through the steps to dye your lacrosse head, ensuring you get a vibrant, lasting result. Let’s dive in and start creating your custom lacrosse head!
Introduction To Lacrosse Head Dyeing
Dyeing a lacrosse head allows you to add your personal touch to your gear. It can make your lacrosse head stand out on the field. This guide will help you learn how to dye a lacrosse head step by step.
Benefits Of Dyeing
Dyeing your lacrosse head has many benefits. Here are some key points:
- Personalization: You can choose your own colors and designs.
- Visibility: A dyed head can be easier to spot on the field.
- Team Spirit: Match your team colors for a unified look.
- Unique Look: Stand out with a one-of-a-kind design.
Materials Needed
Before you start dyeing, gather all the materials you will need. Here’s a list:
| Material | Purpose |
|---|---|
| Lacrosse Head | The item to be dyed. |
| Dye (RIT Dye) | To color the lacrosse head. |
| Hot Water | To mix with the dye. |
| Plastic Container | To hold the dye and water mix. |
| Rubber Gloves | To protect your hands. |
| Masking Tape | To create patterns and designs. |
| Paper Towels | For cleaning up spills. |
| Old Clothes | To wear while dyeing. |
Make sure you have all these materials ready before you start the dyeing process. This preparation will help ensure a smooth and successful dyeing experience.
Choosing Your Design
Choosing your design is a crucial part of dyeing your lacrosse head. The design you choose can show your personality and make your gear unique. Whether you prefer solid colors or intricate patterns, planning ahead is key. Let’s explore the options to help you make the best choice for your lacrosse head.
Solid Colors
Solid colors are a popular choice for many players. They are simple, yet effective. A single color can make a bold statement on the field. Solid colors are also easier to apply, especially for beginners. You can choose your team’s color or your favorite color. Make sure to pick a dye that is vibrant and long-lasting. This ensures your lacrosse head looks great game after game.
Patterns And Graphics
Patterns and graphics add flair to your lacrosse head. Stripes, fades, and splatters are common patterns that look great. Graphics like logos or symbols can make your head stand out. These designs require more skill and patience. It’s helpful to use stencils or tape to create sharp lines and shapes. Planning your design on paper first can save time and reduce mistakes. Remember, the more detailed the design, the more time you will need.
Preparing The Lacrosse Head
Before you begin dyeing your lacrosse head, it’s important to prepare it correctly. Proper preparation ensures the dye adheres well and gives you a vibrant, long-lasting color. Let’s dive into the first steps: cleaning the head and taping off areas.
Cleaning The Head
Start by cleaning the lacrosse head. Use warm water and mild soap. Scrub away dirt, grease, and grime with a brush. Rinse thoroughly to remove all soap residues. Dry the head completely using a soft cloth. Any leftover moisture can affect the dye process.
Taping Off Areas
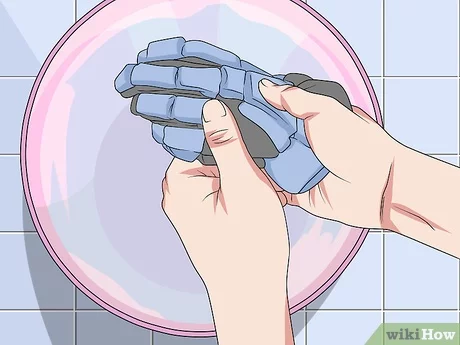
Next, tape off areas you don’t want dyed. Use masking tape or painter’s tape. Cover the throat, ball stop, and other parts you want to keep clean. Ensure the tape is firmly pressed down to prevent dye bleeding. You can also create designs using tape. Get creative with patterns and shapes. This will give your lacrosse head a unique look.

Credit: stylinstrings.com
Setting Up Your Dye Station
Dyeing a lacrosse head can be a fun and creative way to personalize your gear. Before you start, it’s essential to set up your dye station properly. A well-organized work area ensures safety and helps achieve the best results.
Safety Precautions
Always prioritize safety while working with dyes and chemicals. Follow these steps to protect yourself:
- Wear gloves: Prevent skin contact with dyes.
- Use a mask: Avoid inhaling harmful fumes.
- Protective eyewear: Shield your eyes from splashes.
- Work in a ventilated area: Ensure good airflow to disperse fumes.
Work Area Setup
Organizing your work area is crucial for a smooth dyeing process. Here’s how to set it up:
- Cover the surface: Use newspapers or plastic sheets to protect your workspace.
- Gather materials: Have your dye, lacrosse head, and tools within reach.
- Prepare dye baths: Use large containers to mix dyes and water as per instructions.
- Set up drying space: Arrange an area to let the dyed lacrosse head dry completely.
The table below lists the essential materials and their purposes:
| Material | Purpose |
|---|---|
| Gloves | Protect hands from dye |
| Mask | Prevent inhalation of fumes |
| Protective Eyewear | Shield eyes from splashes |
| Plastic Sheets | Cover and protect the work surface |
| Large Containers | Mix dyes and water |
Mixing The Dye
Mixing the dye is a crucial step in dyeing a lacrosse head. Properly mixed dye ensures even color application. Follow these steps to mix your dye correctly.
Choosing Dye Colors
First, choose your dye colors. Select colors that match your team or personal preference. Bright colors stand out, while darker colors offer a sleek look. Most lacrosse dye kits come with various color options. Ensure the dye is safe for plastic.
Preparing Dye Solution
Next, prepare the dye solution. Start by boiling water in a large pot. The water should be hot but not boiling. Pour the hot water into a container. Add the dye powder to the water. Stir until the powder fully dissolves. The solution should be smooth and free of clumps.
For a more vibrant color, add more dye powder. For a lighter shade, use less dye powder. Stir the solution continuously to maintain an even mix. The dye is now ready for use.
Dyeing Techniques
Learning how to dye a lacrosse head can be a fun project. Different techniques can give your lacrosse head unique and vibrant designs. In this section, we will explore two popular methods: the Dip Dye Method and the Splatter Dye Method.
Dip Dye Method
The Dip Dye Method is a simple and effective way to color your lacrosse head. This method involves submerging the head into a dye bath to achieve a uniform color.
- Start by mixing the dye in a large container according to the package instructions.
- Submerge the lacrosse head into the dye solution, holding it by the shaft.
- Keep the head in the dye for about 10-15 minutes, or until you reach the desired color.
- Remove the head and rinse it in cold water to remove excess dye.
- Dry the head with a clean towel and let it air dry completely.
Splatter Dye Method
The Splatter Dye Method creates a more unique and artistic look. This technique involves splattering dye onto the lacrosse head for a random, colorful pattern.
- Protect your workspace with newspapers or plastic sheets.
- Prepare different colors of dye in separate containers.
- Dip a brush or spoon into the dye and flick it onto the lacrosse head.
- Repeat with different colors for a layered splatter effect.
- Allow the dye to set for about 10 minutes between each color application.
- Rinse the head in cold water to remove excess dye.
- Dry the head with a clean towel and let it air dry completely.
Both methods can transform your lacrosse head into a unique piece of equipment. Experiment with colors and techniques to create your perfect design.
Applying The Dye
Applying the dye to a lacrosse head can be a fun and creative process. It allows you to personalize your gear and stand out on the field. In this section, we will guide you through the steps to apply dye effectively. Follow these instructions for a smooth and even application.
Step-by-step Application
First, prepare your dye solution according to the package instructions. Use a bucket or large container for this. Ensure you wear gloves to protect your hands from staining.
Next, dip the lacrosse head into the dye solution. Keep it submerged for at least 10 minutes. This ensures the dye penetrates deeply. Move the head gently to avoid air bubbles.
After the desired time, remove the head from the dye. Rinse it under cold water to remove excess dye. Continue rinsing until the water runs clear. Pat the lacrosse head dry with a clean cloth.
Tips For Even Coverage
To achieve even coverage, rotate the lacrosse head while it’s in the dye. This helps prevent streaks and uneven spots. Use a stirring stick to agitate the dye occasionally.
For a more vibrant color, repeat the dyeing process. Let the head dry completely between each dip. This builds up layers of dye for a richer hue.
Lastly, ensure the dye solution is well-mixed before starting. Uneven dye can cause blotchy patterns. Stirring the solution frequently helps maintain consistency.
Drying And Setting The Dye
After dyeing your lacrosse head, the next steps are crucial. Drying and setting the dye properly ensures a lasting finish. This section covers drying time and heat setting the dye.
Drying Time
Place the dyed lacrosse head in a well-ventilated area. Allow it to air dry completely. This can take several hours or overnight. Ensure it is not exposed to direct sunlight.
Check for any wet spots on the head. Make sure it is thoroughly dry before proceeding. This helps in avoiding any smudging or uneven dye patches.
Heat Setting The Dye
Heat setting the dye ensures that the color stays vibrant. Use a hairdryer on a low heat setting. Hold it a few inches away from the lacrosse head. Move it around evenly.
Continue this process for about 10-15 minutes. This helps the dye to bond better with the plastic. Be careful not to overheat the lacrosse head.
After heat setting, let the lacrosse head cool down. This final step makes sure the dye is set and ready for use.
Finishing Touches
Once you have dyed your lacrosse head, the final steps are crucial. These finishing touches ensure your head looks clean and professional. This section will guide you through the essential steps. Follow these carefully to get the best results.
Removing Tape
Start by removing any tape you used to protect certain areas. Do this slowly to avoid peeling off the dye. If the tape sticks, gently warm it with a hairdryer. This helps loosen the adhesive. Once the tape is off, check the head for any uneven spots.
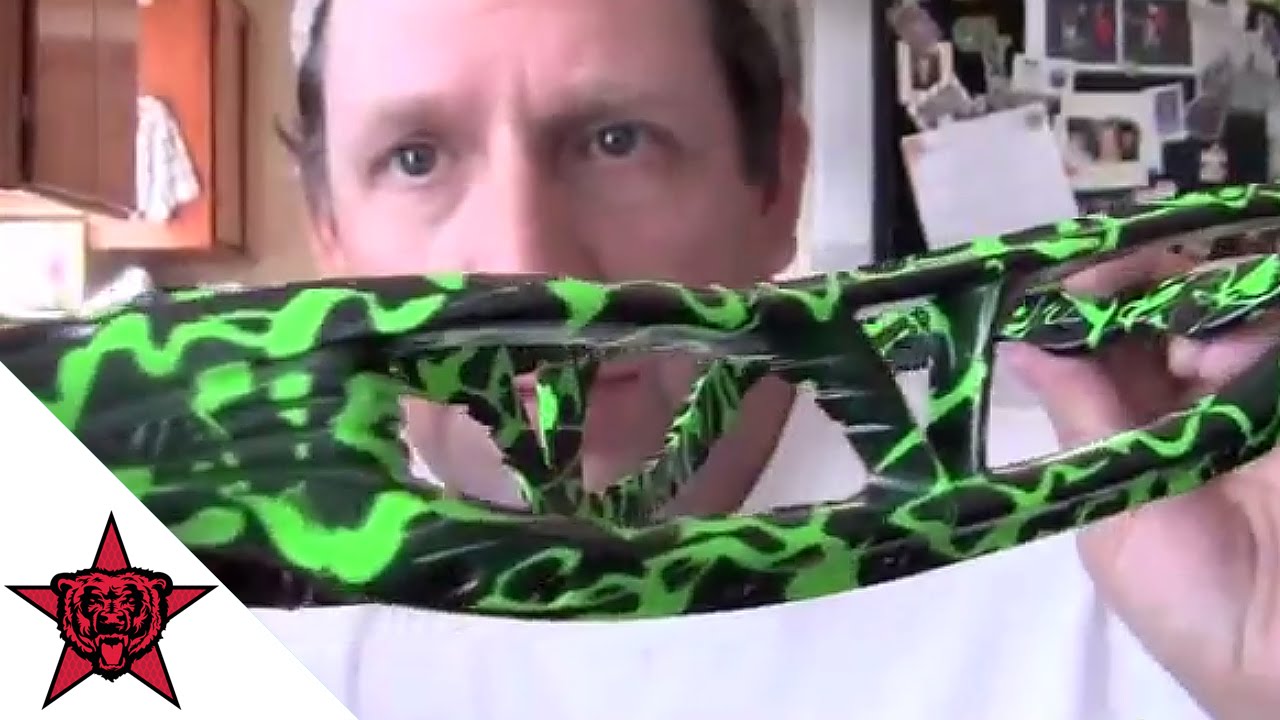
Polishing The Head
After removing the tape, it’s time to polish the head. Use a soft cloth to rub the entire surface. This removes any leftover dye and gives the head a nice shine. Make sure to reach all corners and edges. The goal is to have a smooth and glossy finish.
If you notice any rough spots, lightly sand them with fine-grit sandpaper. This step ensures a uniform look. Once you are done, wipe the head again to remove any dust. Your lacrosse head should now look vibrant and polished.

Credit: www.youtube.com
Maintenance And Care
Maintaining and caring for your dyed lacrosse head ensures it stays vibrant and durable. Proper maintenance will keep your lacrosse head looking fresh and performing well on the field. Below, you will find essential tips for cleaning and re-dyeing your lacrosse head.
Cleaning Tips
Regular cleaning is crucial for maintaining the dye and ensuring your lacrosse head lasts longer. Here are some tips to help you keep it clean:
- Rinse with water: After every game or practice, rinse your lacrosse head with cold water. This helps remove dirt and debris.
- Mild soap: Use a mild soap or detergent to clean the head. Avoid harsh chemicals that can damage the dye.
- Soft brush: Use a soft-bristled brush to scrub the head gently. This helps remove stubborn dirt without damaging the dye.
- Air dry: Allow the head to air dry completely. Avoid using heat sources like hair dryers.
Re-dyeing Techniques
Over time, the dye on your lacrosse head may fade. Re-dyeing can bring back its vibrant color. Follow these techniques for successful re-dyeing:
- Prepare the head: Clean the lacrosse head thoroughly to remove any dirt or residue.
- Choose the dye: Select a dye that matches the original color or a new color of your choice.
- Dye mixture: Mix the dye according to the instructions on the package. Ensure the mixture is even.
- Dye application: Submerge the lacrosse head in the dye mixture. Move it around to ensure even coverage.
- Rinse and dry: After dyeing, rinse the head with cold water. Allow it to air dry completely.
By following these maintenance and care tips, your dyed lacrosse head will remain vibrant and durable, ensuring you always look sharp on the field.

Credit: www.wikihow.fitness
Frequently Asked Questions
How Do You Prepare A Lacrosse Head For Dyeing?
To prepare a lacrosse head for dyeing, clean it thoroughly with soap and water. Remove any stickers and tape. Dry it completely.
What Materials Do You Need To Dye A Lacrosse Head?
You need dye, a large pot, water, tongs, gloves, and a lacrosse head. Optional items include stencils and tape for designs.
How Long Does The Dyeing Process Take?
The dyeing process typically takes about 20-30 minutes. Preparation and drying time add additional time.
Can You Dye A Lacrosse Head Multiple Colors?
Yes, you can dye a lacrosse head multiple colors. Use tape and stencils to create sections for different colors.
Conclusion
Dyeing a lacrosse head can be fun and rewarding. Follow the steps carefully. Gather all necessary materials. Clean the lacrosse head well. Choose your dye and design. Heat your dye, then dip the head. Watch as the color changes. Be patient; let it dry fully.
Your unique, colorful lacrosse head is ready. Enjoy your customized gear on the field. It shows your style and creativity. Happy dyeing!