How to Build a Stand for Baseball Rings: Step-by-Step Guide
Building a stand for baseball rings is a fun project. It showcases your prized possessions.
If you love baseball, you likely have some rings you want to display. Instead of buying a stand, why not build one? Crafting a custom stand adds a personal touch. It can be simple and rewarding. You only need some basic materials and tools.
This guide will walk you through the steps. Soon, you will have a unique stand to show off your baseball rings. Plus, making it yourself can be a fun and fulfilling experience. Let’s get started on this exciting project!

Credit: www.youtube.com
Planning The Design
Designing a baseball ring stand involves sketching ideas and selecting materials. Consider stability and ease of access for displaying rings.
Planning the design of your baseball ring stand is crucial. It sets the foundation for the entire project. A well-thought-out design ensures your rings are displayed beautifully and securely. Let’s break down the key steps in planning the design.Choosing A Style
First, decide on the style of your stand. Do you want a classic wooden look or a modern metal design? The style should match the decor of the room where you will display it. Think about the colors and materials that will complement your space.Measuring Dimensions
Next, measure the dimensions of your rings. This helps determine the size of the stand. Measure the diameter and thickness of each ring. Also, consider the total number of rings you want to display. This will help you decide the height and width of the stand. Make sure to leave some extra space for easy access to the rings. Taking accurate measurements is essential. It ensures your rings fit perfectly and stay secure. Use a ruler or a measuring tape for precise measurements. Write down all the measurements to keep track. By focusing on these key aspects, you’ll ensure your stand is both functional and stylish. Happy building! “`Gathering Materials
Before building a stand for your baseball rings, gather the needed materials. This step ensures a smooth and efficient process. Proper materials will make your stand strong and durable. Let’s dive into the key components you will need.
List Of Tools
Having the right tools is essential for this project. Here is a list of the basic tools you will need:
- Measuring tape
- Hand saw or electric saw
- Drill with various bits
- Hammer
- Nails and screws
- Wood glue
- Sandpaper or a sander
- Paint or wood finish (optional)
Types Of Wood
The type of wood you choose affects the final look and durability. Here are some common options:
- Pine: Affordable and easy to work with.
- Oak: Sturdy and has a classic look.
- Maple: Strong and has a smooth grain.
- Cherry: Rich color and durable.
- Walnut: Dark, elegant, and strong.
Select a type that suits your needs and preferences. Consider both appearance and strength.
Cutting The Wood
Creating a stand for your baseball rings starts with cutting the wood. This step sets the foundation for your project. It requires precision and care. Here, we will cover the basic steps. We will also discuss safety and cutting techniques.
Safety Precautions
Safety is crucial when working with wood. Always wear safety goggles to protect your eyes. Use gloves to keep your hands safe from splinters. Ensure your work area is clean and well-lit. Keep your tools sharp and in good condition. A sharp tool is safer and easier to control. Always cut away from your body. Never force the blade. Let the tool do the work.
Cutting Techniques
Begin by measuring your wood. Mark the measurements with a pencil. Use a ruler or a square for straight lines. For curved cuts, use a flexible curve ruler. Choose the right saw for your cuts. A hand saw works for straight cuts. A jigsaw is better for curves.
Secure the wood with clamps before cutting. This keeps the wood steady. Start cutting slowly. Follow the marked line carefully. Use smooth, even strokes. For thicker wood, cut a little at a time. Keep your hands away from the blade. Check your progress often. Adjust as needed to stay on the line.
Assembling The Base
Assembling the base for your baseball ring stand is the first crucial step. A strong base ensures that your stand will be stable and durable. Let’s break down this process into two main parts: joining pieces and ensuring stability.
Joining Pieces
Start by gathering your materials. You will need wooden pieces, screws, and a screwdriver. Align the wooden pieces to form a square or rectangular base. Make sure the pieces fit together tightly.
Hold the pieces in place and screw them together. Use at least two screws per corner for added strength. Check that each corner is secure before moving on. This will help maintain the structure of your base.
Ensuring Stability
After joining the pieces, check the base for any wobbling. Place it on a flat surface to test its stability. If it wobbles, tighten the screws or add extra support.
Consider adding rubber pads to the bottom of the base. These pads will prevent slipping and protect surfaces from scratches. They also add extra stability to your stand.
Once you are sure the base is stable, you can move on to the next steps of building your baseball ring stand. A solid base is key to a successful project.
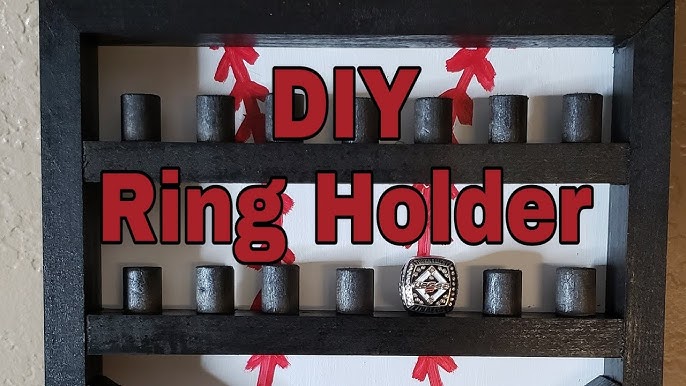
Creating Ring Holders
Creating ring holders for your baseball rings is a rewarding project. This is where your rings will rest and be displayed proudly. The right design and attachment methods will ensure your rings are secure and look great.
Design Options
There are many design options for ring holders. You can choose a simple or elaborate design. A simple wooden peg can hold a ring nicely. You can paint or stain the wood to match your style.
For a more elaborate design, consider using a small figurine or sports-related item. A baseball glove or bat can be a unique holder. These items can be purchased or crafted at home.
Attachment Methods
Secure attachment methods are essential for your ring holders. You can use screws, nails, or adhesive to attach the holders. Screws and nails are more secure but may leave marks.
Adhesive is an easy option. It does not leave marks and holds well. Choose an adhesive that works with your materials. Ensure it can hold the weight of your rings.
For heavy rings, consider using a combination of methods. This will provide extra security.

Credit: www.amazon.com
Sanding And Finishing
Creating a stand for your baseball rings can be a rewarding project. One of the most crucial steps is sanding and finishing. This ensures your stand looks polished and professional. Let’s dive into the details of this important process.
Sanding Tips
Sanding helps to smooth out any rough edges on your stand. Use medium-grit sandpaper to start. Sand the entire surface evenly. Move the sandpaper in the direction of the wood grain.
- Check for any rough spots.
- Switch to fine-grit sandpaper for a smoother finish.
- Wipe away dust with a damp cloth.
Applying Stain Or Paint
After sanding, you can apply either stain or paint. Each option gives a different look. Choose based on your preference.
Stain
- Select a stain color that complements your decor.
- Apply the stain with a brush or cloth.
- Let it soak for a few minutes, then wipe off excess.
- Allow it to dry completely.
Paint
- Pick a color that matches your theme.
- Use a primer to prepare the wood.
- Apply the paint in thin, even coats.
- Let each coat dry before adding another.
Remember, the key to a beautiful finish is patience. Take your time to ensure each step is done properly.
Final Assembly
You’ve cut, sanded, and painted your baseball ring stand. Now it’s time for the final assembly. This last step will bring all your hard work together into a functional and attractive display. Follow these simple steps to ensure your stand is sturdy and ready to showcase your prized rings.
Securing All Parts
First, gather all your assembled parts. Place the base on a flat surface. Position the vertical support pieces upright. Use screws and a drill to attach the vertical supports to the base. Ensure they are straight and evenly spaced. This will provide stability for your stand.
Next, attach the horizontal shelves to the vertical supports. Align them with the pre-drilled holes. Secure them with screws. Check that each shelf is level. This will help your rings stay in place.
Final Adjustments
After securing all parts, inspect the stand closely. Ensure all screws are tight. Look for any wobbling or instability. Adjust as necessary to make the stand sturdy.
Test the stand by placing a few rings on it. Make sure they sit well and do not tilt. If needed, make minor adjustments to the shelves. Double-check the alignment and spacing.
Once satisfied, give the stand a gentle wipe to remove any dust or debris. Your baseball ring stand is now complete and ready for display.
Displaying Your Stand
Displaying your stand for baseball rings is a crucial step. This will ensure your hard work is appreciated. A well-displayed stand can be a conversation starter. It can also be a source of pride. Let’s dive into how you can make your stand shine.
Choosing A Location
The first step is to choose the right location. A good spot can enhance the beauty of your stand. Here are some points to consider:
- Visibility: Place your stand where it can be easily seen. A living room or an office can be ideal.
- Lighting: Good lighting can highlight your rings. Natural light is best, but you can also use spotlights.
- Accessibility: Ensure the stand is easy to reach. This allows you and your guests to admire the rings closely.
Showcasing Your Rings
Showcasing your rings properly can make a big difference. Here are some tips to help you:
- Arrange by Size: Place the largest rings at the bottom. The smallest rings should be at the top.
- Clean Regularly: Dust and dirt can dull the shine of your rings. Clean them regularly to keep them looking new.
- Use a Background: A dark background can make your rings stand out. Consider using a black or navy cloth.
With these tips, your baseball ring stand will be the highlight of any room. Enjoy showing off your collection in style!

Credit: www.amazon.com
Frequently Asked Questions
How Do I Start Building A Baseball Ring Stand?
Begin by gathering materials such as wood, screws, and paint. Cut the wood to desired dimensions. Assemble using screws and paint for a finished look.
What Materials Are Best For A Ring Stand?
Wood is a popular choice for its durability and ease of customization. Additionally, metal or acrylic can provide a modern look and added strength.
Can I Customize My Baseball Ring Stand?
Yes, you can paint it, add team logos, or engrave names. Customization adds a personal touch and showcases your unique style.
How Do I Ensure The Stand Is Stable?
Use a wide base and secure joints with screws or glue. Stability is crucial for safely displaying your valuable baseball rings.
Conclusion
Creating your own baseball ring stand is rewarding and straightforward. It showcases your prized rings beautifully. Follow the steps carefully for a sturdy stand. Customize it to reflect your style and preferences. Remember, practice makes perfect. Try different designs until satisfied.
Share your creation with friends and family. They will admire your craftsmanship. Enjoy displaying your baseball rings with pride. Happy building!