How to Make a Baseball Teapot: Step-by-Step Craft Guide
Making a baseball teapot is fun and creative. It combines two popular hobbies: sports and crafting.
A baseball teapot is a unique project that adds a personal touch to your kitchen decor. Imagine sipping tea from a pot that looks like your favorite sport. It’s a great conversation starter and a fun way to show off your love for baseball.
Whether you are a baseball fan or just enjoy crafting, this project is both enjoyable and rewarding. You don’t need to be a professional artist to create something beautiful. With a few simple materials and a bit of patience, you can make a teapot that looks like a baseball. Ready to get started? Let’s dive into the steps to create your very own baseball teapot!

Credit: www.instagram.com
Materials Needed
Creating a baseball teapot can be a fun and creative project. The right materials make the process smooth and enjoyable. In this section, we will cover the essential supplies and optional decorations you need. Follow these guidelines to gather everything necessary for your project.
Essential Supplies
Begin with the basic materials. These are the items you must have:
- A plain white teapot
- Acrylic paints (red and black)
- Paintbrushes (small and medium sizes)
- Pencil and eraser
- Painter’s tape
- Clear acrylic sealer spray
Each of these supplies plays a crucial role. They ensure your baseball teapot looks authentic and lasts long. The teapot should be plain and white for easy painting. Acrylic paints provide vibrant colors. Paintbrushes allow you to add details with precision. The pencil and eraser help sketch the design. Painter’s tape keeps lines clean. The clear acrylic sealer spray protects your artwork.
Optional Decorations
Want to add a personal touch? Consider these optional decorations:
- Stencils for patterns
- Small decals or stickers
- Glitter or metallic paint
- Fabric or ribbon for the handle
These optional items add unique details to your teapot. Stencils help create consistent patterns. Decals or stickers offer quick design enhancements. Glitter or metallic paint adds sparkle. Fabric or ribbon can wrap the handle for a cozy feel. Choose decorations based on your style and creativity.

Credit: www.instagram.com
Preparing The Workspace
Before starting your baseball teapot project, set up your workspace. An organized area helps you work efficiently and stay focused. Follow these steps to get your workspace ready.
Cleaning And Organizing
First, clear your workspace of any clutter. Remove unnecessary items that might get in the way. A clean space boosts creativity and reduces distractions.
Next, wipe down the surface with a damp cloth. This removes dust and dirt that could affect your materials. Make sure everything is dry before moving on.
Finally, organize your materials. Place them where you can easily reach them. This saves time and keeps you in the flow of your project.
Gathering Tools
Gather all the tools you need for making the baseball teapot. Essential tools include a teapot mold, clay, and sculpting tools. You will also need paint and brushes for decoration.
Place your tools in an orderly manner. This helps you find what you need quickly. It also keeps your workspace tidy.
Double-check your list to ensure you have everything. Missing tools can disrupt your workflow.
Designing The Teapot
Designing a baseball teapot can be a fun and creative process. Start with a clear vision. This section will guide you through choosing a baseball theme and sketching the layout. Let’s begin our journey to create a unique baseball teapot.
Choosing A Baseball Theme
First, decide on the baseball theme for your teapot. Think about your favorite team or player. You might want a vintage baseball look. Or perhaps a modern design. Reflect on what makes baseball special to you. This will help you choose the right elements. Consider colors, logos, and patterns. These will make your teapot stand out.
Sketching The Layout
Next, sketch the layout of your teapot. Start with a basic teapot shape. Now, add baseball elements to it. Draw the handle like a baseball bat. Make the spout resemble a glove. Use stitches like on a baseball for decoration. Keep your design simple but detailed. This helps in the crafting process later. Don’t worry if your first sketch isn’t perfect. Keep refining it until you are happy with the design.

Credit: www.youtube.com
Forming The Teapot Body
Forming the teapot body is a crucial step in making a baseball teapot. This process involves shaping the clay and creating the base. Both steps require patience and care. Let’s dive into each step.
Shaping The Clay
First, prepare your clay. It should be soft but firm. Begin by kneading the clay. This removes air bubbles. Roll the clay into a ball. Use your fingers to create a hollow center. Gradually widen the hollow. Shape the clay into a round form, resembling a baseball. Smooth the surface with a damp sponge. Make sure the walls are even. This ensures a strong teapot body.
Creating The Base
Next, create the base of the teapot. Take a small amount of clay. Roll it into a flat disc. This will be the bottom. Attach the base to the hollowed ball. Use a scoring tool to roughen the edges. Press the base gently onto the ball. Smooth the joint with water. Ensure it is well attached. The base should be flat. This makes the teapot stable. Allow the teapot body to dry slightly. This prepares it for the next steps.
Crafting The Spout And Handle
Creating the perfect baseball teapot involves attention to detail. Two key elements are the spout and handle. These parts not only add functionality but also enhance the teapot’s aesthetic. Let’s explore how to craft and attach these components.
Attaching The Spout
To begin with, the spout is crucial for pouring tea smoothly. Follow these steps to attach the spout:
- Shape the Spout: Mold the clay into a spout shape. Ensure it has a narrow end for easy pouring.
- Score the Edges: Use a tool to score the edges of both the spout and the teapot body. This helps the clay pieces stick together.
- Apply Slip: Prepare slip (a mixture of clay and water). Apply it to the scored edges.
- Attach the Spout: Press the spout onto the teapot body. Make sure it’s aligned and secure.
- Smooth the Joints: Use a wet sponge to smooth out any rough edges. This ensures a seamless look.
Securing The Handle
The handle is essential for holding the teapot. Here’s how to secure it:
- Form the Handle: Roll out a piece of clay into a thick coil. Shape it into a handle form.
- Score the Connection Points: Score the points where the handle will attach to the teapot body.
- Apply Slip: Use slip on the scored areas of both the handle and the teapot.
- Attach the Handle: Press the handle onto the teapot. Ensure it is firmly in place.
- Blend the Edges: Smooth the connection points with a wet sponge.
Paying attention to these steps ensures a sturdy and attractive teapot. Your baseball teapot will be both functional and beautiful.
Adding Baseball Details
Adding baseball details to your teapot can make it look unique. This step involves creating stitch lines and painting the design. These details will make your teapot stand out.
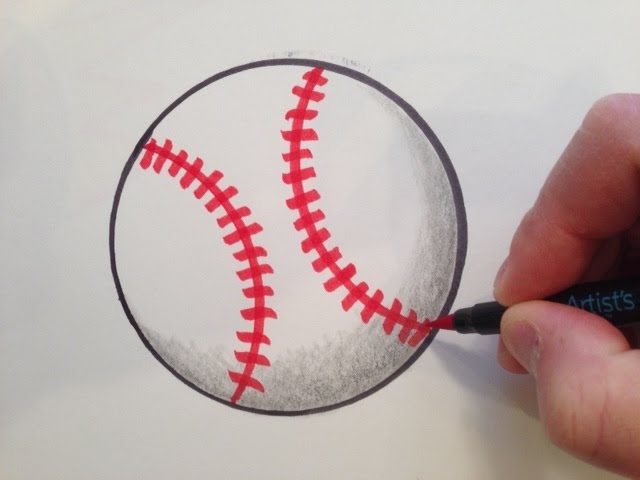
Creating Stitch Lines
First, draw the stitch lines on the teapot. Use a pencil to sketch light lines. Follow the curve of the teapot to mimic a baseball. Make sure the lines are evenly spaced. This will create a realistic look.
Next, go over the pencil lines with a fine-tip marker. Make small, V-shaped marks along the lines. These marks will look like the stitches on a baseball. Be patient and take your time. This step requires precision.
Painting The Design
Now, it’s time to paint your teapot. Use red paint for the stitches. A thin brush will help you stay within the lines. Apply the paint carefully to avoid smudging. Let the paint dry before moving to the next step.
For the rest of the teapot, use white paint. This will give it the look of a real baseball. You can also add some shading with grey paint. This will add depth to your design. Once all the paint is dry, your baseball teapot is complete!
Firing And Glazing
Creating a baseball teapot is a fun and rewarding project. The final steps of this process are crucial. Firing and glazing are essential to give your teapot its beautiful finish. Let’s dive into these steps and ensure your teapot shines.
First Firing Process
The first firing process is known as the bisque firing. This step hardens the clay and prepares it for glazing. Place your teapot in the kiln. Make sure the kiln is not overcrowded. This allows for even heat distribution.
Set the kiln to the correct temperature. For most clays, this is around 1,945 degrees Fahrenheit (1,063 degrees Celsius). This firing process usually takes about 8 to 10 hours. Once the kiln cools, carefully remove your teapot. It should be hard and ready for the next step.
Applying Glaze
Applying glaze is where your teapot gets its final look. Choose a glaze that suits your design. There are many colors and finishes available. Before you apply the glaze, make sure your teapot is clean. Any dust or grease can affect the finish.
There are several methods to apply glaze:
- Brushing: Use a brush to apply the glaze evenly.
- Dipping: Dip the teapot into the glaze for a uniform coat.
- Spraying: Use a spray gun for a smooth finish.
Allow the glaze to dry completely. This usually takes a few hours. Once dry, the teapot is ready for the final firing.
Final Firing
The final firing is called the glaze firing. This process melts the glaze and creates a glassy surface. Place the teapot back in the kiln. Set the kiln to the appropriate temperature for your glaze. This is typically between 1,820 to 2,380 degrees Fahrenheit (993 to 1,300 degrees Celsius). The glaze firing takes about 12 hours.
After the kiln cools, carefully remove your teapot. Your baseball teapot should now have a beautiful, glossy finish. Enjoy your handcrafted piece!
Final Assembly
Now that all the individual parts of your baseball teapot are ready, it is time for the final assembly. This step brings everything together and ensures your teapot is functional and aesthetically pleasing. Pay close attention to detail to avoid any mishaps.
Attaching The Lid
The lid is a crucial part of your teapot. It keeps the tea warm and prevents spills. Follow these steps to attach the lid correctly:
- Align the lid with the top opening of the teapot.
- Ensure that the lid fits snugly but not too tight.
- Use a food-safe adhesive to secure the lid handle.
- Allow the adhesive to dry completely before proceeding.
Inspecting The Teapot
Before using your baseball teapot, inspect it thoroughly. This ensures there are no leaks or loose parts.
- Check all seams and joints for gaps or cracks.
- Fill the teapot with water to check for leaks.
- Ensure the handle is secure and can support the teapot’s weight.
- Examine the spout to make sure it pours smoothly.
If you find any issues, address them before using the teapot. A well-made teapot will provide a better tea-drinking experience.
Caring For Your Teapot
Proper care of your baseball teapot will keep it looking great and functioning well. Regular cleaning and correct storage are key to maintaining its beauty and longevity.
Cleaning Instructions
Clean your teapot after each use. Rinse it with warm water. Avoid using harsh chemicals. Use a soft cloth to wipe the exterior. For stubborn stains, use a mix of baking soda and water. Let it sit for 10 minutes. Then, scrub gently and rinse thoroughly. Dry the teapot with a clean towel.
Storage Tips
Store your teapot in a cool, dry place. Avoid direct sunlight. It can cause colors to fade. Keep the lid slightly open. This prevents any moisture buildup inside. Use a shelf or cabinet with enough space. Ensure the teapot is not cramped. This helps prevent accidental damage.
Frequently Asked Questions
What Materials Are Needed To Make A Baseball Teapot?
To make a baseball teapot, you need a ceramic teapot, baseball, glue, and paint. Make sure the baseball fits the teapot’s design.
How Do You Prepare The Teapot Surface?
Clean the teapot surface with soap and water. Dry it thoroughly. This ensures proper paint and glue adhesion.
Can I Use Any Type Of Paint?
Use ceramic paint for durability and a professional finish. Follow the manufacturer’s instructions for the best results.
How Do You Attach The Baseball To The Teapot?
Use strong, heat-resistant glue to attach the baseball. Allow it to dry completely before using the teapot.
Conclusion
Creating a baseball teapot is fun and simple. Follow the steps carefully. You will have a unique teapot that impresses friends. This project also makes a great gift. Enjoy your creative journey. Happy crafting!