Creating a baseball card costume is easy and fun. You can make this unique outfit with simple materials.
Baseball cards have been a treasured part of sports history for many. They capture moments and memories that fans cherish. Turning this iconic piece into a costume can be a hit at parties or events. It’s an exciting way to show off your creativity and love for the game.
Plus, it’s a perfect conversation starter. In this guide, we’ll walk you through the steps to craft your own baseball card costume. You’ll find that with a little effort and imagination, you can create an eye-catching outfit that stands out. Get ready to impress your friends with your DIY skills!
Credit: www.etsy.com
Materials Needed
Creating a baseball card costume can be a fun and creative project. To start, you’ll need some basic materials. Let’s dive into the essentials required to make your costume stand out.
Cardboard
Cardboard is the base of your costume. It’s sturdy and easy to work with. You can use old boxes or buy sheets from a craft store. Ensure the cardboard is large enough to mimic a real baseball card size.
Markers And Paints
Markers and paints are essential for adding color and details. Use markers for fine lines and small details. Paints work well for larger areas and backgrounds. Choose colors that match the baseball card theme.
Plastic Sheets
Plastic sheets add a glossy finish to your card. They make the costume look more authentic. You can find these sheets at office supply stores. Cut them to match the size of your cardboard.
Tape And Glue
You’ll need tape and glue to assemble your costume. Use strong tape to secure edges and corners. Glue is perfect for attaching details and decorations. Ensure you have enough to complete your project.
Scissors And Cutting Tools
Good scissors and cutting tools are crucial. They help you cut cardboard, plastic sheets, and other materials. Make sure your scissors are sharp and handle them with care. A box cutter can also be useful for precise cuts.
Choosing Your Player
Creating a Baseball Card Costume is a fun and creative project. One important step is Choosing Your Player. This choice will make your costume unique and authentic. Let’s dive into the essential steps for selecting the right player.
Selecting A Team
First, decide on your favorite team. This can be your local team or a famous one. Here are some factors to consider:
- Personal Preference: Choose a team you love.
- Popularity: Popular teams make recognizable costumes.
- Team Colors: Pick a team with colors you like.
Once you have a team, you can move on to selecting a player.
Finding Player Images
You need a clear image of the player for your costume. Follow these tips:
- Search for high-quality images online.
- Visit the team’s official website.
- Check sports news websites for player photos.
Make sure the image shows the player clearly, with their team uniform visible.
Print Or Draw Options
Next, decide if you want to print or draw the player’s image. Here are the options:
| Option | Advantages | Disadvantages |
|---|---|---|
| Quick and easy | May require a color printer | |
| Draw | Personal touch | Time-consuming |
If you choose to print, make sure you have access to a color printer. If you prefer to draw, gather your art supplies and take your time to create a detailed image.
Creating The Card Frame
Creating the card frame is a vital step in making your baseball card costume. This frame will hold the main elements of your costume together. It needs to be sturdy and visually appealing. Here’s how you can create it:
Measuring Dimensions
First, measure your body to determine the frame size. You’ll need a tape measure for this. Measure from your shoulders to your knees for the height. For the width, measure across the widest part of your body.
Here is a simple table to help you record these measurements:
| Body Part | Measurement |
|---|---|
| Height (Shoulders to Knees) | _________ inches |
| Width (Widest Part) | _________ inches |
Cutting Cardboard
Next, transfer these measurements to a large piece of cardboard. Use a pencil to mark the dimensions. Cut along these lines with a utility knife.
Be careful while cutting to avoid jagged edges. Straight cuts will give your frame a neat look.
Reinforcing Edges
To make your frame durable, reinforce the edges. Use duct tape or masking tape. Apply the tape along the edges of the cardboard.
For additional strength, you can also glue strips of cardboard to the back of your frame. This will help it hold its shape better.
Here are the materials you will need:
- Cardboard
- Utility knife
- Ruler or tape measure
- Pencil
- Duct tape or masking tape
- Glue

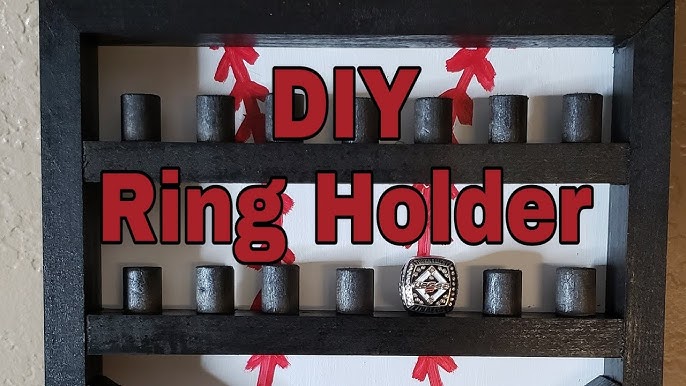
Credit: www.tiktok.com
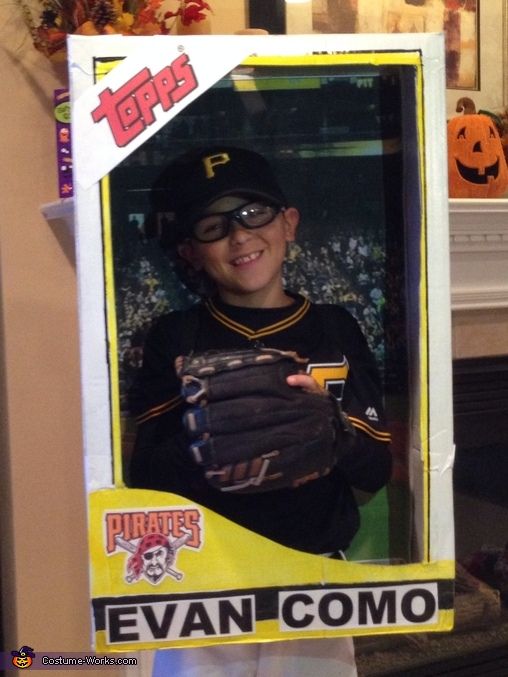
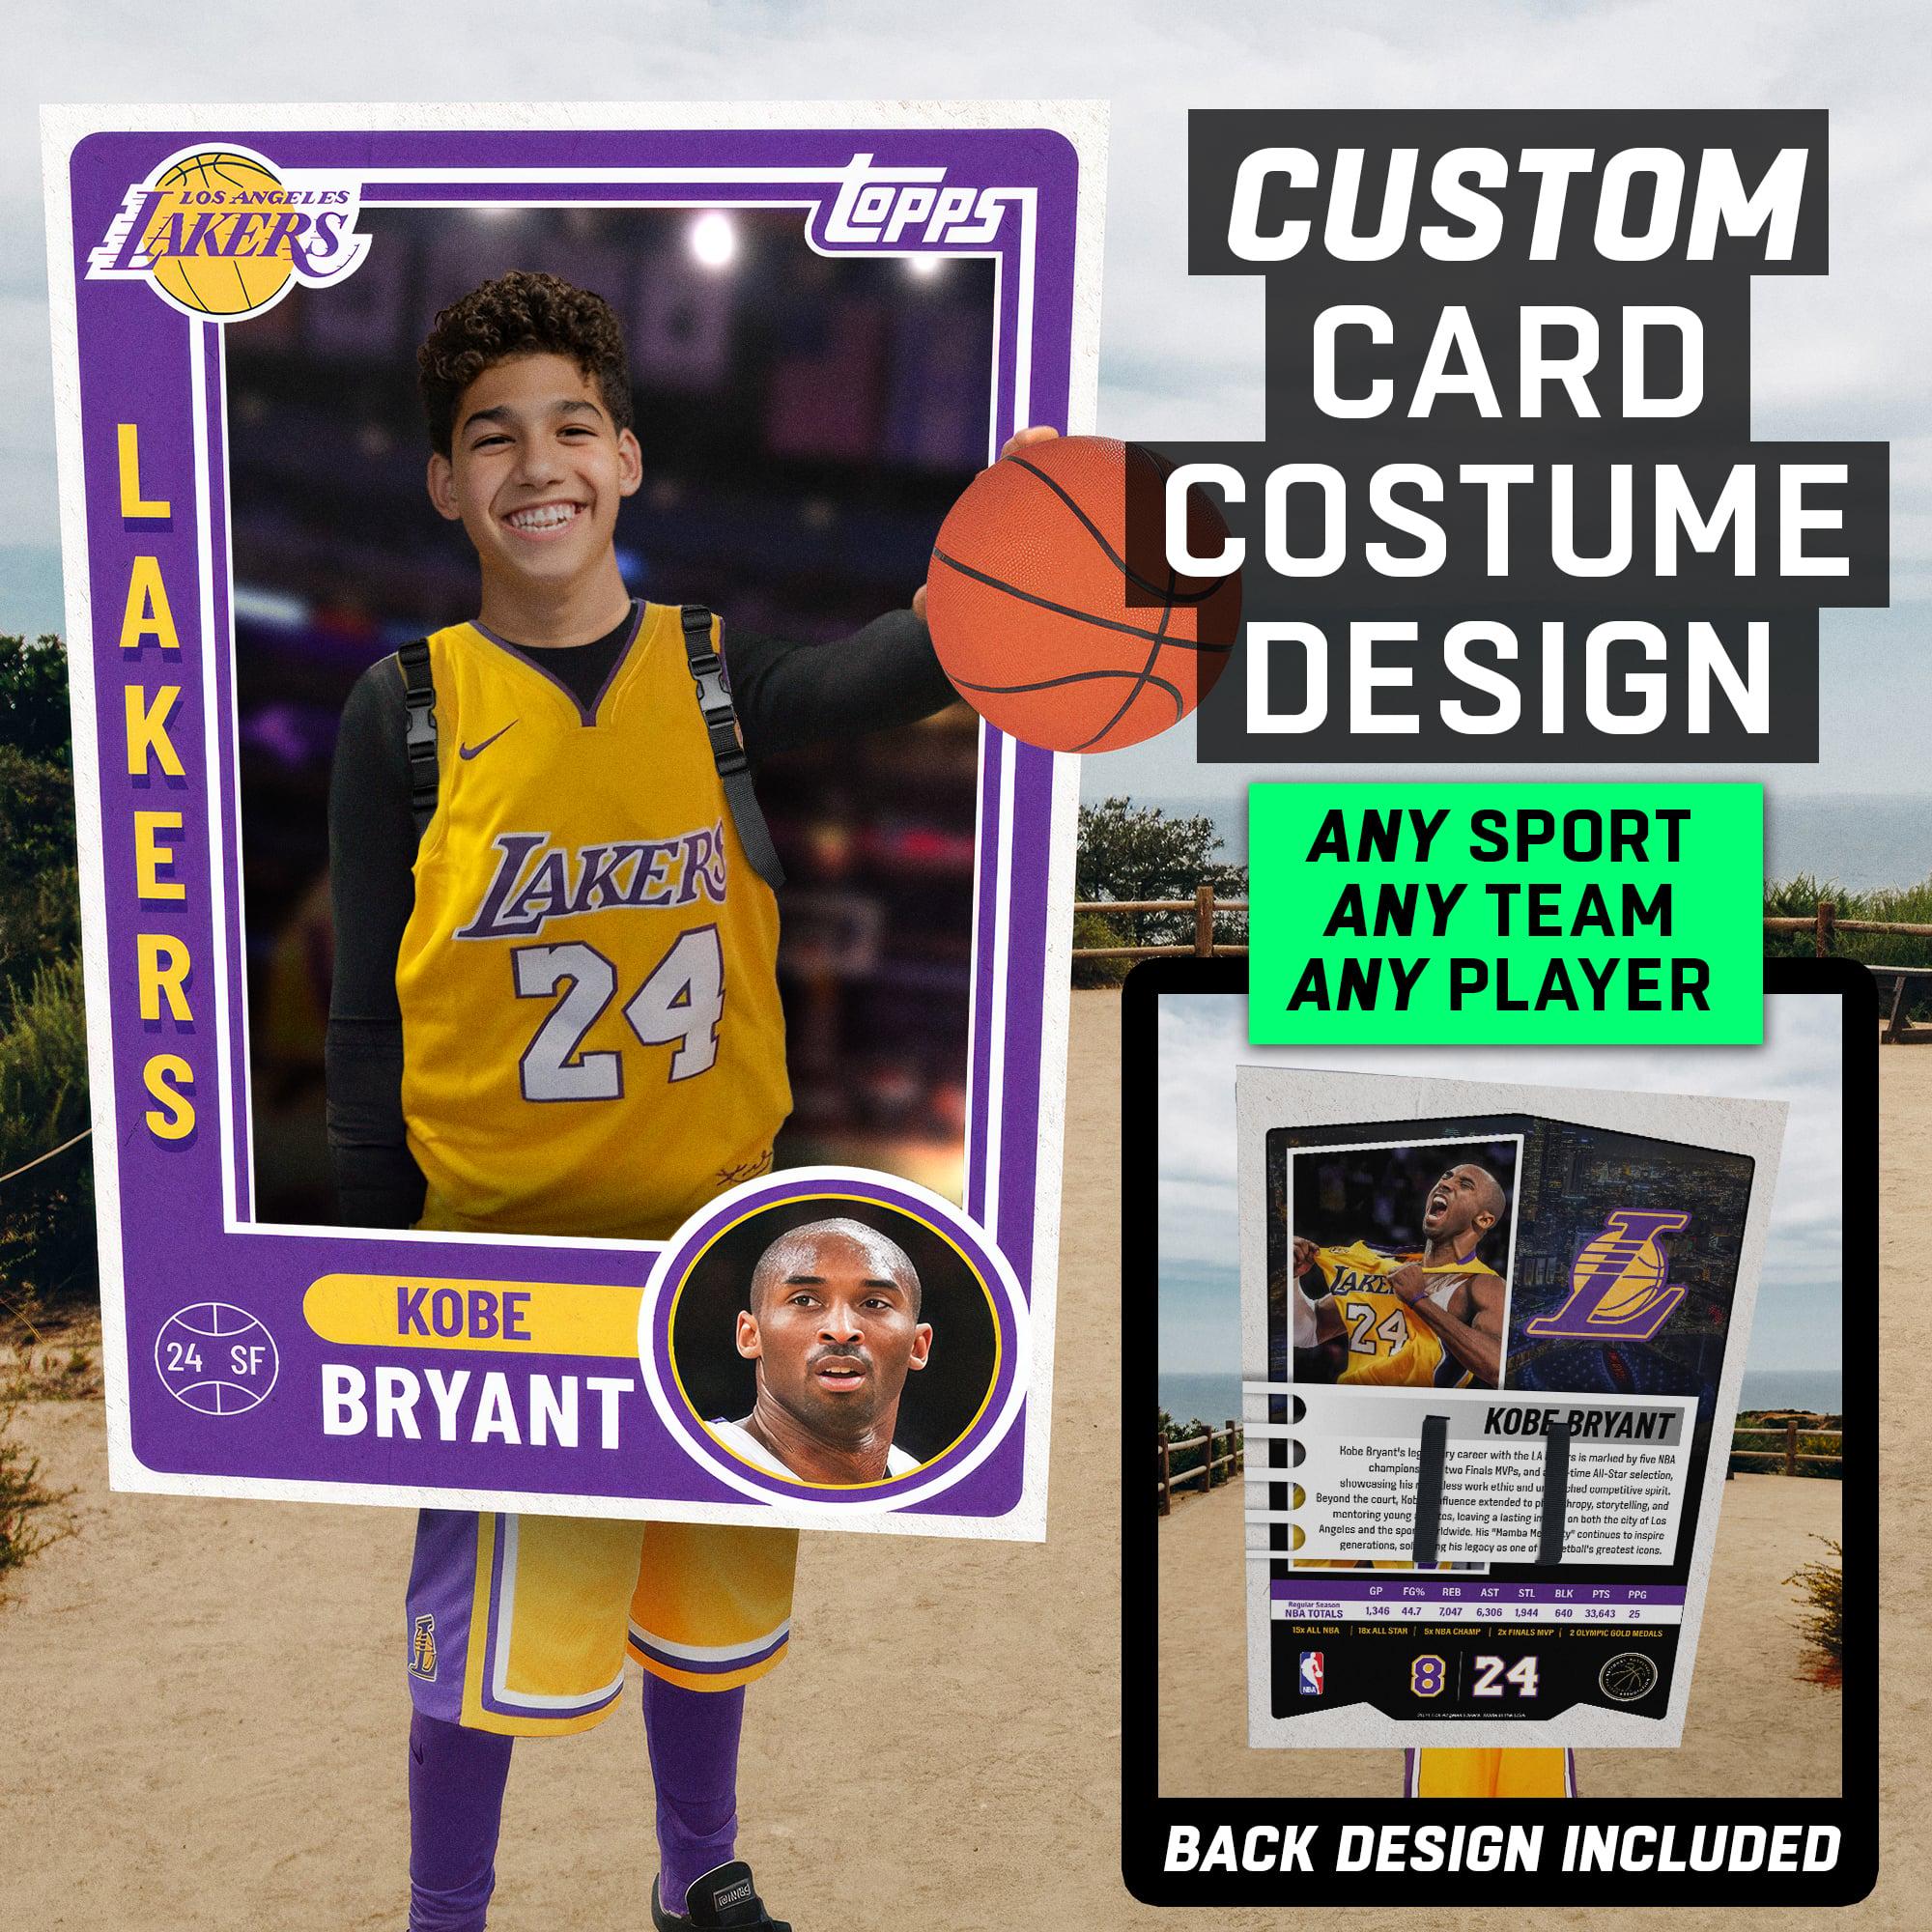
Designing The Front
Creating the front of a baseball card costume is a fun and creative process. This part of the costume should feature the player’s image, team logo, and key stats. By focusing on these elements, you can make your costume look authentic and eye-catching. Let’s break down each component.
Adding Player Image
The player image is the focal point of your baseball card costume. Use a high-quality photo or draw the player yourself. Make sure the image is clear and centered.
- Choose a player with a strong pose.
- Ensure the image size fits well on the card.
- Consider adding a border to frame the image.
Drawing Team Logo
The team logo adds authenticity to your costume. Place it in the top corner, just like on real baseball cards.
- Find the team’s official logo online.
- Print it out or draw it by hand.
- Use bold colors to make the logo stand out.
| Step | Action |
|---|---|
| 1 | Locate the logo online |
| 2 | Print or draw the logo |
| 3 | Use bold colors |
Writing Player Stats
Player stats are essential for an authentic look. Include key statistics such as batting average, home runs, and RBIs.
Example:
- Batting Average: .320
- Home Runs: 25
- RBIs: 80
Write the stats neatly and clearly. Ensure they are easy to read and properly aligned.
Designing The Back
Creating a unique baseball card costume is fun and rewarding. The back of the card is just as important as the front. It tells the story of the player. You can include many details to make it interesting. Here are some sections you can add:
Bio And Career Stats
Include a brief bio of the player. Mention their full name, date of birth, and place of birth. This gives the costume a personal touch. Next, add career stats. You can use a table for this:
| Season | Team | Games | Hits | Home Runs |
|---|---|---|---|---|
| 2022 | Yankees | 150 | 180 | 30 |
| 2021 | Yankees | 145 | 170 | 25 |
Team History
List the teams the player has been a part of. This can show their journey through their career. For instance:
- 2018-2020: Boston Red Sox
- 2021-2023: New York Yankees
Adding team history makes the costume more interesting. It shows the player’s growth and experience.
Fun Facts
Include fun facts about the player. These can be unique and entertaining. Here are some examples:
- Player loves cooking Italian food.
- Has a pet dog named Max.
- Won MVP award in high school.
Fun facts add a personal touch to the costume. They make the player more relatable and memorable.
Designing the back of a baseball card costume can be creative and enjoyable. Use these sections to make it detailed and engaging.
Adding The Plastic Cover
Adding the plastic cover to your baseball card costume is a crucial step. The plastic will give your costume the authentic look of a real baseball card. Below, we’ll guide you through the process with easy-to-follow steps.
Cutting The Plastic
First, you need to cut the plastic sheet to fit your frame. Use a clear plastic sheet for the best effect. Measure the frame’s dimensions carefully. Mark these dimensions on the plastic sheet using a marker. Cut along the marked lines with a sharp pair of scissors. Take your time to ensure straight edges.
Attaching To Frame
Now, it’s time to attach the plastic sheet to the frame. Lay the plastic sheet flat on a table. Place the frame on top of the plastic. Align the edges of the frame with the edges of the plastic sheet. Use a glue stick to apply adhesive along the frame’s edges. Press the frame down onto the plastic firmly. Let the glue dry for about 15 minutes.
Securing With Tape
Once the glue is dry, reinforce the attachment with tape. This will ensure the plastic stays in place. Use clear adhesive tape for a clean look. Tape along all four edges of the frame. Make sure the tape is smooth and free of wrinkles. For extra security, add a second layer of tape. Your plastic cover is now securely attached!
Creating Shoulder Straps
Creating shoulder straps for a baseball card costume is a fun and simple task. These straps help to keep the card frame securely attached to your body. They also ensure comfort while you wear the costume. Below are the steps to make and attach shoulder straps.
Measuring Length
To start, you need to measure the length of the straps. Use a measuring tape for accuracy. Measure from your shoulder down to your waist. Add a few extra inches to this measurement for adjustments.
Note the measurement and cut two pieces of fabric or sturdy material. These will be your shoulder straps.
Attaching To Card Frame
Next, attach the shoulder straps to the card frame. Place the card frame flat on a table. Position the straps at the top corners of the frame. Use a hot glue gun or strong adhesive to secure the straps.
Make sure the glue is dry before moving to the next step. This ensures the straps hold firmly.
Adjusting For Comfort
Finally, put on the costume and adjust the straps for comfort. Ensure the card frame sits correctly on your body. If the straps are too tight or loose, make adjustments.
You can use safety pins or Velcro strips for easy adjustments. This makes the costume more comfortable to wear for longer periods.
Final Touches
Once you have assembled your baseball card costume, it’s time for the final touches. These steps ensure your costume stands out and stays in place. Focus on stability, decoration, and how it fits.
Checking Stability
Stability is crucial to ensure your baseball card costume stays intact. Follow these steps:
- Check all joints and connections.
- Make sure the costume fits snugly.
- Secure any loose parts with tape or glue.
Test the costume by moving around to ensure it holds up. Adjust any weak points as needed.
Adding Decorative Elements
Decorative elements bring your baseball card costume to life. Here are some ideas:
- Use markers or paint to add details.
- Attach stickers or printed images.
- Add glitter or other shiny materials for sparkle.
Make sure all decorations are securely attached. Check that they do not interfere with the costume’s stability.
Trying On The Costume
Trying on the costume is the final step. It ensures a perfect fit. Follow these steps:
- Wear the costume and make any adjustments needed.
- Check for comfort and ease of movement.
- Ensure all parts are secure and not too tight.
Walk around and test your range of motion. Make sure you can move freely without the costume falling apart.

Credit: www.tiktok.com
Frequently Asked Questions
How To Make A Baseball Card Costume?
To make a baseball card costume, start with a large cardboard. Print or draw your favorite player’s image. Attach straps for wearing.
What Materials Are Needed?
You need cardboard, a printed player image, markers, glue, and straps. These materials are affordable and easy to find.
How Long Does It Take To Make?
Making a baseball card costume takes about 1-2 hours. Time depends on your crafting skills and preparation.
Can Kids Make This Costume?
Yes, kids can make this costume with adult supervision. It’s a fun, creative activity for children and parents.
Conclusion
Creating a baseball card costume is fun and easy. You only need simple materials and a bit of creativity. This unique costume will surely impress your friends. Plus, it offers a nostalgic touch. Follow the steps, and you’ll have a standout outfit.
Enjoy making and wearing your DIY costume. Happy crafting!