Baking ice hockey skates can enhance comfort and performance. It helps the skates mold to your feet for a better fit.
Ice hockey skates straight from the box may feel stiff and uncomfortable. Baking them at home offers a simple solution. This process uses heat to soften the skate material, allowing it to shape perfectly to your feet. Not only does this improve comfort, but it also boosts your on-ice performance.
In this blog, you’ll learn how to bake your skates safely and effectively. This guide will help you get that snug fit every player desires. So, if you’re ready to take your game to the next level, read on. Let’s explore the step-by-step process of baking ice hockey skates.

Credit: www.wikihow.com
Materials Needed
Before you begin baking your ice hockey skates, gather all necessary materials. Having the right tools and safety gear ensures a smooth and safe process.
Required Tools
You will need a few essential tools to bake your ice hockey skates. These include:
- An oven (preferably a dedicated skate oven)
- A timer
- A baking sheet
- A towel
- A chair
Ensure you have a clean, flat surface to work on. This will help keep the process organized and efficient.
Safety Equipment
Safety should be a top priority when baking your skates. Use the following safety equipment:
- Heat-resistant gloves
- Protective eyewear
Heat-resistant gloves protect your hands from burns. Protective eyewear guards against any unexpected splashes or debris.
Being prepared with the right materials and safety gear will help you bake your skates effectively and safely.
Preparation Steps
Properly baking your ice hockey skates can give you a custom fit. Before you start the baking process, you need to prepare your skates. These preparation steps ensure the best results. Follow these simple steps to get your skates ready for baking.
Clean The Skates
First, clean your skates thoroughly. Remove any dirt or debris. Wipe down the exterior with a damp cloth. This ensures that no dirt gets baked into the material. Pay attention to the areas around the eyelets and seams. Clean skates will better absorb the heat during baking.
Remove Insoles And Laces
Next, remove the insoles from your skates. This prevents them from shrinking or warping in the heat. Place the insoles in a safe spot. Also, take out the laces. Removing the laces allows the heat to evenly reach the entire boot. Keep the laces aside for later use.
Oven Settings
Baking your ice hockey skates at home can help improve the fit. It’s important to get the oven settings just right. Incorrect settings can damage your skates. Let’s dive into the details of the oven settings.
Temperature Guidelines
Setting the right temperature is crucial. Most skates require a temperature between 175°F and 200°F (80°C to 93°C). Always check the manufacturer’s instructions. They provide the best guidance for your specific model.
If you don’t have the instructions, use the lower end of the range. This helps prevent any potential damage to your skates.
Preheating The Oven
Preheating the oven ensures even heat distribution. Set your oven to the desired temperature and let it preheat for about 10 minutes. This ensures it reaches the correct temperature.
Use an oven thermometer to check the temperature. Sometimes ovens can be off by a few degrees. The thermometer will help you ensure accuracy.
Here’s a simple table to summarize the guidelines:
| Step | Details |
|---|---|
| Set Temperature | 175°F to 200°F (80°C to 93°C) |
| Preheat Time | 10 minutes |
| Check Temperature | Use an oven thermometer |
Following these steps ensures your skates bake evenly. This leads to a better fit and more comfort on the ice.
Baking Process
Skate baking is a crucial step for custom-fitting ice hockey skates. This process helps mold the skates to your feet, ensuring comfort and better performance. Follow these steps to bake your skates correctly.
Placing Skates In Oven
First, preheat the oven to the recommended temperature. Usually, it’s around 175°F (80°C). Avoid using a microwave or a gas oven. Use an electric oven for even heating. Place the skates on a baking sheet. Make sure they do not touch each other. This ensures even heating on all sides.
Baking Duration
Once the oven reaches the correct temperature, place the skates inside. Set a timer for 6 to 8 minutes. Monitor the skates closely. Do not exceed the recommended baking time. Overheating can damage the skate materials. Once the time is up, carefully remove the skates from the oven.
Fitting The Skates
Properly fitting ice hockey skates is crucial for comfort and performance. Whether you’re a beginner or a seasoned player, ensuring a good fit will enhance your game. Follow these steps to ensure your skates fit well.
Wearing The Skates
Start by wearing your skates with the appropriate socks. Thin, moisture-wicking socks are best. Sit down and loosen the laces. Insert your foot into the skate, pushing your heel back firmly. Make sure your toes are not curled. Tighten the laces snugly from the bottom to the top. Ensure the skate feels snug but not painfully tight.
Molding To Feet
For a custom fit, bake the skates following the manufacturer’s instructions. This process involves heating the skates in a specialized oven or your home oven. Once heated, put the skates on immediately. Stand up and bend your knees slightly. This helps the skates mold to your foot shape. Leave the skates on for the recommended time. Usually, this is around 15-20 minutes.
Afterward, allow the skates to cool completely before removing them. This ensures the material hardens and retains your foot shape. Your skates should now fit more comfortably and provide better support.

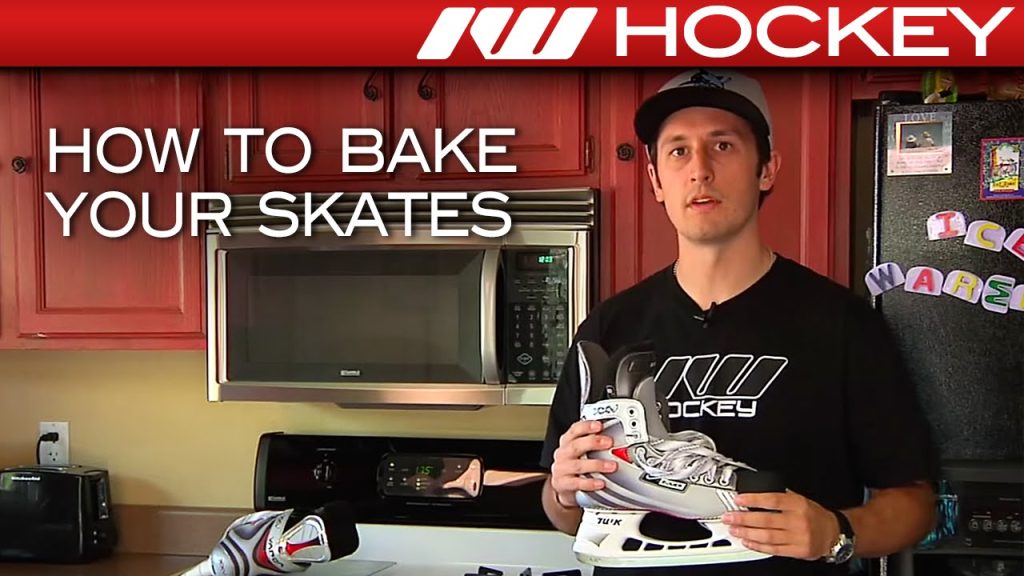
Credit: www.youtube.com
Cooling Down
After baking your ice hockey skates, the next step is crucial. Cooling down ensures the skates mold perfectly to your feet. This step prevents any deformation and sets the shape firmly. Follow these steps to cool down your skates properly.
Cooling Time
Allow the skates to cool naturally. This process should take around 15 to 20 minutes. Do not use fans or cold air to speed it up. Natural cooling ensures even distribution of the shape.
Keep the skates on your feet during this time. This helps the skates mold to your foot shape. Sit still and keep your feet flat on the ground. This position aids in creating a comfortable fit.
Reassembling The Skates
Once the skates have cooled down, reassemble them. First, check if all parts are intact. Tighten any loose screws or bolts. Ensure the blade is properly aligned. This ensures safety and optimal performance.
Re-lace your skates firmly. Ensure the laces are tight but not uncomfortable. A good fit is essential for support and control on the ice. Your skates are now ready for use.
Maintenance Tips
Proper maintenance of your ice hockey skates extends their life and performance. Regular care ensures optimal performance and safety on the ice.
Regular Cleaning
Keep your skates clean to maintain their quality. After each use, wipe the blades with a dry cloth to prevent rust. Remove the insoles and let them air dry to avoid odor and bacteria build-up.
Cleaning the boots is also essential. Use a damp cloth to remove dirt and debris. For leather boots, apply a leather conditioner to keep the material supple.
Storage Advice
Proper storage keeps your skates in top condition. Always store skates in a dry place. Avoid leaving them in damp environments to prevent rust and mold.
Use blade guards to protect the blades when not in use. Hang the skates or place them upright to maintain their shape. Avoid stacking heavy items on top of them.
Here are some quick tips for proper storage:
- Dry skates thoroughly before storing.
- Use a skate bag for protection.
- Keep them in a cool, dry place.
- Regularly check for signs of wear and tear.

Credit: www.wikihow.com
Frequently Asked Questions
How To Bake Ice Hockey Skates At Home?
Baking ice hockey skates at home involves heating them in an oven. This process allows the skates to mold to your feet, providing a custom fit. Always follow the manufacturer’s instructions for temperature and time.
Why Bake Ice Hockey Skates?
Baking ice hockey skates helps achieve a more comfortable fit. It reduces break-in time and enhances performance on the ice. Properly molded skates provide better support and control.
Can All Ice Hockey Skates Be Baked?
Not all ice hockey skates are suitable for baking. Check if your skates are labeled “thermoformable” or “heat-moldable. ” Follow the manufacturer’s guidelines to avoid damaging the skates.
How Long To Bake Ice Hockey Skates?
Bake ice hockey skates for 6-10 minutes, depending on the manufacturer’s instructions. Overheating can damage the skates. Always follow the recommended time to ensure proper molding.
Conclusion
Baking your ice hockey skates can boost comfort and performance. Follow the steps carefully for the best fit. The right temperature and timing are crucial. Avoid rushing the process to prevent damage. Properly baked skates mold perfectly to your feet.
This reduces pain and enhances your game. Remember, practice makes perfect. Keep your skates clean and well-maintained. Happy skating!