Making your own ping pong table is a rewarding project. It saves money and offers customization.
Crafting a ping pong table at home can be a fun and fulfilling task. Whether you are a DIY enthusiast or just looking to add a personalized touch to your game room, building your table can be both economical and enjoyable.
In this guide, we will walk you through the steps needed to construct a sturdy and functional ping pong table. You will learn about the materials required, the measurements to follow, and the assembly process. By the end, you’ll have a custom-made table ready for endless hours of ping pong fun. Let’s get started!

Credit: www.youtube.com
Choosing The Right Materials
Choosing the right materials is crucial for making a ping pong table. The materials you choose will affect the table’s durability and playability. Let’s explore the different types of wood and surface considerations.
Types Of Wood
For the base, plywood is a popular choice. It is strong and affordable. MDF (medium-density fiberboard) is another option. MDF offers a smooth surface but is heavier. Hardwood like maple or birch can be used for the frame. These woods are sturdy and long-lasting.
Surface Considerations
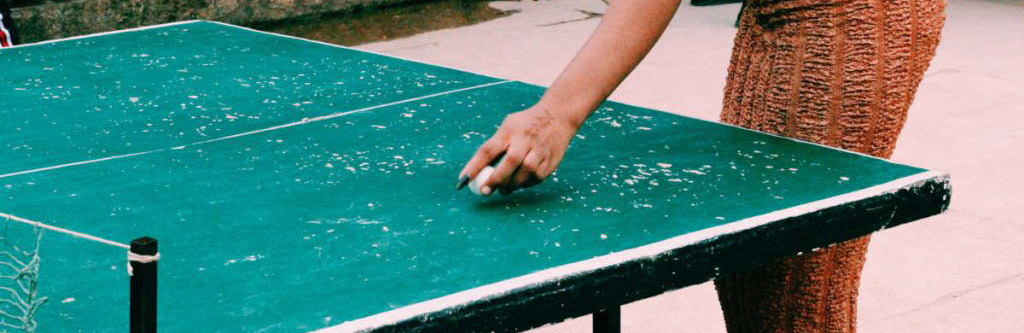
The playing surface needs special attention. It should be smooth and even. A melamine coating can help achieve this. Melamine provides a hard, flat surface. It also resists scratches. The thickness of the surface is important too. A thickness of 3/4 inch (19mm) is standard. This ensures a consistent bounce of the ball.
Credit: learn.kregtool.com
Preparing The Work Area
Before diving into the exciting task of building your own ping pong table, you need to prepare your work area. A well-prepared space ensures safety and makes the process smoother. Let’s look at how to get your work area ready.
Safety Measures
First, clear the area of any obstacles. This includes loose items on the floor. Tripping hazards can cause accidents. Wear safety goggles to protect your eyes. Gloves are also important to protect your hands from splinters or sharp edges.
Ensure your workspace is well-lit. Good lighting helps you see what you are doing. Also, have a first aid kit nearby. Accidents can happen, and it’s better to be prepared.
Organizing Tools
Next, gather all the tools you will need. This includes a saw, measuring tape, and drill. Keep all tools within arm’s reach. Use a toolbox or a designated area to store them. This prevents you from constantly searching for tools.
Lay out your materials, such as wood and screws, in an organized manner. This helps you find what you need quickly. It also keeps the work area tidy. Label each item if necessary. Being organized saves time and reduces frustration.
Cutting And Shaping The Wood
Creating a ping pong table starts with cutting and shaping the wood. This step is crucial for ensuring a smooth and level playing surface. Proper measurements and precise cuts are essential to achieve the best results. Let’s dive into the details.
Measuring Dimensions
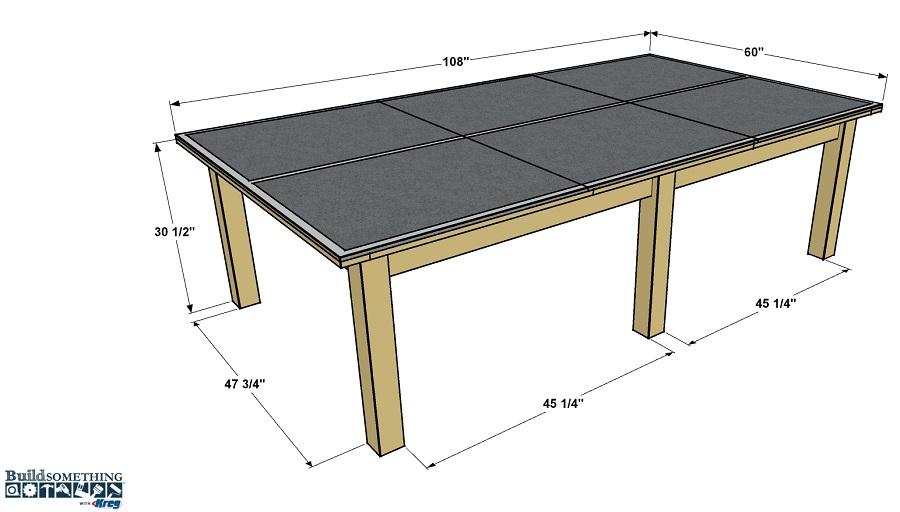
First, measure the dimensions of your ping pong table. Standard tables are 9 feet long and 5 feet wide. Use a tape measure to mark these dimensions on your wood. Ensure your measurements are accurate to avoid mistakes.
Double-check your measurements before making any cuts. This will save you time and prevent waste. Precision is key to creating a professional-looking table.
Cutting Techniques
Use a circular saw or table saw for cutting the wood. Make sure your saw blade is sharp and suitable for the type of wood you are using. Follow the marked lines carefully to get straight cuts.
Wear safety goggles and gloves to protect yourself. Clamp the wood firmly before cutting to prevent it from moving. Take your time and cut slowly for the best results.
After cutting, sand the edges to smooth out any rough spots. This will prevent splinters and give your table a clean finish. Use medium-grit sandpaper for this task.
Assembling The Tabletop
The tabletop is the heart of your ping pong table. Proper assembly ensures a smooth playing surface. Follow these steps to achieve the best results.
Joining Pieces
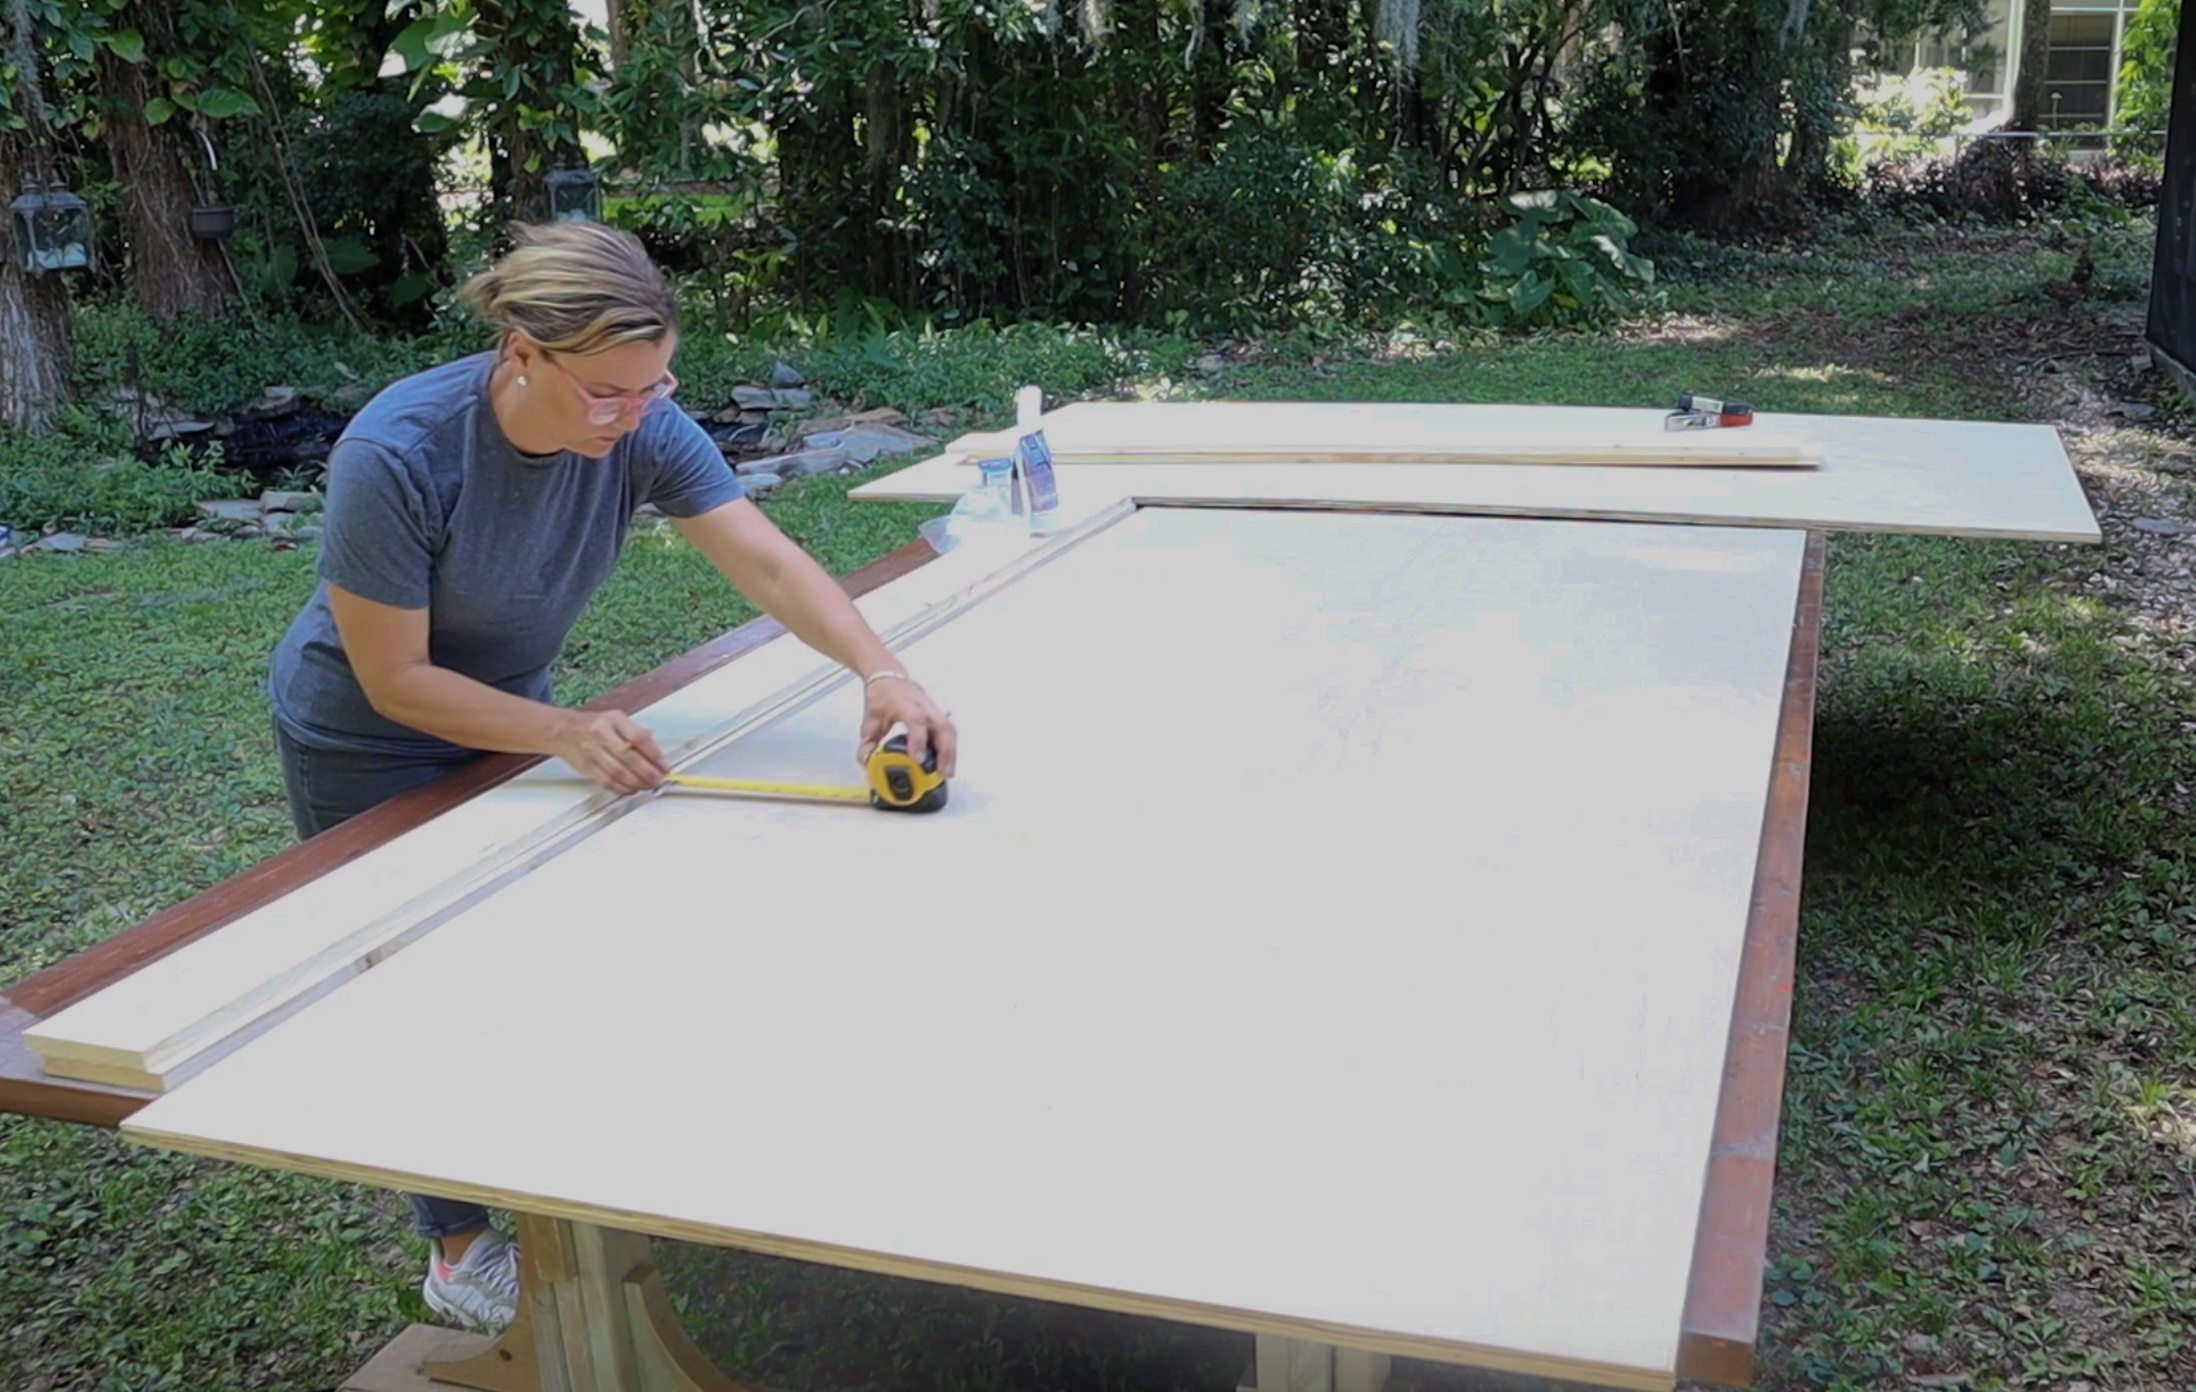
Start by laying out the pieces on a flat surface. Ensure all edges align perfectly. Use wood glue to join the pieces. Apply a thin, even layer along the edges.
Press the pieces together firmly. Secure them with clamps until the glue dries. This helps maintain a strong bond. For additional strength, use wood screws.
- Align the edges
- Apply wood glue
- Press and clamp
- Use wood screws
Ensuring Stability
Stability is crucial for a good game. Check for any wobble in the tabletop. If there is, adjust the screws or add more glue. Use a level to ensure the surface is even.
Add support beams underneath the table. These beams provide extra stability. Secure them with wood screws. Make sure they are evenly spaced.
- Check for wobble
- Adjust screws or glue
- Use a level
- Add support beams
- Secure with wood screws
By following these steps, you can assemble a stable and durable ping pong table. Enjoy your game!
Building The Table Legs
Building the table legs for your ping pong table is a crucial step. Strong and stable legs ensure a safe and enjoyable game. This section will guide you through different leg design options and how to attach them to the tabletop.
Leg Design Options
You can choose from various leg designs based on your skills and materials. Wooden legs are sturdy and easy to work with. Metal legs offer durability and a modern look. Folding legs provide convenience for storage.
Consider the height and stability of the legs. Standard ping pong tables are 30 inches tall. Make sure your legs support this height. Cross-bracing can add extra stability to wooden legs. It helps prevent wobbling during play.
Attaching Legs To Tabletop
Securely attaching the legs to the tabletop is vital. First, mark the positions where the legs will go. Use a measuring tape for accuracy. Drill pilot holes into the marked spots. This prevents the wood from splitting.
Use screws or bolts to attach the legs. Screws are easier for wooden legs. Bolts work well for metal legs. Ensure the screws or bolts are tight. Loose legs can make the table unstable. Check the stability by shaking the table gently. If it wobbles, tighten the screws or bolts again.
For folding legs, follow the manufacturer’s instructions carefully. Make sure the legs lock securely when extended. This ensures the table stays stable during play.
Adding The Finishing Touches
Adding the final touches to your ping pong table is crucial. It ensures a smooth, durable, and attractive finish. This step can make or break the whole project. So, let’s dive into the details of sanding, smoothing, and applying paint or finish.
Sanding And Smoothing
First, ensure all surfaces are even. Use medium-grit sandpaper to start. Sand the entire table surface. Pay special attention to the edges. They need to be smooth to prevent injuries.
After the initial sanding, use fine-grit sandpaper. This helps to achieve a smooth finish. Wipe the table with a damp cloth. This removes any dust and debris.
Consider using a sanding block for better control. Make sure to sand in the direction of the wood grain. This avoids scratches and ensures a smooth finish.
Applying Paint Or Finish
Now, it’s time to apply paint or finish. Choose a high-quality paint or finish. This ensures durability and a professional look. Use a primer first. This helps the paint adhere better.
Apply the primer evenly across the table. Let it dry completely. Once dry, sand the table lightly. Use fine-grit sandpaper for this step.
Next, apply the paint or finish. Use a brush or roller for even application. Allow the first coat to dry. Then, sand lightly and apply a second coat. Repeat if necessary.
For a classic look, use a green or blue paint. Add white lines to mark the playing area. Use painter’s tape to ensure straight lines. This gives your table a professional appearance.
Finally, consider a clear topcoat. This protects the table and adds shine. Let it dry completely before use. Your ping pong table is now ready for play!
Setting Up The Net
Setting up the net on your ping pong table is crucial. A properly set net ensures fair play and smooth gameplay. Let’s break down the process into simple steps. Follow these steps to get your net ready for action.
Net Placement
First, place your net at the center of the table. Ensure the net divides the table into two equal parts. The net should align with the centerline of the table. This placement is essential for a balanced game.
Securing The Net
Next, secure the net to the table. Use the clamps or posts provided with your net. Attach the clamps to the edges of the table. Tighten the clamps until the net is firm. Ensure the net is taut and straight. A saggy net can ruin your game.
Check the height of the net. It should be 6 inches above the table surface. Adjust the net height if necessary. Make sure both sides of the net are at the same height. This keeps the game fair and consistent.
Testing And Adjustments
After assembling your ping pong table, testing and adjustments are crucial. These steps ensure the table performs well during games. Let’s dive into two key areas: leveling the table and ensuring proper bounce.
Leveling The Table
A level table provides a fair playing field. Place a spirit level on the table surface. Check both the length and width. Adjust the legs if needed. Many tables have adjustable feet. Turn them to raise or lower corners. This step prevents the ball from rolling unfairly.
Ensuring Proper Bounce
A consistent bounce is essential for a good game. Drop a ping pong ball from 12 inches above the table. The ball should bounce back up about 9 inches. Test different spots on the table. Adjust if you notice uneven bounces. The surface should be smooth and uniform. Sand any rough spots or high edges. This ensures every shot behaves as expected.
Maintenance Tips
Maintaining your ping pong table ensures its longevity and performance. Regular care keeps it in top shape for many games to come. Below, find essential maintenance tips to keep your table looking and playing great.
Cleaning The Table
First, remove any dust with a soft, dry cloth. This prevents scratches. Next, mix a small amount of mild soap with water. Dampen a cloth with the solution. Wipe the table gently. Avoid soaking the surface. Water can damage the table. Dry the table with a clean, dry cloth. Do this after each use for best results.
Storing The Table
Store the table in a dry, cool place. Avoid direct sunlight. Sunlight can warp the surface. Keep it away from damp areas. Moisture can cause mold. If you have a foldable table, fold it when not in use. This saves space and protects the surface. Use a table cover for added protection. It shields from dust and accidental spills.
Credit: mimzyandcompany.com
Frequently Asked Questions
How Long Does It Take To Make A Ping Pong Table?
Building a ping pong table can take around 3-5 hours. Time depends on your skill level and tools.
What Materials Are Needed For A Ping Pong Table?
You need plywood, legs, screws, paint, and a net. These are the basic materials required.
Can I Build A Ping Pong Table Alone?
Yes, you can build it alone. However, having help will make the process easier and quicker.
How Much Does It Cost To Make A Ping Pong Table?
The cost varies, but typically it ranges from $100 to $300. It depends on the quality of materials used.
Conclusion
Building your own ping pong table is both fun and rewarding. You save money and gain a sense of accomplishment. The steps are simple and easy to follow. Plus, you get a custom table that fits your space perfectly. Gather your materials, follow the guide, and start building.
Soon, you’ll enjoy countless hours of ping pong with friends and family. So, why wait? Start your project today and make your own ping pong table. It’s a great way to spend your time and create lasting memories.