How to String a Lacrosse Stick: Step-by-Step Guide

Stringing a lacrosse stick can seem tricky at first. But, it’s essential for good performance.
Whether you’re new to lacrosse or just need a refresh, knowing how to string your stick properly is key. In this guide, we’ll break down the steps in a simple way. From choosing the right materials to tightening the last knot, you’ll find everything you need here.
A well-strung stick can improve your game by giving you better control and accuracy. Plus, learning to string your own stick can save you money and help you customize your gear. So, let’s dive in and get your lacrosse stick game-ready!
Introduction To Lacrosse Stick Stringing
Stringing a lacrosse stick can seem daunting at first. Yet, it is an important skill for every player. Proper stringing improves performance on the field. It ensures better control and accuracy. In this guide, we will explore the basics of lacrosse stick stringing.
Importance Of Proper Stringing
Proper stringing affects how the ball sits in the pocket. It also impacts the release point of your shots. Correct stringing can enhance your game. It provides better ball control. It ensures a more consistent throw. This can make a difference during crucial moments.
Tools And Materials Needed
To string a lacrosse stick, you need specific tools. These include lacrosse mesh, strings, scissors, and a lighter. A ball and knife may also be helpful. The lacrosse mesh forms the pocket. The strings secure the mesh to the head. A lighter helps seal the string ends.
Make sure to gather all these items before starting. Having the right tools makes the process easier. It ensures a well-strung lacrosse stick. This can improve your performance on the field.
Choosing The Right Mesh
Stringing a lacrosse stick starts with choosing the right mesh. The mesh you select impacts your stick’s performance. It affects the pocket, ball control, and shooting accuracy. So, let’s dive into the different types of mesh and what you should consider.
Types Of Mesh
There are various mesh options available. Here are the main types:
- Soft Mesh: Easy to break in. Provides excellent ball control.
- Hard Mesh: Offers durability. Holds its shape longer.
- Waxed Mesh: Coated with wax. Repels water and maintains consistency in wet conditions.
- Hybrid Mesh: Combines features of soft and hard mesh. Offers a balanced performance.
Factors To Consider
Choosing the right mesh involves considering several factors:
| Factor | Description |
|---|---|
| Playing Position | Attackers may prefer soft mesh for better control. Defenders might choose hard mesh for durability. |
| Weather Conditions | Waxed mesh is ideal for wet conditions. It resists water and retains shape. |
| Skill Level | Beginners may find soft mesh easier to use. Advanced players might prefer hard or hybrid mesh. |
| Personal Preference | Ultimately, choose the mesh that feels right. Comfort and confidence are key. |
Take time to try different meshes. Experiment to find what suits your play style best. This can significantly improve your game.
Preparing The Head
Before you start stringing your lacrosse stick, it is crucial to prepare the head. Proper preparation ensures that the stringing process will be smooth and effective. It also helps you get a better feel for the equipment you are working with. This step involves two main tasks: cleaning the head and understanding the holes.
Cleaning The Head
Begin by cleaning the head of your lacrosse stick. Dirt and debris can affect the performance of your stick. Use a soft cloth or a gentle brush to remove any dirt. You can also use a mild soap solution for a more thorough clean.
- Use a soft cloth or brush
- Remove dirt and debris
- Use mild soap if necessary
- Dry the head completely
Make sure the head is completely dry before you start stringing. Moisture can weaken the strings over time.
Understanding The Holes
Next, take a close look at the holes on the head. These holes are where the strings will go through. Different heads have different hole patterns, so it’s important to understand your specific head.
Here is a simple table to help you understand the typical hole placements:
| Hole Type | Location |
|---|---|
| Sidewall Holes | Along the sides of the head |
| Top Holes | At the top of the head |
| Bottom Holes | At the bottom of the head |
Understanding the placement and purpose of each hole will make the stringing process easier. Sidewall holes are used for attaching the mesh to the sides. Top holes are for securing the top of the mesh. Bottom holes are for the bottom string.
By properly preparing the head, you set the foundation for a well-strung lacrosse stick. Clean your head and understand the holes to make the stringing process straightforward and effective.
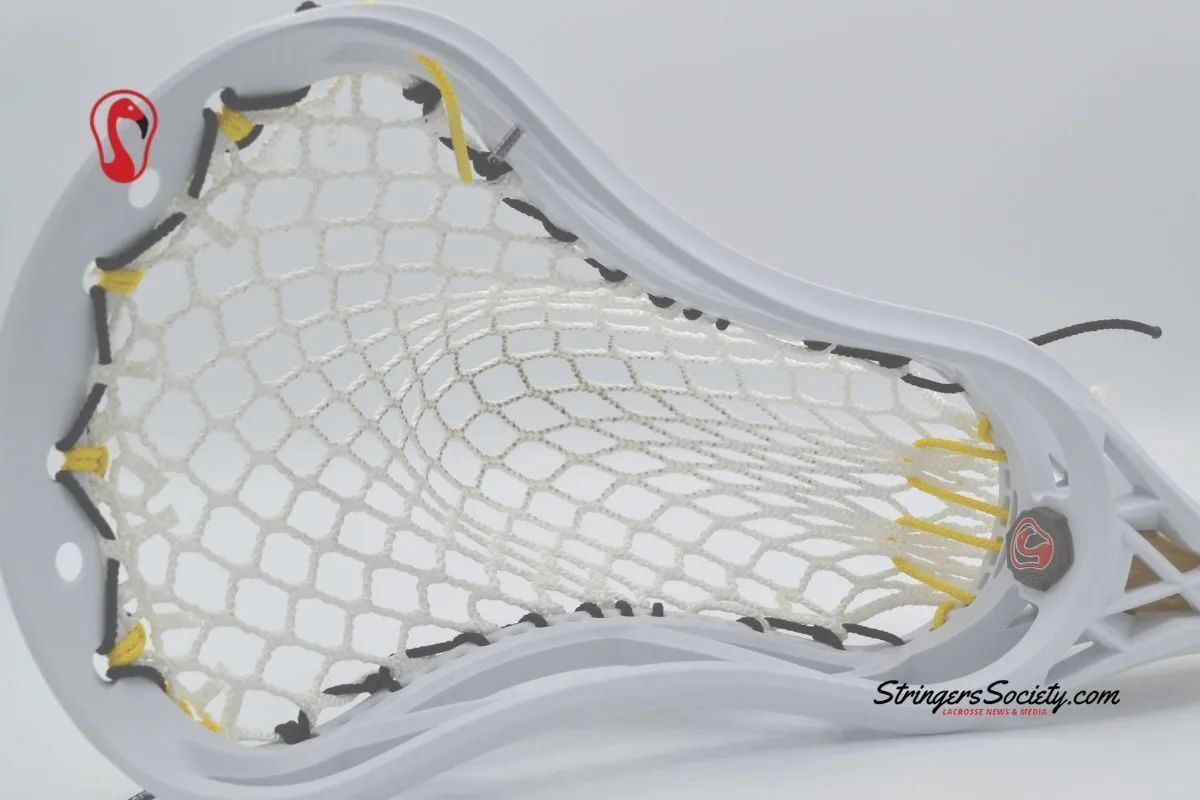
Credit: stringerssociety.com
Attaching The Top String
Attaching the top string is a critical step in stringing a lacrosse stick. This string keeps the mesh secure at the top. It impacts how the ball comes out of the stick. Properly attaching it ensures better control and accuracy.
Measuring The String
Begin by measuring the top string. Cut a piece of string about 30 inches long. This length ensures you have enough to work with. You don’t want to be short on string during the process.
Lay the mesh flat on the head. Count the number of diamonds to find the center. This helps in even stringing. Finding the center is crucial for balance.
Securing The Knots
Start by threading the string through the first hole on the head. Use a simple knot to secure it. Pull it tight. This is the anchor point.
Next, thread the string through the top of the mesh. Then back through the second hole on the head. Repeat this step. Secure each knot tightly. This will ensure the mesh stays in place.
Continue this process across the top of the head. Make sure each knot is even. This will provide a smooth release for the ball. Check for any loose strings and tighten if necessary.
Finally, tie off the end of the string with a strong knot. Cut off any excess string. Your top string should now be secure and ready for action.
Weaving The Sidewalls
Weaving the Sidewalls is a crucial step in stringing a lacrosse stick. It ensures that your pocket has the right shape and depth. Proper sidewall stringing can greatly affect your game performance. Let’s dive into the details of starting the sidewalls and adjusting the tension.
Starting The Sidewalls
Begin by attaching the sidewall string to the top sidewall hole. Use a simple knot to secure it. Next, weave the string through the mesh and the sidewall holes. Alternate between the mesh diamonds and sidewall holes.
- Pull the string through the first diamond of the mesh.
- Insert the string into the first sidewall hole.
- Repeat this process along the sidewall.
Make sure the string is tight but not too tight. This will set the foundation for a strong and durable pocket.
Adjusting The Tension
Adjusting the tension is key to achieving the perfect pocket. If the string is too loose, the pocket will be shallow. If it is too tight, the pocket will be too deep.
- Check the tension of each diamond.
- Ensure consistency across the sidewall.
- Adjust the tension as needed.
Use your fingers to feel the tension. Pull on the string lightly to test it. A balanced tension will give you better control and accuracy.
| Step | Action | Tip |
|---|---|---|
| 1 | Attach sidewall string | Use a secure knot |
| 2 | Weave through mesh and sidewall holes | Alternate between mesh and holes |
| 3 | Adjust tension | Ensure consistency |

Credit: stringking.com
Creating The Pocket
Creating the pocket in a lacrosse stick is crucial for better ball control and improved accuracy. The pocket is the area where the ball sits in the stick head. A well-formed pocket enhances your gameplay, providing a better hold and release. Let’s dive into the steps for creating the perfect pocket.
Forming The Shape
First, form the shape of the pocket. Start by loosening the sidewall strings. This allows you to adjust the mesh. Push the mesh downwards to create a deeper pocket. Ensure the mesh is evenly distributed. This helps in maintaining a consistent shape.
Next, tighten the shooting strings. Shooting strings affect the ball’s release. Experiment with different patterns. This helps you find the best setup for your style. A common method is the U or V pattern.
Depth And Legal Requirements
Check the depth of your pocket. A deeper pocket offers better control. But, it should meet legal requirements. The ball must be visible above the sidewall. This is crucial during official games.
Adjust the strings if needed. Ensure the pocket is not too deep. Use a ball to test the depth. Place the ball in the pocket and hold the stick horizontally. The top of the ball should be visible.
Remember, different positions require different pocket depths. Attackers may prefer a shallow pocket for quick releases. Defenders may opt for a deeper pocket for better control.
Stringing The Bottom
Stringing the bottom of a lacrosse stick is a crucial step. It affects how well you control and throw the ball. Let’s break down this process into easy steps.
Securing The Mesh
First, ensure the mesh is even and aligned. This helps in achieving a consistent pocket.
Thread the string through the bottom holes of the mesh. Pull it tight, ensuring no slack.
Next, weave the string through the sidewalls. This secures the mesh to the head of the stick.
Repeat this process for each hole along the bottom. Keep the tension consistent.
Tying The Final Knots
Once the mesh is secured, it’s time to tie the final knots. Begin at one end of the string.
Tie a simple knot to anchor the string. Ensure it is tight and secure.
Continue tying knots along the bottom. This locks the mesh in place.
Check for any loose ends. Tuck them in to avoid interference during play.
Test the pocket by cradling a ball. Adjust the knots if needed for a better feel.
Final Adjustments
Once you have strung your lacrosse stick, the final adjustments are crucial. These tweaks ensure your stick performs well during play. This section will guide you through the necessary steps to perfect your stringing job.
Checking For Consistency
Consistency in your stringing affects your game. Here’s how to check for it:
- Pocket Depth: Ensure the pocket isn’t too deep or too shallow.
- Shooting Strings: Verify that shooting strings are evenly spaced.
- Sidewall Tension: The sidewall strings should have uniform tension.
Hold the stick and check the pocket’s shape. It should be symmetrical. Use a ball to test the pocket. Place the ball in the pocket and see how it sits. Adjust if the ball doesn’t sit well.
Making Necessary Tweaks
If you find inconsistencies, you need to make tweaks. Here’s a step-by-step guide:
- Adjust the Sidewalls: Loosen or tighten the sidewall strings.
- Fix the Shooting Strings: Adjust the shooting strings for better control.
- Modify the Pocket Depth: Use your fingers to reshape the pocket.
After adjustments, recheck for consistency. Repeat the process until satisfied. A well-strung stick can improve your game significantly. Take your time with these final tweaks.
Maintaining Your Lacrosse Stick
Keeping your lacrosse stick in top shape is crucial. Regular maintenance ensures your stick performs well during games. This section focuses on maintaining your lacrosse stick.
Regular Check-ups
Regular check-ups are important for your lacrosse stick’s longevity. Examine the strings, head, and shaft often. Look for wear and tear. Tighten any loose strings. If the head is cracked, consider replacing it.
- Inspect strings for fraying
- Check the head for cracks
- Ensure the shaft is not bent
Common Repairs
Knowing how to perform common repairs can save you money. Fixing a frayed string is simple. Remove the damaged string. Thread a new string through the holes. Knot it securely.
For a cracked head, use a strong adhesive. Apply it to the crack and press firmly. Allow it to dry completely. If the shaft is bent, try straightening it. Use gentle pressure to avoid damage.
| Repair | Steps |
|---|---|
| Frayed String | 1. Remove damaged string 2. Thread new string 3. Knot securely |
| Cracked Head | 1. Apply adhesive 2. Press firmly 3. Allow to dry |
| Bent Shaft | 1. Apply gentle pressure 2. Straighten carefully |
Regular maintenance keeps your lacrosse stick game-ready. Perform check-ups and repairs often. Your stick will last longer and perform better.

Credit: www.youtube.com
Frequently Asked Questions
What Tools Do I Need To String A Lacrosse Stick?
To string a lacrosse stick, you need strings, mesh, scissors, a lighter, and a stringing kit.
How Long Does It Take To String A Lacrosse Stick?
Stringing a lacrosse stick can take around 30 minutes to an hour, depending on skill level.
Why Is Stringing A Lacrosse Stick Important?
Stringing a lacrosse stick is crucial for control, accuracy, and consistency in your game performance.
Can I Use Any Type Of Mesh For Stringing?
Different mesh types are available, but it’s important to choose one that suits your playing style.
Conclusion
Stringing a lacrosse stick can seem tough at first. With practice, it gets easier. Follow the steps carefully. Adjust the tension as needed. This ensures better control and accuracy. A well-strung stick improves your gameplay. Now, you’re ready to hit the field.
Enjoy the game and keep practicing! Happy playing!