Badminton Lift/Clear Shot: When to Use It and How to Get Height

A badminton lift shot technique that actually works is not about swinging harder, it is about contact point, wrist snap, and knowing when the shot is the right tactical call in the first place. Here is how to generate real height and when to reach for it instead of something more aggressive.
A badminton lift (from the net) or clear (from the back or mid court) is a defensive shot that sends the shuttle high and deep to the back of the opponent’s court, buying you time to recover position rather than trying to win the point outright. Real height comes from getting under the shuttle with a high, slightly-in-front contact point and a wrist that snaps upward through the hit, not from swinging harder. Use it when you are out of position, under pressure at the net, or need to reset the rally’s tempo; overusing it against a strong attacking opponent gives them repeated smash opportunities.
New and intermediate players tend to treat the lift and clear as an afterthought, the shot you hit when nothing better is available, and that attitude shows up in the technique: rushed, flat, and short of the back line where it hands the opponent an easy attacking shuttle. A well-executed lift or clear is not a defensive afterthought, it is a deliberate reset that takes real technique to execute consistently under pressure.
This guide covers the difference between a lift and a clear, the technique that actually generates height rather than just distance, and when using one is the right tactical call instead of a panic response.
- →A lift comes from the net or forecourt; a clear comes from the back or mid court, but both send the shuttle high and deep
- →Height comes from a high, slightly-in-front contact point and an upward wrist snap, not from swinging harder
- →Use a lift or clear to recover position, reset tempo, or escape a defensive net situation, not as a default shot
- →Hitting too early sends the shuttle too high and short; hitting too late sends it flat and shallow
- →Overusing lifts against a strong smasher gives them repeated attacking opportunities; mix in drives and net shots too
Table of Contents
Lift versus clear: not the same shot
A lift starts from the net or forecourt, where the shuttle has dropped low and you need to send it back up and over your opponent to the back of their court, usually with an underarm or low forehand/backhand swing. A clear starts from the back or mid court, hit with an overhead swing similar to a smash but aimed high and deep instead of down. Both shots share the same goal, height and depth, but the swing mechanics are different enough that players who are solid on one often struggle with the other until they practice it specifically.
What actually creates height
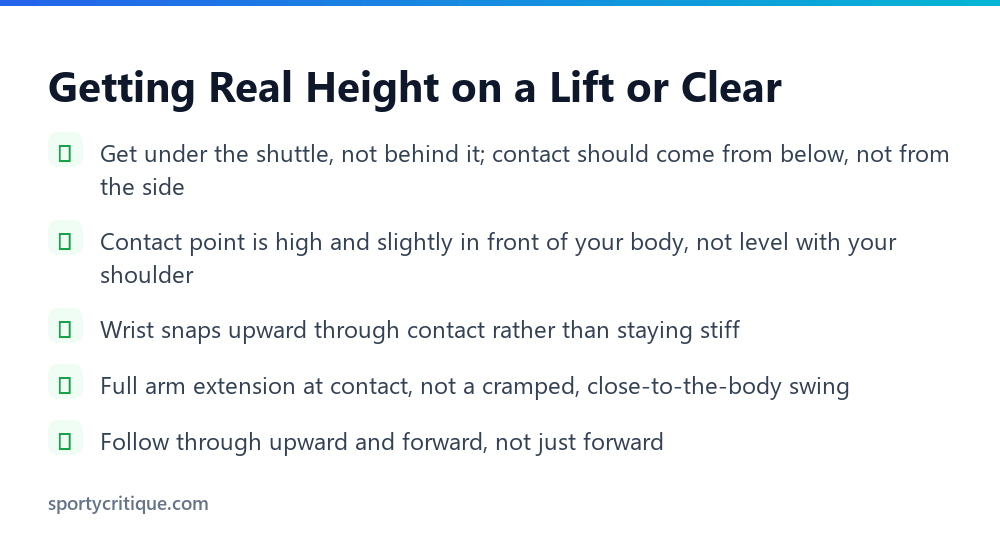
Getting under the shuttle matters more than swing power. Contact needs to come from below the shuttle, with your racket face angled to lift it upward, not from the side or level with it. A shot hit from beside or slightly above the shuttle, even with a hard swing, tends to travel flat and fast rather than high, which is the opposite of what a lift or clear is trying to accomplish.
The contact point itself should be high, reached with a fully extended arm, and slightly in front of your body rather than directly overhead or behind it. Contact that is too far behind your body tends to send the shuttle into the net or short of where you intended; contact too far in front loses power and control both.
The wrist snap through contact is what actually generates the lift itself. A stiff wrist that just pushes the shuttle produces distance without real height, which is why some players describe a good lift or clear as feeling like a whip rather than a push. This snap happens in the same fraction of a second as forearm rotation, and it takes real repetition to feel naturally rather than as a conscious, separate motion.
When to actually use a lift or clear
Use it when you are out of position and need time to recover to center court, when you are under pressure at the net and a weak return would set up an easy opponent smash, or when you want to deliberately reset the pace of a rally that has gotten too fast for your current positioning. A lift or clear is a tempo tool as much as a defensive one: sending the shuttle high and deep buys you roughly a full second more recovery time than any flatter shot would.
Do not use it as a default response any time you are unsure what else to hit. Against an opponent with a strong overhead attack, repeated clears simply feed them repeated smash opportunities from the back of the court, which is exactly the position they want. Mixing in net shots, drives, and drops keeps an opponent from settling into an easy smash-return rhythm against you.
⚠️ Watch out: A clear that lands short of the back three-quarter line, sometimes called a weak or attacking clear when done by accident rather than on purpose, is one of the easiest shots in badminton for an opponent to punish. If your clears are consistently landing short, that is a technique problem worth fixing before it costs you more points than the shot was ever meant to concede.
Practicing height with consistent equipment
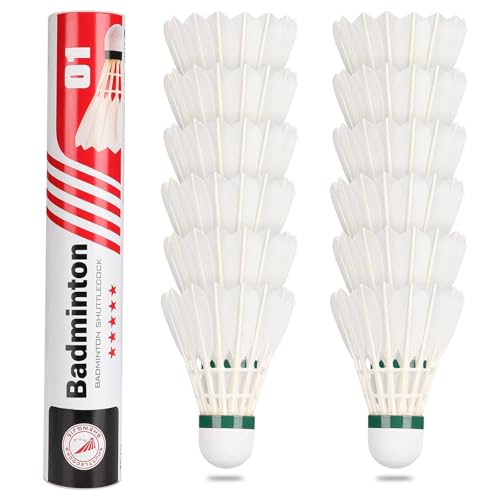
Feel for contact point and timing develops faster with consistent, quality shuttles. Cheap or worn feathers fly inconsistently shot to shot, which makes it hard to tell whether a short clear was your technique or the shuttle. A set like these goose feather practice shuttlecocks gives you a stable, repeatable flight while you are specifically drilling lift and clear technique, so the feedback you get on contact point and timing actually reflects your swing rather than an unpredictable birdie.
💡 Pro tip: Practice lifts and clears from a fed, stationary position before adding footwork. Isolating the contact point and wrist snap without also worrying about getting to the shuttle lets you groove the actual technique faster, then layer in movement once the swing itself feels consistent.
Footwork that sets up a clean contact point
Most short or flat clears trace back to footwork, not the arm swing itself. If you are still moving toward the shuttle at the moment of contact, your base is unstable and the racket arm compensates by rushing through the hit rather than snapping cleanly. Split-step as your opponent hits, read the shuttle’s direction early, and aim to arrive at the contact point with your back foot planted and weight ready to transfer forward through the shot, not still traveling sideways or backward when the racket meets the shuttle.
For a backcourt clear specifically, a small chasse or scissor step gets you under the shuttle with your body already turned sideways, which is what allows the shoulder rotation that generates power without needing to muscle the shot. Players who shuffle straight backward without turning the hips and shoulders tend to arrive at the shuttle square to the net, which limits the same rotational power a turned stance provides for free.
Lift and clear versus the drop shot
A drop shot looks similar in setup, often hit from the same overhead position as a clear, but sends the shuttle just over the net instead of to the back line. Confusing the two in practice is common and usually comes down to disguise: a well-disguised drop and a clear should look identical right up until contact, with the difference coming entirely from wrist action and swing speed rather than a different backswing an opponent could read early. Practicing both shots from the identical setup position, deciding which one to hit only at the last moment, builds the disguise that makes either shot harder for an opponent to anticipate and counter.
Common myths about lifts and clears
Building it into your game
- ✓Get under the shuttle with a high, slightly-in-front contact point every time
- ✓Use the wrist snap to generate height rather than muscling the shot with your arm
- ✓Reserve lifts and clears for genuine tactical resets, not as a default panic shot
- ✓Practice with consistent shuttles so you can isolate technique from equipment inconsistency
- ✕Swinging harder to compensate for a flat, low contact point
- ✕Clearing repeatedly against a strong smasher and feeding them attacking chances
- ✕Hitting late and reaching, which produces a flat, shallow, easily attacked shuttle
- ✕Ignoring a pattern of short clears and assuming it is just bad luck
📊 Note: Doubles and singles use lifts and clears differently. In singles, a clear is a central tactical tool used constantly to control court position. In doubles, where the court is shorter but attacking pressure is higher with two opponents at the net, lifts tend to be a more reluctant last resort, since a high shuttle in doubles gives both opponents a clean attacking angle rather than just one.
Bottom line
A lift or clear is a deliberate, technical shot, not a panic response, and treating it that way changes both how you execute it and how often you actually need it. Get under the shuttle, contact high and slightly in front, snap the wrist upward through the hit, and save the shot for genuine tactical resets rather than every uncertain moment in a rally. Do that consistently and the shot stops costing you points and starts buying you the time it was always meant to.
What is the difference between a badminton lift and a clear?
A lift is hit from the net or forecourt, sending a low shuttle back up high and deep. A clear is hit from the back or mid court with an overhead swing, sending the shuttle high and deep from a higher starting point. Both share the same goal, height and depth, but use different swing mechanics.
Why does my clear keep landing short?
Short clears usually come from hitting too late, reaching for the shuttle instead of moving your feet earlier, or from a contact point that is too far behind your body. Both cause the shuttle to travel flat and shallow instead of high and deep.
Should I use a clear every time I’m under pressure?
No. Clears are a useful tactical reset but overusing them against a strong attacking opponent hands them repeated smash opportunities. Mix in net shots and drives so an opponent cannot settle into an easy attacking rhythm against predictable clears.
How do I get more height on my lift shots specifically?
Get fully under the shuttle with your racket face angled upward, make contact with a high, slightly-in-front point, and snap your wrist through the hit rather than pushing the shuttle with a stiff arm. Swinging harder without fixing contact point rarely adds real height.
As an Amazon Associate, we earn from qualifying purchases through links on this page.