How to Draw a Basketball: The Curved Seams Are What Make It Round


Draw a light circle, then add the seams: one long curved line from top to bottom, a second crossing it, and two short curved seams hooking off the sides. Shade one side softly — a basketball is matte, so no hard glare — and add the pebbled texture last. The seams are what make it read as a basketball rather than a circle, and the trick is that they curve.
Table of Contents
The circle isn’t the hard part
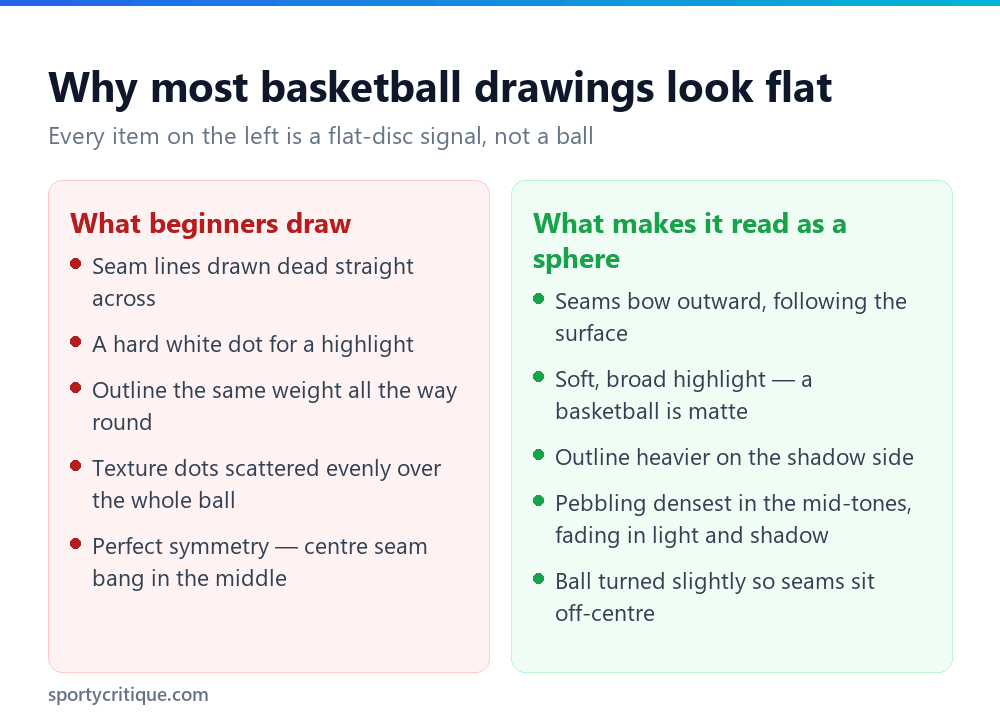
Ask someone to draw a basketball and they’ll get the circle more or less right, then draw a straight vertical line down the middle, a straight horizontal line across it, and stop. The result looks like a beach ball that’s been run over. It’s flat.
The reason is geometry, and it’s the only genuinely difficult idea in this whole exercise. A basketball’s seams are painted onto a curved surface. When you look at the ball, you’re seeing those lines wrap away from you. A line running down the exact centre of a sphere does look straight from head on — but every other line on that surface bends.
Straight seams say ‘circle with lines on it.’ Curved seams say ‘ball.’ That single distinction is most of the drawing.
What you need
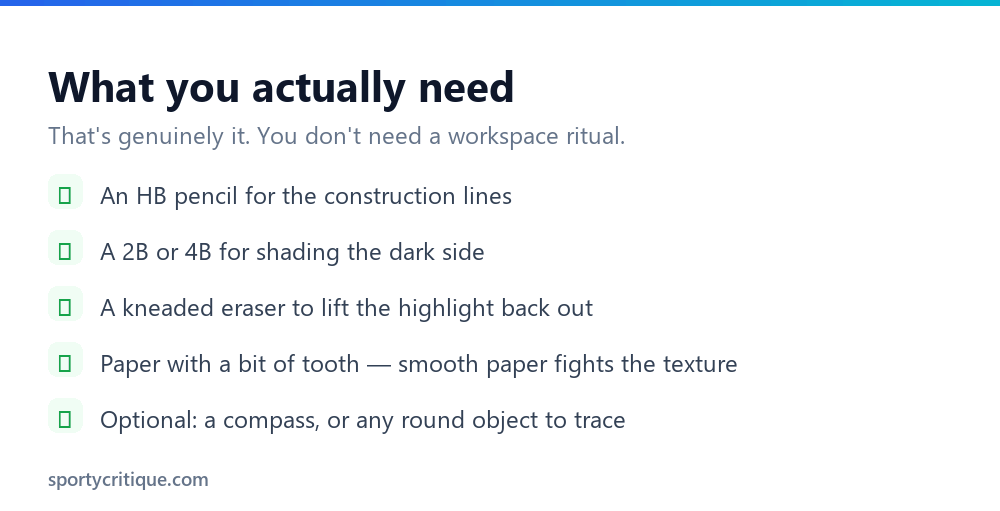
Two pencils and an eraser. An HB for the construction lines because it stays light and lifts cleanly, and something softer — a 2B or 4B — for the shadow side. A kneaded eraser is genuinely worth having here, because the way you make a highlight on a matte ball is by lifting graphite back off rather than leaving white paper.
Use paper with a little texture if you have it. Smooth paper is fine for the shape but works against you when you get to the pebbling, because the grain of the paper is doing half that job for you.
Step 1: the circle
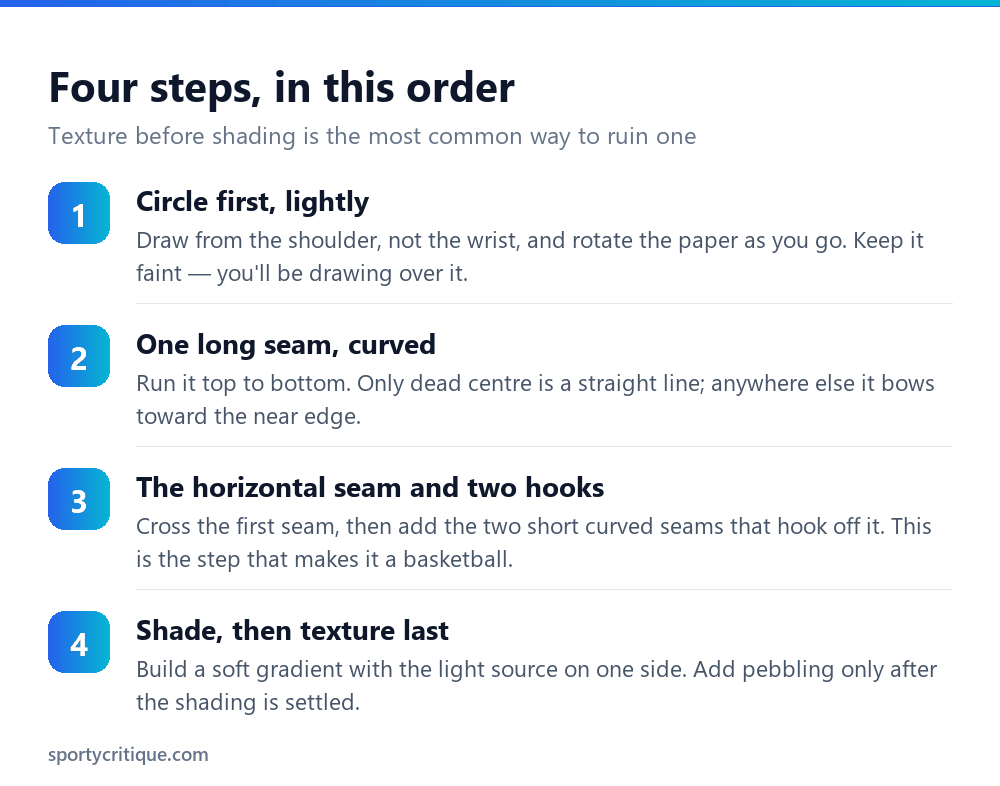
Draw it faintly. You’re going to be working on top of this line and you don’t want it showing through in the finished drawing.
If you’re going freehand, move from your shoulder rather than your wrist — wrist movement produces short arcs that don’t join smoothly. The other trick is to rotate the paper as you draw and keep your hand still, which sounds like cheating and is how a lot of people get clean circles.
💡 Pro tip: Trace something. A mug, a roll of tape, a jar lid. Nobody looking at your finished drawing is going to ask how you made the circle round, and the interesting part of this drawing starts at step two.
Step 2: the seams, which is the whole drawing
A basketball has four seam lines. Two long ones that wrap right around the ball, and two shorter ones that curve off to the sides. Getting the count right matters less than getting the curvature right.
The long vertical seam
Start at the top of the circle and run down to the bottom. If you place it exactly down the middle it’s a straight line — that’s the one position where it is. Almost always you want it slightly off-centre instead, because a perfectly centred ball is a duller drawing. Once it’s off-centre, it has to bow: the line curves toward whichever edge it’s nearest.
The horizontal seam
Now cross it. Same rule — if it sits dead across the middle it’s straight, and anywhere above or below it curves. Above the midpoint it bows upward at the edges; below, it bows downward. Think about the line of the horizon on a globe and you’ve got it.
The two side hooks
These are what people forget, and they’re the detail that makes the drawing recognisable. On either side of the vertical seam, add a short curved line that starts near the top of the ball, bows outward toward the edge, and comes back in near the bottom. They’re roughly parallel to the centre seam but flattened, like two brackets holding the ball.
⚠️ Watch out: If your side seams touch the outer edge of the circle, they’ve gone too far. They should stop short — the surface is turning away from you there, and a seam that reaches the outline reads as a line drawn on a flat disc.
Step 3: shading, and why the highlight is the giveaway
Pick a light source and commit to it. Top-left is conventional and easy. The side facing the light stays pale, the opposite side goes dark, and there’s a gradient between them that should be gradual rather than a hard edge.
Here’s the bit that separates a convincing basketball from a plastic-looking one: a basketball is matte. It’s rubber or composite leather with a pebbled surface, and it scatters light. It does not produce the tight white glare you’d put on a snooker ball or a car. Give it a broad, soft, slightly-lighter region instead, with no crisp border. If you’ve already shaded over the area, lift it back out with the kneaded eraser rather than trying to leave a gap.
One more thing that costs nothing: add a little reflected light along the very bottom edge of the shadow side. A thin band that’s slightly lighter than the shadow above it. That’s light bouncing off whatever surface the ball is sitting on, and it stops the dark side looking like a hole.
Step 4: the pebbling
The texture goes on last, over the top of finished shading. If you put it down first you’ll smear it while you shade, and you’ll also end up with even, mechanical dots across the entire surface, which looks like fabric rather than rubber.
Use small irregular marks — dots, tiny commas, short flicks. Vary the pressure. The density should follow the shading: heaviest through the mid-tones where the surface is most visible, sparse in the lit area, and barely there in the deepest shadow where you wouldn’t be able to make it out anyway.
You don’t have to texture the whole ball. Suggesting it across two-thirds and letting the rest fade is more convincing than covering every millimetre, and it’s a great deal quicker.
Adding colour
Plain orange is the trap. A real basketball sits somewhere between orange and a burnt, slightly brown tone, and it gets duller and darker the more it’s been used. If you colour it straight out of the orange pencil it comes out looking like a novelty balloon.
The approach that works with coloured pencils is to lay orange over the whole ball first, keeping it light, then go over the shadow side with a light brown or a burnt sienna. A touch of blue or grey in the deepest part of the shadow will stop it turning muddy — shadows on an orange object aren’t just darker orange, they pick up colour from everything around them.
Leave the seams until the colour is finished. They’re black, but not solid black along their whole length: where the seam runs into the lit side it lightens, and where it disappears round the edge it thickens slightly. Painting them in flat, uniform black is the colour equivalent of ruling them straight.
💡 Pro tip: With markers, work light to dark and accept you can’t lift colour back out. Put the highlight in by leaving that area of paper untouched from the very first pass — there’s no recovering it later.
Drawing it small, or as part of a scene
Most of the time a basketball isn’t the subject of the drawing. It’s in someone’s hands, mid-air over a hoop, or sitting on a court in the background, and at that size all of the above changes.
Below about a centimetre across, drop the pebbling entirely. It turns into grey mush and reads worse than clean shading. Keep the seams — even two of them — because those are what identify the object. A small ball with two curved lines and a simple gradient is instantly a basketball; a small ball with beautiful texture and no seams is just a circle.
Match the light to the rest of the scene, not to habit. If your figure is lit from the right, a ball lit from the top-left will look pasted in no matter how well it’s drawn on its own. And put a shadow underneath it — contact shadow if it’s resting on the floor, a softer offset one if it’s in the air.
How to actually get better at this
Draw the same ball ten times in a row on one sheet, small, at different angles. Not carefully — a couple of minutes each. What you’re training is the seam curvature, and doing it ten times teaches your hand more than one careful attempt does.
Then do a set from a reference photograph rather than from your head. Photographs will show you things you’d never invent, like how much the seam width varies along its length, or how the pebbling is only really visible across a narrow band of the surface. Your imagination smooths all of that out.
What goes wrong
- ✓Keep construction lines light enough to erase
- ✓Bow the seams outward, following the curve of the surface
- ✓Stop the side seams short of the outline
- ✓Keep the highlight soft and broad — the ball is matte
- ✓Add reflected light along the bottom of the shadow side
- ✓Texture last, and only where the surface is most visible
- ✕Ruling the seams straight with a ruler
- ✕Placing the centre seam exactly in the middle every time
- ✕A hard white dot of glare — that’s a billiard ball, not a basketball
- ✕Outlining the whole circle in one uniform heavy line
- ✕Even, evenly-spaced texture dots across the entire ball
- ✕Shading on top of texture instead of underneath it
Once it looks right, turn it
A ball drawn straight on is a good exercise and a slightly boring picture. The same four seams tilted a few degrees look considerably better, and it’s no harder — you just rotate the whole seam structure together rather than shifting lines individually.
If you want it in motion, squash it very slightly along the direction of travel and add a soft shadow underneath, offset from the ball. Even a small ellipse of shadow sells the idea that the thing is above a surface rather than pasted onto one.
And if you’re drawing the ball as part of a wider scene, remember that it’s usually not the subject. A ball in someone’s hands should be shaded to match the light on the figure — worth a look at our ice hockey player drawing guide for how to keep a figure and equipment consistent.
Frequently asked questions
How many lines are on a basketball?
Four seams. Two long ones that wrap around the ball at roughly right angles to each other, and two shorter curved ones on either side. Most drawings only include the two long ones, which is why they look unfinished.
Why do my seam lines make the ball look flat?
They’re almost certainly too straight. Only a seam running exactly through the centre of the visible sphere appears straight; everything else bends toward the nearest edge. Curving them is the single biggest improvement you can make.
Do I need a compass?
No. Trace a round object, or draw freehand moving from the shoulder and rotating the paper. A compass leaves a centre dot you then have to erase, which is a small nuisance on a drawing you’re about to shade.
What colour is a basketball, exactly?
Not plain orange. It sits between orange and a burnt, brownish tone, and it varies with wear — an old ball is darker and duller. If you’re colouring, a base orange with a light brown over the shadow side reads far truer than orange alone.
How long should this take?
Fifteen minutes for a decent one, once you’ve done a couple. The circle and seams take a few minutes; the shading and texture are where the time goes, and they’re also where it’s worth slowing down.
- →The trickiest of the ball drawings — how to draw a soccer ball, where the pentagon and hexagon pattern has to shrink toward the edges
- →Simpler but seam-dependent in the same way: how to draw a baseball and its figure-eight stitching
- →Step up to a figure with how to draw an ice hockey player
- →Or put the ball down and go and use one — how to shoot a basketball