Stringing a lacrosse head can seem tricky, but it’s essential. A well-strung head improves control and accuracy.
Lacrosse players know the importance of a perfectly strung head. It can make a huge difference in your game. Whether you’re new to lacrosse or looking to refine your skills, understanding how to string a lacrosse head is crucial. The process involves threading the mesh and securing it properly.
This ensures the ball moves smoothly and consistently. Even small adjustments can change how you play. So, let’s dive into the basics and get your lacrosse head strung right!

Credit: www.youtube.com
Choosing The Right Head
Stringing a lacrosse head starts with choosing the right head. The right head can make a huge difference in your performance. Consider the types and factors to find the best fit for your needs.
Types Of Lacrosse Heads
Lacrosse heads come in different types. Each type serves a specific purpose and playing style.
- Offensive Heads: Lightweight and designed for quick shots.
- Defensive Heads: Stronger and wider for better control and checks.
- Goalie Heads: Larger to help block shots.
Factors To Consider
Several factors play a role in choosing the right lacrosse head. These include:
| Factor | Details |
|---|---|
| Position | Choose a head that fits your position. Attackers need precision, while defenders need strength. |
| Skill Level | Beginners may prefer wider heads for easier catching. |
| Material | Durable materials last longer. Lightweight materials offer better handling. |
| Shape | The shape of the head affects ball control and accuracy. |
Consider these factors carefully. They will guide you to the best choice for stringing your lacrosse head.
Preparing The Head
Before you start stringing a lacrosse head, proper preparation is key. Ensuring the head is clean and free from damage will make stringing easier and more effective. Follow these steps to prepare your lacrosse head.
Cleaning The Head
Start by thoroughly cleaning the lacrosse head. Remove any dirt, grass, or residue. A clean head allows for a better stringing job.
- Use a soft brush to remove loose dirt.
- Rinse the head with warm water.
- Use mild soap to clean stubborn spots.
- Rinse off all soap and let it dry completely.
Inspecting For Damage
Next, inspect the head for any signs of damage. A damaged head can affect your game performance.
- Check for cracks or splits in the plastic.
- Look for any broken or frayed strings.
- Ensure the head maintains its shape.
If you find any damage, consider replacing the head. Stringing a damaged head can lead to poor performance and further damage.
Measuring The Strings
Stringing a lacrosse head can be tricky. Measuring the strings correctly is key to success. Incorrect measurements can affect play and performance. Let’s look at how to measure the strings properly.
Types Of Strings
Different strings serve different purposes in a lacrosse head. Here are the main types:
- Shooting Strings: These are placed horizontally across the pocket. They help control the ball when shooting.
- Sidewall Strings: These run along the sides of the head. They attach the mesh to the head.
- Top Strings: These secure the top of the mesh to the head.
- Bottom Strings: These keep the mesh tight at the bottom of the head.
Cutting The Right Length
Getting the right length of string is important. Use these steps to measure and cut accurately:
- For shooting strings, measure around 20-24 inches. Cut and burn the ends to prevent fraying.
- For sidewall strings, measure around 30 inches. This length allows for proper attachment.
- For top strings, measure 15-18 inches. This length keeps the mesh secure.
- For bottom strings, measure around 8-10 inches. This length ensures a tight fit.
Be precise. Use a ruler or tape measure for accuracy. Always cut longer than needed. You can trim the excess later.
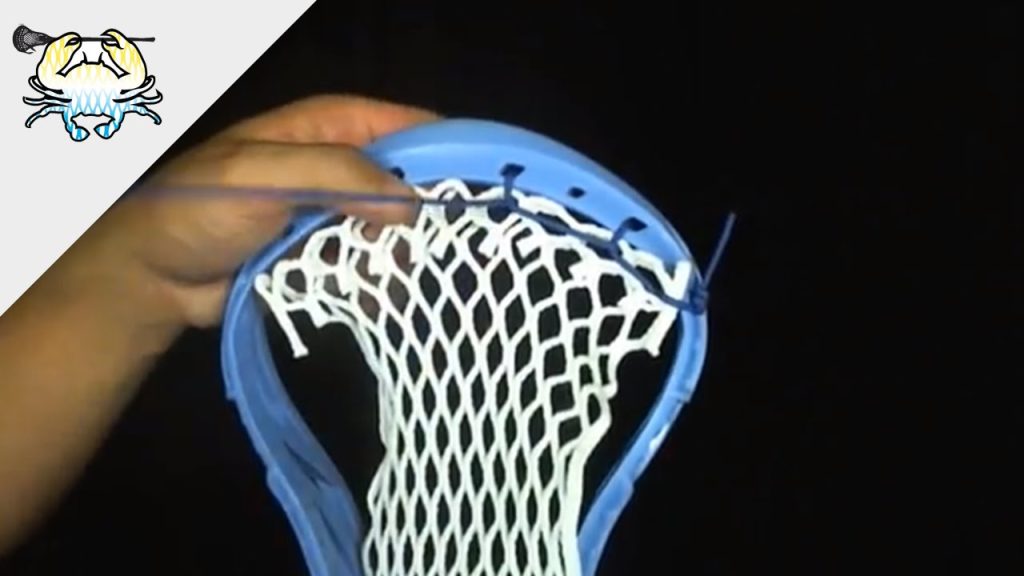
Creating The Top String
Creating the top string is a crucial step in stringing a lacrosse head. This part of the process ensures the mesh is tight and secure. It also affects the way the ball travels in and out of the pocket. Follow these steps to create a reliable and consistent top string.
Starting The Top String
Begin by choosing a durable string. Pass the string through the top hole of the head. Ensure the string is even on both sides. Next, thread the string through the first hole of the mesh. Pull it tight to create tension.
Continue by threading the string back through the top hole of the head. Then, move to the next hole in the mesh. Repeat this pattern across the top of the head. Make sure each loop is tight and secure.
Securing The Top String
Once you reach the last hole, pull the string tight. Tie a knot to secure the end of the string. Double-check each loop to ensure they are all tight.
If needed, adjust the tension by loosening or tightening the loops. The top string should be straight and even. This will ensure the mesh sits properly on the head.
Finally, trim any excess string. Burn the ends to prevent fraying. Your top string is now secure and ready for play.
Stringing The Sidewalls
Stringing the sidewalls of a lacrosse head is crucial. The sidewalls hold the pocket in place. They affect the ball’s control and release. Let’s break down this process into simple steps.
Attaching The Sidewalls
First, thread your string through the top hole of the sidewall. Secure it with a knot. Pull the string through the first sidewall hole on the lacrosse head. Loop it through the corresponding mesh diamond. Tighten the string firmly. Repeat this step for each hole down the sidewall. Ensure the mesh stays even and tight. This creates a consistent pocket.
Tying Off The Sidewalls
Once the string reaches the bottom, secure it. Loop the string through the last sidewall hole. Make a tight knot. Ensure there are no loose ends. Trim any excess string. This prevents the string from unraveling.
Take a moment to check your work. The sidewalls should be tight and even. This ensures a better performance on the field.
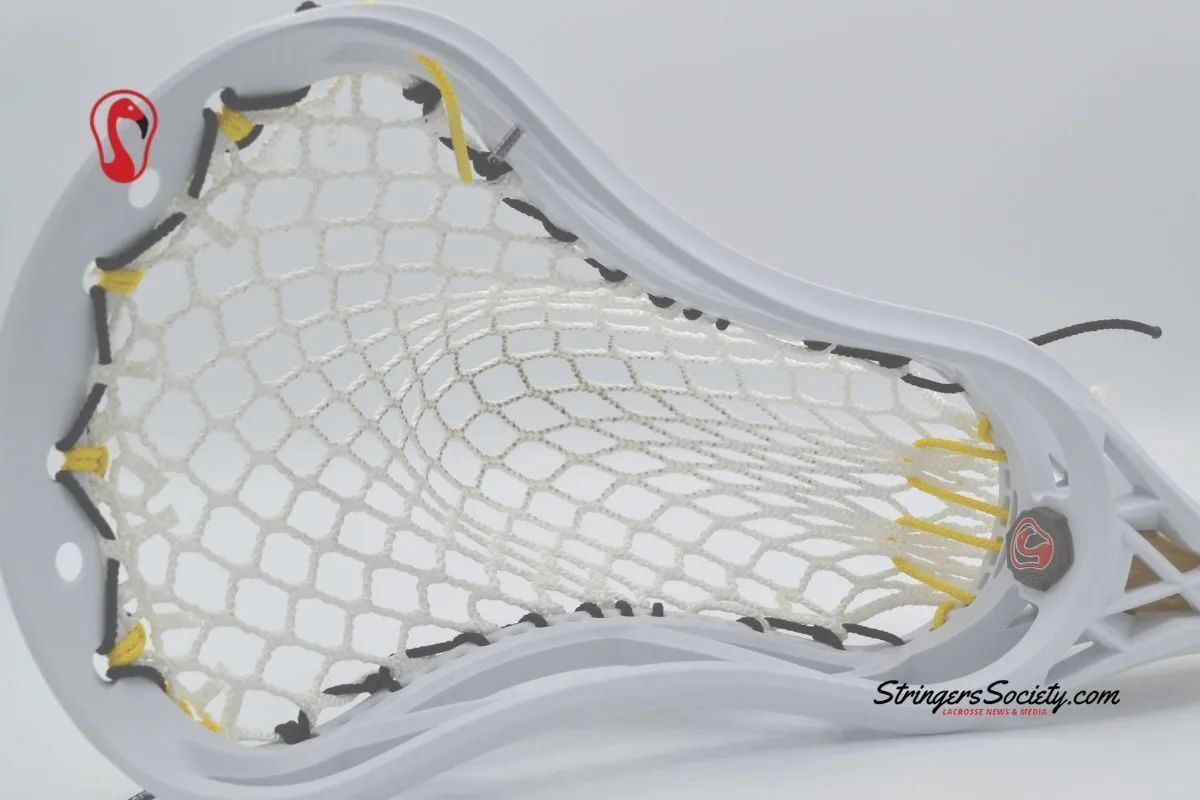
Forming The Pocket
Forming the pocket in a lacrosse head is crucial for better control. It helps in catching, cradling, and shooting the ball. A well-formed pocket can improve your game by enhancing accuracy and ball retention.
Determining Pocket Depth
First, decide how deep you want the pocket to be. A deeper pocket offers more control. A shallower pocket allows for quicker release. To find the right depth, press your thumb into the mesh. This will give you an idea of the pocket depth.
Use a ball to test the pocket. Place it in the mesh. Press down gently. The ball should sit snugly without falling out.
Adjusting Pocket Tension
Next, adjust the tension of the strings. Tighter strings at the top create a shallower pocket. Looser strings at the bottom allow for a deeper pocket. Start by loosening the sidewall strings. This gives the mesh more slack.
Then, adjust the top and bottom strings. Tighten or loosen them as needed. Check the pocket depth and tension frequently. This ensures you get the desired result. A well-adjusted pocket will greatly improve your game.
Final Touches
After securing the main components of your lacrosse head, it’s time for the final touches. These steps ensure your lacrosse stick performs at its best. Let’s focus on adding the bottom string and trimming excess strings.
Adding The Bottom String
The bottom string stabilizes the pocket. This helps maintain a consistent shape. To add it, start by threading the string through the sidewall holes. Make sure to weave it through the mesh. This creates a secure hold. Pull it tight but not too tight. You want some give for better control. Tie a knot at the end to secure it.
Trimming Excess Strings
After adding all strings, you’ll notice some excess. Use sharp scissors to trim these. Leave a small length for adjustments. Burn the ends with a lighter to prevent fraying. Be careful while doing this. Frayed ends can affect performance. Finally, check all knots. Ensure they are tight and secure. This final step ensures your lacrosse head is game-ready.

Credit: stringking.com
Testing And Adjusting
Testing and adjusting your newly strung lacrosse head is essential. This ensures your pocket meets legal standards and performs well on the field. Follow these steps to make sure your lacrosse head is game-ready.
Checking Legal Specifications
First, you need to check the pocket depth. Place a lacrosse ball in the pocket. The ball should not sink below the sidewalls. This is a key rule in lacrosse. Next, measure the pocket width. The widest part of the pocket should not be more than 6.5 inches. Use a tape measure for accuracy. Lastly, ensure the shooting strings are within the top 4 inches of the head. This is a common rule in most leagues.
Making Necessary Adjustments
If the pocket is too deep, tighten the bottom string. This will raise the pocket. Check the sidewalls too. Tightening them can help adjust the pocket depth. If the pocket is too wide, adjust the sidewall strings. Tighten them to bring the width within legal limits. Adjust the shooting strings if they are too low. Move them up to stay within the top 4 inches of the head. Lastly, test your lacrosse head again after each adjustment. This ensures it meets all legal specifications and performs well.
Maintenance Tips
Maintaining your lacrosse head ensures your equipment performs at its best. Regular care and timely restringing keep it game-ready. Here are key maintenance tips to help you stay on top of your game.
Regular Inspections
Check your lacrosse head often. Look for frayed strings and worn-out mesh. Tighten any loose knots. Ensure the pocket maintains its shape. Regular inspections prevent small issues from becoming big problems.
When To Restring
Restring your lacrosse head if you see significant wear. If the pocket loses its shape, it is time. Also, if the mesh starts to tear, restring it. Keeping an eye on these signs helps maintain your performance on the field.
Credit: stringerssociety.com
Frequently Asked Questions
What Materials Are Needed To String A Lacrosse Head?
To string a lacrosse head, you’ll need mesh, sidewall string, shooting strings, and a lacrosse head. A pair of scissors and a lighter are also useful.
How Do I Choose The Right Mesh?
Choose mesh based on your playing style. Soft mesh offers better control, while hard mesh provides more consistency and durability.
How Tight Should Sidewall Strings Be?
Sidewall strings should be tight but not too tight. They should secure the mesh firmly without causing it to bunch up.
How Often Should I Restring My Lacrosse Head?
Restring your lacrosse head when the mesh becomes worn or loses its shape. This usually happens every few months.
Conclusion
Stringing a lacrosse head can seem tricky at first. But with practice, it gets easier. Follow the steps carefully. Use the right materials. Pay attention to the details. A well-strung head improves your game. It gives better control and accuracy.
Don’t rush the process. Take your time. Soon, you’ll notice the difference on the field. Enjoy the craft of stringing your lacrosse head. It’s rewarding and beneficial. Happy stringing and good luck!