How to Hold and Bridge a Pool Cue Properly


Most missed shots in pool trace back to the two hands, not the aim. Here’s how to actually hold the cue and build a bridge that lets your stroke travel where you pointed it.
Here’s how to hold a pool cue: rest it loosely in the fleshy part of your hand between thumb and fingers, about 4 to 6 inches from the butt end, with just enough pressure to keep it from slipping, not enough to steer it. Then build a bridge with your other hand flat on the table, using an open V-groove bridge for most shots or a closed loop bridge for extra stability on harder ones. Both hands exist to let the cue swing in a straight line, not to control the shot by force.
Most beginners aim fine and still miss, because the miss isn’t happening at the aim, it’s happening in the stroke. A cue that gets gripped too hard or a bridge hand that wobbles turns a correctly aimed shot into a crooked one before the tip ever reaches the cue ball. Grip and bridge are the two things that determine whether your stroke actually travels where you pointed it.
Neither one is complicated once you see it done correctly, and neither takes special hand strength or flexibility to learn. What takes practice is unlearning the instinct to grab the cue tighter when a shot matters, which is the single most common fault at every skill level below advanced.
- →Grip the cue loosely, 4 to 6 inches from the butt, letting your forearm hang roughly perpendicular to the cue at contact
- →The most common beginner mistake is gripping too tightly, which steers the cue off a straight line
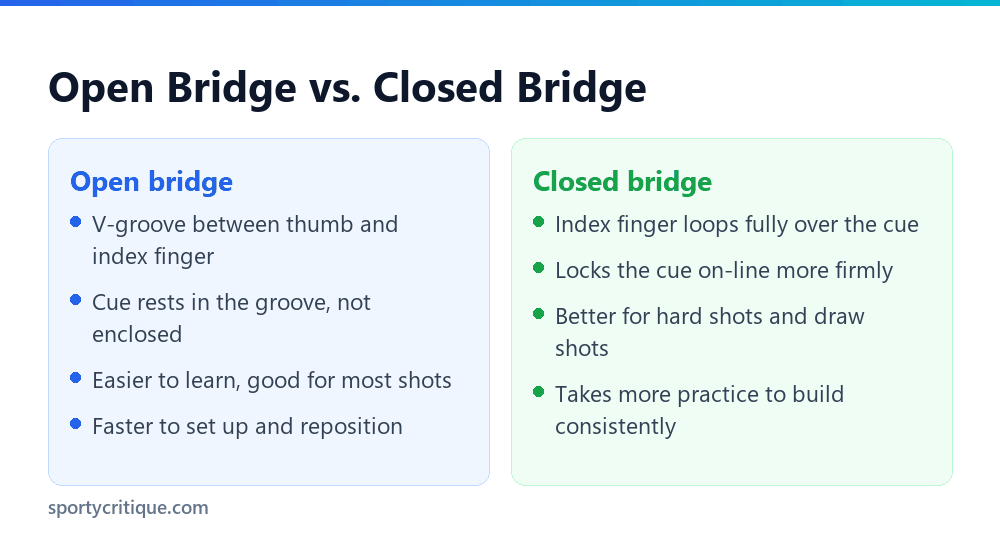
- →An open bridge (a V-groove between thumb and index finger) is easier to learn and fine for most shots
- →A closed bridge (index finger looped over the cue) adds stability for hard shots or draw shots that need extra control
- →Your bridge hand should stay planted and still through the entire stroke; movement there causes more misses than a shaky back hand
Table of Contents
The grip: how your back hand should actually hold the cue
Place the cue in the fleshy part of your hand between your thumb and index finger, then let your other three fingers wrap around it lightly. Your pinky can stay loose or even come off the cue entirely if that feels more natural; it isn’t doing much work either way. The grip point itself usually sits 4 to 6 inches from the butt end, close enough that your forearm hangs roughly straight down, perpendicular to the cue, at the moment the tip meets the cue ball.
Pressure is the part almost everyone gets wrong early on. A useful comparison: hold the cue the way you’d hold a bird, firm enough that it can’t fly off, gentle enough that you won’t hurt it. If you can’t slide the cue smoothly forward and back through your fingers with almost no resistance, your grip is too tight, and no amount of correct aiming will fix a stroke that gets steered off-line by a clenched hand.
⚠️ Watch out: A grip that tightens up right before contact, often without the shooter noticing, is the single most common cause of pushed or steered shots. If your shots tend to drift left or right of where you aimed despite a solid bridge, check your grip pressure at the exact moment of contact before changing anything else about your technique.
Open bridge vs. closed bridge
Your bridge hand rests flat on the table and does one job: guide the cue in a straight line toward the cue ball while keeping the shaft level. There are two standard ways to build it, and most players end up using both depending on the shot.
Building the open bridge
Spread your fingers and thumb flat on the table, then raise your knuckles slightly and press your thumb against the side of your index finger to form a shallow V. The cue sits in that groove, resting on it rather than gripped by it. Adjust the height of the V by flattening or raising your hand until the cue lines up level with the cue ball, not angled up or down.
Building the closed bridge
Start the same way, then loop your index finger up and over the cue so the shaft passes through a full circle formed by your thumb and index finger, with your other three fingers spread on the table for a stable base. This locks the cue more firmly on-line than an open bridge, which is why it shows up most on power shots, draw shots, and any shot where a slightly crooked stroke would cost you position.
When the normal bridge doesn’t work: rails and long reaches
Two situations break the standard bridge: the cue ball sitting tight against a rail, and a shot too far away to reach with a normal stance. For a rail shot, drop your bridge hand flat on the rail itself instead of the table, using the same open V shape, just built an inch or two lower than usual to keep the cue level.
For a truly long reach, most players either stretch further than is comfortable, which wrecks stroke control, or reach across the table on their toes, which is worse. A Sumind Retractable Pool Cue Bridge Stick solves this properly: it extends your reach without forcing an off-balance stance, and a removable head lets you match the same open or closed contact point you’d use with your hand. It isn’t cheating, every pool hall keeps house bridges on the wall for exactly this reason.
- ✓Check your grip pressure specifically at the moment of contact, not just at address
- ✓Keep your bridge hand completely still through the entire stroke, from backswing to follow-through
- ✓Switch to a closed bridge for hard shots or draw shots where extra stability matters
- ✓Use a mechanical bridge for a genuine long reach instead of stretching off-balance
- ✕Grip the cue in your palm instead of your fingers; that adds unwanted rotation to the stroke
- ✕Let your bridge hand slide or lift as the cue moves forward, even slightly
- ✕Assume a closed bridge is always better; it’s slower to set up and not needed on easy, short shots
- ✕Ignore a shot just because a mechanical bridge feels awkward the first few times you use one
💡 Pro tip: Practice your grip and bridge without a ball on the table first. Set up a normal stance, take five slow practice strokes, and watch the tip in a mirror or on video. If the tip drifts left or right through the stroke instead of moving in a straight line, the fix is almost always grip pressure or bridge-hand movement, not your aim.
How grip and bridge fit into your stance
Neither hand works correctly in isolation. Your bridge hand distance from the cue ball, usually 6 to 8 inches, only holds up if your stance puts your body in the right spot to begin with: feet roughly shoulder-width apart, front foot pointed toward the shot line, and your chin low enough to sight down the cue without straining your neck. Fix your stance first, then set the bridge distance, not the other way around.
A common chain reaction: a cramped stance pushes the bridge hand too close to the cue ball, which shortens your stroke and makes the grip hand compensate by gripping harder to generate power that a longer, looser stroke would have produced anyway. Untangling that usually starts with backing the stance up half a step and rebuilding the bridge distance from there, rather than trying to fix the grip pressure directly.
Common faults and quick fixes
📊 Note: Grip and bridge only matter once your stance and aim are already lined up. Our guide to
How long this actually takes to fix
Grip and bridge problems that have been ingrained for months don’t disappear in one session. Most players see a real difference within two or three focused practice sessions of slow, deliberate strokes, watching the tip travel in a straight line before adding any speed or pace back in. Rushing that process by going straight back to full-speed shots tends to bring the old habits right back with it, since the fix hasn’t had time to become automatic yet.
It helps to isolate one change at a time rather than rebuilding grip, bridge, and stance all in the same session. Fix the grip pressure first and play a full session with just that change. Once it feels normal without thinking about it, move to bridge-hand stability, then stance. Trying to fix all three simultaneously usually means none of them stick, because there’s too much to consciously track on every single shot.
Bottom line
Hold the cue loosely enough that it can slide through your fingers on its own, build a bridge that stays flat and still through the whole stroke, and switch to a closed bridge or a mechanical bridge when the shot actually calls for it. Everything else in your fundamentals, stance, aim, follow-through, works better once the two hands doing the actual work aren’t fighting the stroke.
How tight should my grip be on a pool cue?
Loose enough that the cue slides forward and back through your fingers with almost no resistance. A common way to check: if you can’t slide the cue smoothly by hand before you even take a stroke, your grip is already too tight.
Should beginners use an open or closed bridge?
Start with the open bridge; it’s faster to learn and works for the large majority of shots. Add the closed bridge once the open bridge feels natural, and use it specifically on harder shots like draws or hard power shots where extra stability helps.
Where should my grip hand sit on the cue?
Roughly 4 to 6 inches from the butt end for most players, adjusted so your forearm hangs close to perpendicular to the cue at the moment the tip contacts the cue ball. Taller players sometimes grip slightly further back; shorter players sometimes slightly forward.
Is it okay to use a mechanical bridge instead of my hand?
Yes, on any shot where your hand can’t reach without an unstable, off-balance stance. It’s standard equipment in every pool hall for exactly that reason, not a sign of lesser skill.
Why do my shots keep drifting off-line even though I feel like I’m aiming correctly?
The most common cause isn’t aim at all, it’s grip pressure tightening at the moment of contact or a bridge hand that shifts slightly during the stroke. Check both before assuming the problem is your aim.
As an Amazon Associate, we earn from qualifying purchases through links on this page.