How to Hit a Badminton Net Kill (Timing & Wrist Snap)

A badminton net kill looks like a small shot on video, but almost all of its power comes from timing and contact height, not the wrist. Here’s the read, the footwork, and the loose-to-tight grip pattern that actually finish the point.
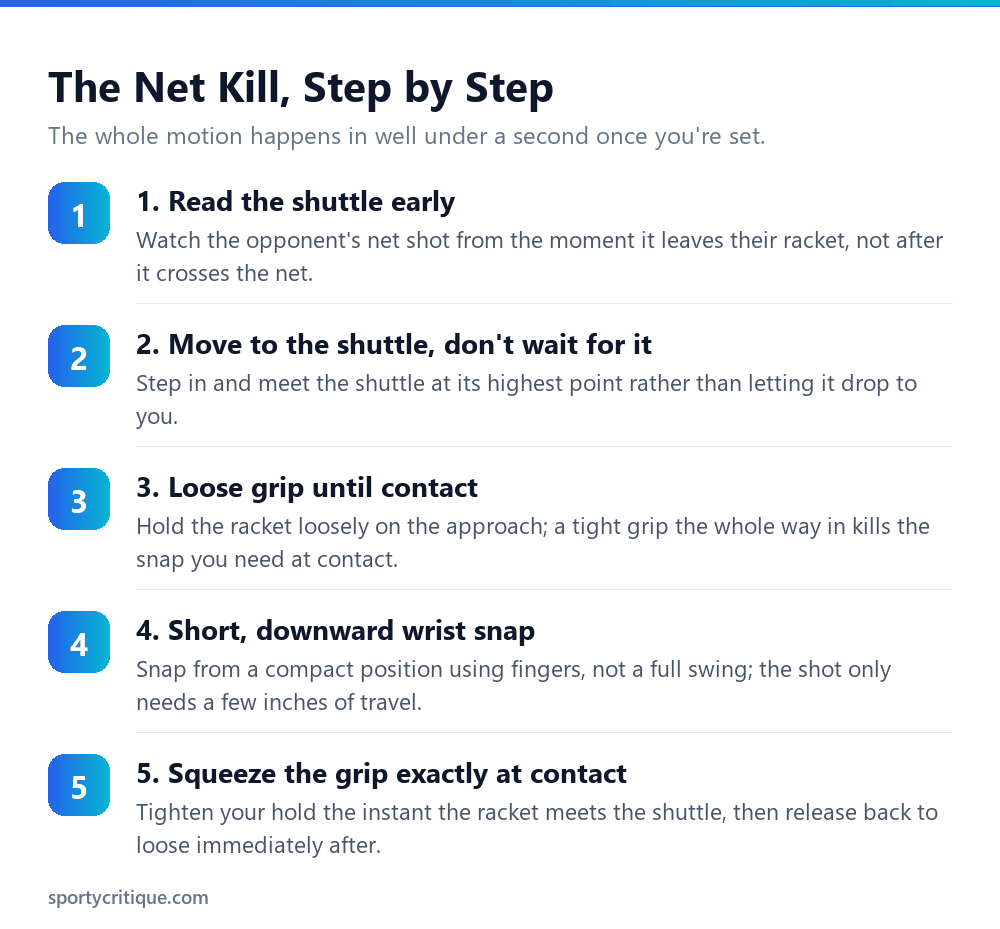
A net kill is not a swing, it’s a short, downward tap. Meet the shuttle as early and as high as possible, keep your grip loose on the approach, and snap from the fingers in a compact motion that tightens the grip only at the exact moment of contact. Most missed kills come from waiting too long and letting the shuttle drop below net height, not from a weak wrist snap.
A net kill ends a rally faster than almost any other shot in badminton, and it looks simple on video, a short downward tap that drops the shuttle dead on the opponent’s side. What the video doesn’t show is how much of the shot happens before contact: reading the opponent’s net shot early enough to close the distance, and getting there while the shuttle is still above net height. Miss that window and no amount of wrist snap saves the shot.
- →Early contact matters more than a strong wrist snap; take the shuttle at its highest point, ideally above the net tape
- →Keep the grip loose on the approach and squeeze only at the exact instant of contact, not before
- →The wrist snap is short and compact, generated mostly from the fingers, not a full arm swing
- →Forehand kills use finger power; backhand kills rely more on the thumb pressing into the grip
- →If the shuttle has already dropped below the net tape, a net kill usually isn’t the right shot anymore; a controlled net shot back is safer
Table of Contents
Why timing beats power on this shot
The net kill’s entire advantage comes from hitting the shuttle while it’s still above the height of the net, which gives you a steep downward angle into the opponent’s court with almost no time for them to react. Once the shuttle drops below tape height, that angle disappears, and trying to force a kill from below the net either sends the shuttle into the net or pops it up into an easy return. This is why reading the opponent’s net shot early is more valuable than any amount of wrist strength: a fraction of a second of extra reaction time is what actually creates the shot, not a harder swing.
The grip: loose, then tight, then loose again
Holding the racket tightly through the entire approach is one of the most common habits that quietly ruins a net kill. A tense grip slows down your ability to adjust the racket face at the last instant, which matters because the shuttle’s exact height and angle off the opponent’s racket isn’t fully predictable until it’s almost at the net. Stay loose on the way in, squeeze firmly for the fraction of a second at contact, and release the tension again immediately after. That squeeze-and-release is where the actual snap and power come from, not from muscling the racket through a bigger swing.
⚠️ Watch out: Don’t wind up for a bigger swing when you see an easy net shot coming. The temptation to take a full backswing on what looks like a sure kill is exactly what causes the shuttle to clip the net or sail long. The shot needs a few inches of travel, not a few feet.
Forehand versus backhand net kills
On the forehand side, the power in a net kill comes mostly from the fingers pressing forward against the grip at contact, a small, precise motion rather than a wrist flick in the way a smash uses the wrist. On the backhand side, that role shifts largely to the thumb, which presses down against the flat part of the grip to generate the same short, downward snap. Players who try to muscle a backhand kill with the same finger action they’d use on the forehand usually find it feels weak and imprecise, because the thumb is doing most of the real work on that side.
Getting there early: footwork before the wrist
No amount of hand technique compensates for arriving at the shuttle late. Split-step the moment your opponent commits to their net shot, and take your first step forward before the shuttle has even crossed the net if you can read the shot early enough. Players who wait to see exactly where the shuttle is going before moving are already giving up the height advantage the shot depends on. Reading racket angle and swing speed on your opponent’s net shot, rather than watching the shuttle itself, is what buys that extra half step of reaction time.
💡 Pro tip: Practice net kills from a feed, not live rallies, when you’re first building the timing. Have a partner or coach feed net shots at a consistent height so you can groove the loose-tight-loose grip pattern before adding the unpredictability of a real opponent’s shot.
A note on racket choice for net play
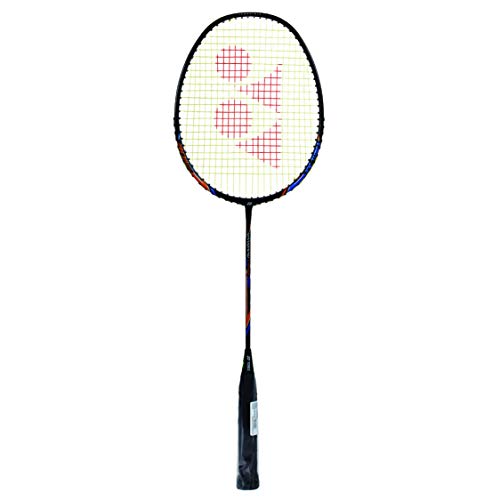
A head-light racket makes the fast hand adjustments a net kill demands noticeably easier than a head-heavy one built for power smashing. Something like the YONEX Nanoflare 1000 Play Badminton Racquet, built with a head-light balance for faster handling, lets you make last-instant angle corrections at the net without fighting the racket’s own momentum. It won’t create a wrist snap you don’t already have, but a head-heavy racket will actively work against the compact motion a good net kill needs.
Common mistakes that turn a kill into an error
Reaching up and back for a shuttle that’s already dropped low is the most frequent one. Once the shuttle is below net height, the physics of a kill no longer work in your favor, and trying to force the shot anyway is how a routine point turns into an unforced error. The better play at that point is a controlled net shot back over, keeping the rally alive rather than gambling on a low-percentage kill attempt.
A second common mistake is over-rotating the wrist on contact, treating the kill like a mini smash. That extra rotation adds inconsistency without adding useful power, since the shot only needs to travel a few inches downward. Keep the wrist mostly still and let the finger or thumb pressure do the work instead.
When to kill and when to hold back
- ✓The shuttle is at or above net tape height when you make contact
- ✓You’ve read the opponent’s net shot early enough to arrive with time to spare
- ✓Your grip has stayed loose on the approach, ready to squeeze precisely at contact
- ✓You’re confident in the angle; a kill hit into the net or long is worse than a safe net shot back
- ✕The shuttle has already dropped below the net tape by the time you reach it
- ✕You’re reaching or stretching awkwardly to get to the shot
- ✕You tensed the grip early and lost the ability to adjust the racket face at the last moment
- ✕You’re not sure of the angle; a controlled net return keeps the rally alive instead
Drilling the shot without a partner
A wall or a partner feeding shuttles by hand both work for isolated practice. Toss or feed shuttles just over net height and practice the loose-tight-loose grip pattern in a compact motion, focusing on contact point rather than trying to add pace. Once the motion feels automatic without needing to think about it, move to live net exchanges where the timing element, reading the opponent’s shot rather than a predictable feed, becomes the harder part of the skill.
A simple progression that works well for most players: fifteen kills off a hand feed focusing only on contact height, fifteen more focusing only on the grip pattern, then live net exchanges where you’re rewarded for choosing correctly between a kill and a safe net shot rather than just for hitting hard. That last stage matters more than it sounds like it should, since plenty of players can execute a clean kill motion in isolation but still misjudge which shots actually deserve one during a live rally.
Doubles versus singles net kill situations
In doubles, net kills happen far more often simply because the net player is positioned to intercept far more shots than in singles, where covering the whole court limits how often you’re actually at the net when a kill opportunity appears. That changes how aggressively you should crowd the net. A doubles net player can afford to sit closer and take more risks jumping on marginal shots, since a partner is covering the back court behind them. In singles, committing hard to the net on a shot that turns out to be a lift or a deceptive flick can leave the whole back court open, so the decision to commit to a kill attempt carries more weight.
This is part of why doubles players tend to develop faster, more automatic net kill reflexes than singles players of a similar overall level. The shot comes up more often in doubles practice and match play, and the lower risk of committing to it means players get more repetitions making the read under real pressure.
Deception and the net kill
Once your net kill technique is reliable, the next layer is disguising when you’re going to use it. Opponents who know you’ll kill anything above net height will start aiming their net shots lower and tighter to the tape specifically to take that option away, which forces a harder decision on marginal shots. Mixing in an occasional soft net shot from the same ready position you use for a kill, rather than committing to a kill motion the moment you see any liftable shuttle, keeps opponents guessing and buys you slightly more margin on shots that are borderline in height.
Bottom line
A badminton net kill wins on timing and contact height far more than it wins on wrist strength. Read the opponent’s net shot early, get there while the shuttle is still above the tape, and keep the motion short: loose grip on the approach, a firm squeeze exactly at contact, then release. Master that sequence and the shot becomes close to automatic whenever the opportunity shows up, and once it is, layering in a bit of disguise is what keeps opponents from simply taking the option away by changing where they place their net shots.
See also: Badminton Net Shot Technique for the soft, defensive counterpart to this shot.
What’s the difference between a net kill and a net shot?
A net shot is a soft, controlled return that drops just over the net, used defensively or to set up a point. A net kill is an aggressive downward tap hit while the shuttle is still above net height, meant to end the rally immediately.
Why do my net kills keep going into the net?
Usually because contact happens too late, after the shuttle has already dropped below tape height. At that point the downward angle a kill depends on isn’t available anymore; a controlled net shot back is the safer play instead.
Do I need a strong wrist for a good net kill?
Not really. The shot depends far more on early contact height and a loose-to-tight grip pattern than on wrist strength. A well-timed soft tap above the net beats a hard, late wrist snap almost every time.
How is a backhand net kill different from a forehand one?
The power source shifts. A forehand kill uses mostly finger pressure against the grip; a backhand kill relies more on thumb pressure against the flat side of the grip to create the same short, downward snap.
As an Amazon Associate, we earn from qualifying purchases through links on this page.