How to Stickhandle in Hockey: Drills for Puck Control

Learning how to stickhandle hockey drills actually work comes down to a handful of repeatable movements, not talent. Here is the grip that everything else depends on, plus five drills in the order that builds real puck control from a slow foundation up to full-speed, head-up handling.
Good hockey stickhandling starts with grip: top hand firm, bottom hand loose and about a forearm’s length down the shaft, so the blade can roll the puck from forehand to backhand without your wrists locking up. Build puck control with five drills in order: the side-to-side cradle, figure-8s around obstacles, toe drags, wide-to-tight transitions, and finally the same drills again with your head up instead of down. Two to three minutes a day of slow, deliberate reps beats occasional fast, sloppy sessions.
Stickhandling is one of the few hockey skills you can meaningfully build without a sheet of ice, which is exactly why so much off-ice puck control training exists. The skill itself comes down to a small number of repeatable movements, cradling the puck side to side, dragging it with the toe of the blade, and controlling it at different distances from your body, layered together at increasing speed once each one is solid on its own.
This guide walks through the grip and stance that everything else depends on, then five drills in the order most coaches actually teach them, from the slowest foundational movement to full-speed, head-up puck control.
- →Grip: top hand firm on the shaft, bottom hand loose about a forearm’s length down, never gripping tightly with both hands
- →Start every session with the side-to-side cradle slowly for 2-3 minutes before adding any speed
- →Toe drags build the pull-back move that creates space from a defender in game situations
- →Practice every drill with your head up as the final step; looking down at the puck is the habit that limits in-game vision the most
- →Short, daily off-ice sessions build muscle memory faster than occasional long ones
Table of Contents
Grip and stance before anything else
Your top hand grips the stick firmly near the butt end and controls the angle of the blade. Your bottom hand sits roughly a forearm’s length down the shaft and stays loose, almost cradling rather than gripping, so the shaft can rotate slightly as you roll the puck forehand to backhand. A bottom hand that grips too tightly is the most common reason a new player’s stickhandling looks stiff and mechanical instead of fluid, since a locked bottom hand fights the natural rotation the move depends on.
Knees bent, stick blade out in front of you rather than tucked close to your skates, and weight balanced rather than leaning back. A lot of the control in stickhandling comes from having the puck far enough in front of your body that both hands have room to work, not crowded up against your feet where the blade angle gets awkward.
Drill 1: the side-to-side cradle
Cup the puck on your forehand, roll your wrists to bring it across to your backhand, cup it there, then roll back. Do this slowly, genuinely slowly, for two to three minutes before adding any speed at all. This drill looks almost too simple to matter, which is exactly why players skip it and go straight to flashier moves, but it is the foundation every other drill on this list builds on. If the cradle breaks down under speed later, it is almost always because this slow version was rushed.
Drill 2: figure-8 around obstacles
Set two gloves, cones, or any small objects about shoulder-width apart and stickhandle the puck in a figure-8 pattern around them, crossing the puck in front of your body each time you switch direction. Start with the obstacles close together and gradually widen the gap to five or six feet as your control improves. This drill forces the cradle you just built in drill one to work while your feet and body are also moving, which is a much closer approximation of what stickhandling actually looks like in a game.
Drill 3: toe drags
Using the toe of the blade, drag the puck back toward your body in a sweeping motion, then push it forward again. This is the move behind most highlight-reel dekes, but its real value is far more practical: it creates a burst of separation from a defender’s stick by pulling the puck out of their reach for a split second. Practice it slowly first, focusing on keeping the puck cupped through the entire drag rather than losing control partway through the pull, which is the most common failure point at speed.
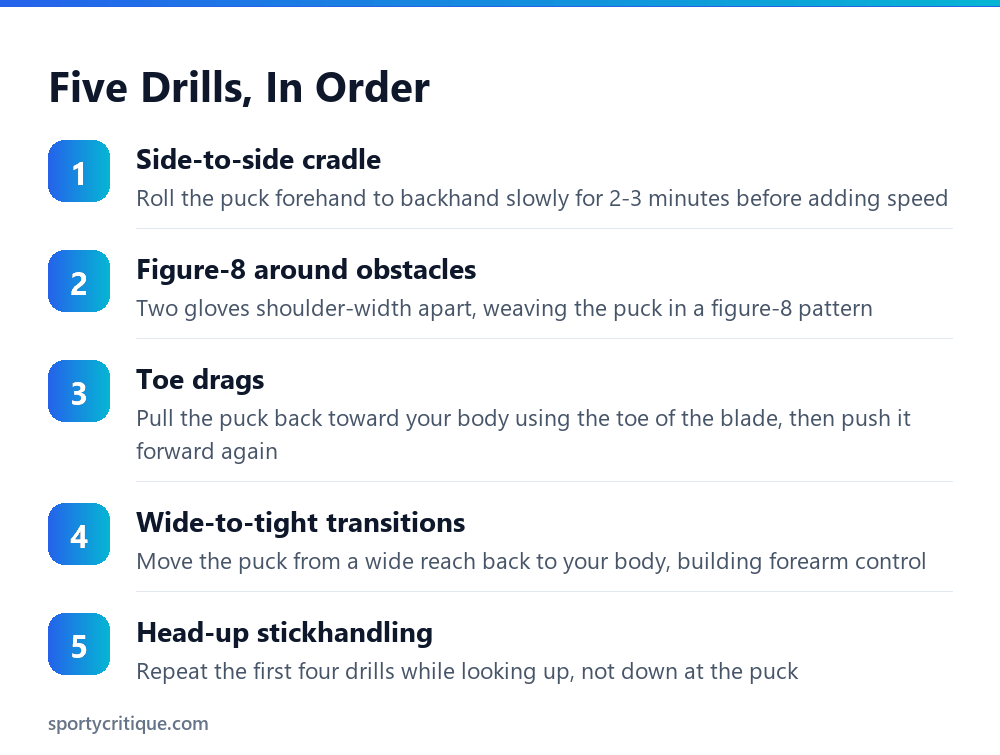
Drill 4: wide-to-tight transitions
Push the puck out to one side at full arm extension, then pull it back tight to your body, then push it out to the other side. Game situations constantly demand this exact transition, reaching to protect the puck from a defender on one side, then pulling it back into your body to shield it or change direction. This drill builds the forearm and wrist strength that controlled wide stickhandling actually requires, which is different muscle memory than the tight, close-to-the-body cradle in drill one.
Drill 5: head-up stickhandling
Repeat drills one through four, but keep your eyes up and off the puck the entire time. This is less a new drill than a constraint layered onto the first four, and it is the single biggest gap between practice-rink stickhandling and game stickhandling. A player who can only control the puck while staring down at it cannot see a passing lane, an open teammate, or an incoming check, all of which matter more than the puck-handling itself once the fundamentals are solid.
⚠️ Watch out: Do not skip straight to head-up reps before the movement itself is automatic. Trying to look up before your hands have the drill memorized usually causes both the head-up habit and the stickhandling to fall apart together, since your brain reverts to watching the puck the moment the movement gets difficult.
Off-ice training aids that actually help
You do not need ice to build any of these five drills. A stickhandling trainer with training pucks designed for street and driveway use, built around the same low-friction puck design most off-ice programs use, lets you run the full drill progression on concrete, asphalt, or a basement floor without needing ice time at all. The pucks are weighted and shaped to glide smoothly on rough surfaces, which matters because a puck that catches or bounces unpredictably teaches you to compensate for the surface instead of building the actual hand skill.
💡 Pro tip: Practice with your stick blade slightly open, angled to cup the puck rather than flat, during the early reps of any new drill. A blade that is too flat lets the puck slide off the edge easily, which slows down how quickly you build confidence in a new movement pattern.
How stick flex and blade pattern affect stickhandling
A stick that is too stiff for your size and strength resists the small, quick wrist and forearm movements that stickhandling depends on, which forces you to compensate with bigger, less controlled motions. A stick that flexes too easily does the opposite: it feels responsive on small moves but can flutter unpredictably during a hard toe drag or a quick direction change. Most players do fine with a flex rating roughly half their body weight in pounds as a starting point, then adjust from there based on feel rather than chasing a specific number.
Blade curve matters less for stickhandling than for shooting, but an aggressive curve with a lot of loft can make backhand control noticeably harder, since the puck wants to roll off the open face during a backhand cradle. Players who struggle specifically with backhand puck control are worth checking for this before assuming the problem is purely a technique gap; sometimes it is the equipment fighting the movement.
How the drills change as you improve
A beginner should spend real time on drill one alone, the slow side-to-side cradle, before layering in the figure-8 pattern at all. An intermediate player who already has a reasonably fluid cradle can compress the first two drills into a shorter warm-up and spend most of a session on toe drags and wide-to-tight transitions, which is where most of the game-relevant separation moves actually come from. An advanced player should spend the majority of practice time on drill five, head-up stickhandling, since by that stage the hand skill itself is rarely the limiting factor and vision under pressure is.
Common myths about stickhandling
Building a practice routine
- ✓Start every session with the slow side-to-side cradle, even once you are advanced
- ✓Progress from slow to fast only after each drill feels automatic, not on a fixed schedule
- ✓Finish sessions with head-up reps, since that is the skill that transfers most directly to games
- ✓Practice daily in short sessions rather than occasionally in long ones
- ✕Rushing straight to fast, flashy moves before the fundamentals are solid
- ✕Practicing exclusively with your head down, which builds a habit that is hard to undo later
- ✕Gripping the bottom hand tightly, which fights the wrist rotation the cradle depends on
- ✕Skipping toe drags because they feel awkward at first; the awkwardness is the point of practicing them
Bottom line
Stickhandling comes down to a small number of movements practiced slowly before they are practiced fast: the cradle, the figure-8, the toe drag, and control at different distances from your body, all eventually done with your head up. None of it requires ice time to build, which makes it one of the most efficient skills in hockey to train at home with short, consistent sessions rather than occasional long ones.
How long does it take to get good at stickhandling?
Noticeable improvement usually shows up within a few weeks of daily short sessions, two to three minutes at a time. Real fluency, especially head-up stickhandling under game pressure, typically takes months of consistent practice layered on top of the basic drills.
Should I practice stickhandling with a puck or a ball?
A puck is the more accurate practice tool since it matches the weight and glide you will actually use on ice. Off-ice training pucks designed for concrete or asphalt are a closer match to a real puck’s feel than a ball, which tends to bounce and behave differently.
Why can I stickhandle fine looking down but lose the puck when I look up?
This is the most common plateau in stickhandling development. It means the movement is not yet automatic enough to run without visual feedback. Go back to slower reps of the same drill with your head up rather than pushing speed, since rushing this step usually makes it worse before it gets better.
Do I need special equipment to practice stickhandling off the ice?
No, a stick and any puck-like object on a smooth surface works. A dedicated off-ice training puck, designed to glide on concrete or asphalt without catching or flipping, makes practice smoother and more realistic than an improvised substitute, but it is a convenience, not a requirement.
As an Amazon Associate, we earn from qualifying purchases through links on this page.