How to Hockey Stop: The Progression That Beats the Fear

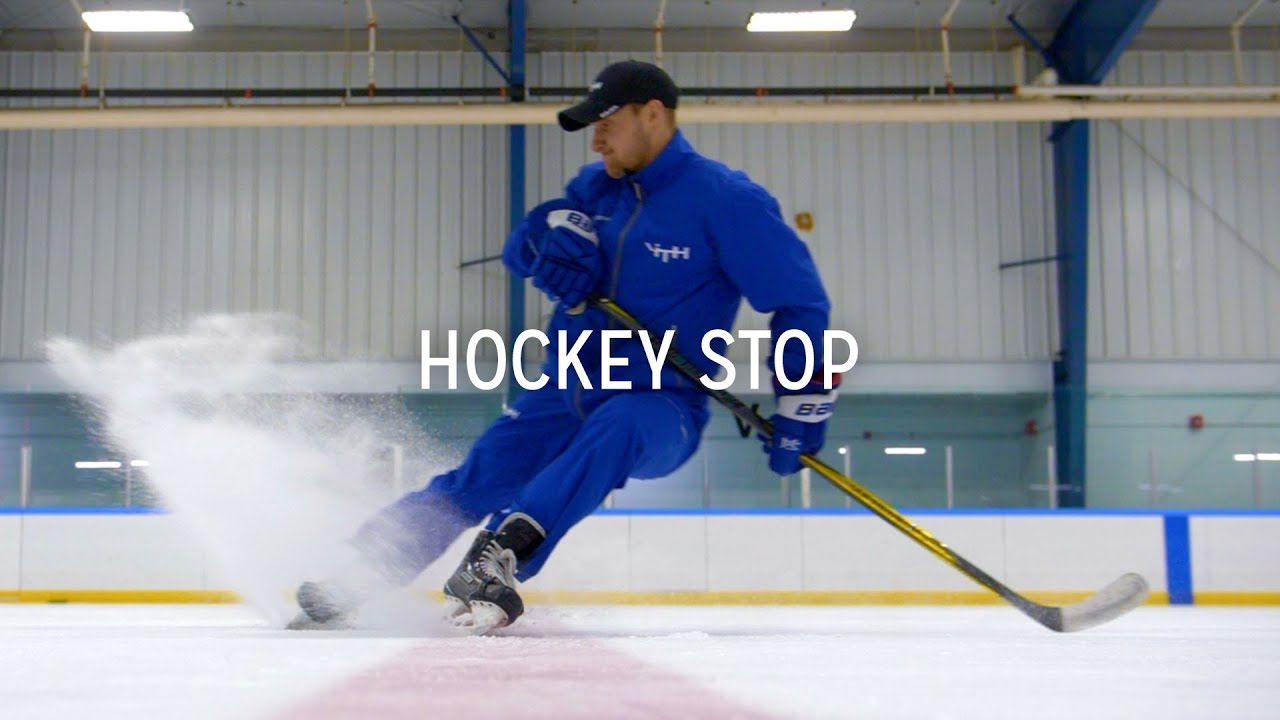
Quick Answer: Skate forward with knees bent, rise slightly to unweight your blades, snap your hips and both skates 90° to your direction of travel, then sink your weight and dig in — front skate on its inside edge, back skate on its outside edge. The spray of snow is your blades shaving ice. That shaving is the stop.
🏒 Ice Hockey Hub: Explore all 36 skate reviews, shooting mechanics, and drills in our Complete Ice Hockey Resource Hub.
Nothing separates ‘person on skates’ from ‘hockey player’ like the stop. It’s also the skill adults fear most, and for a rational reason: every part of it — turning sideways at speed, deliberately skidding, trusting two 3mm blades — feels exactly like the beginning of a fall.
Here’s the honest path through that, including the progression steps most guides skip straight past on their way to ‘just commit!’
Table of Contents
Why you can’t muscle it
A hockey stop isn’t a brake. There’s nothing to press. What actually happens is that your blades turn sideways and shave a thin layer off the top of the ice — that’s the spray — and the friction of that shaving is what kills your speed.
This matters because it tells you what the failure modes are. Too upright and your blades skim without biting: you keep gliding sideways, going nowhere. Too much bite too suddenly and the ice grabs your edges and throws you — because you’ve turned a skid into a pivot point with your body still travelling at speed.
The whole skill is controlled slippage: enough edge to shave, not so much that you catch. Which is exactly why you build it in stages rather than committing on day one and landing on your hip.
Edges: the thing nobody explains first
Every skate blade has two edges — a hollow is ground down the middle of the blade, leaving a sharp edge on each side. Which one you’re on determines everything.
| Edge | Where it is | In a hockey stop |
|---|---|---|
| Inside edge | The side facing your other foot (big-toe side) | Your front/lead skate rides this |
| Outside edge | The side facing away (little-toe side) | Your back/trail skate rides this |
That combination is the whole two-footed stop: lead skate on its inside edge, trail skate on its outside edge, both shaving simultaneously. The outside edge on the back foot is the hard part — it’s the least natural edge in skating and it’s why most people can stop confidently on one side and flail on the other.
💡 Before you attempt a stop, spend five minutes just gliding on one foot on each edge — inside, then outside, both feet. Feel what an outside edge does. Most people have never consciously ridden one, and the hockey stop asks you to trust it at speed. Five minutes here saves a month of frustration.
The progression ladder (do these in order)
Each rung teaches one piece. Skip a rung and you’ll try to learn three things at once at speed, which is how people fall and decide they’re ‘not a natural.’
- The snowplow stop. Toes angled in, heels out, push both inside edges into the ice. Ugly, unglamorous, and genuinely useful — it teaches your legs what shaving ice feels like with zero risk.
- The one-foot drag. Glide on your left skate; turn your right skate sideways and drag it behind you, letting it shave. Now you’ve felt the actual stopping mechanism without committing your body to anything.
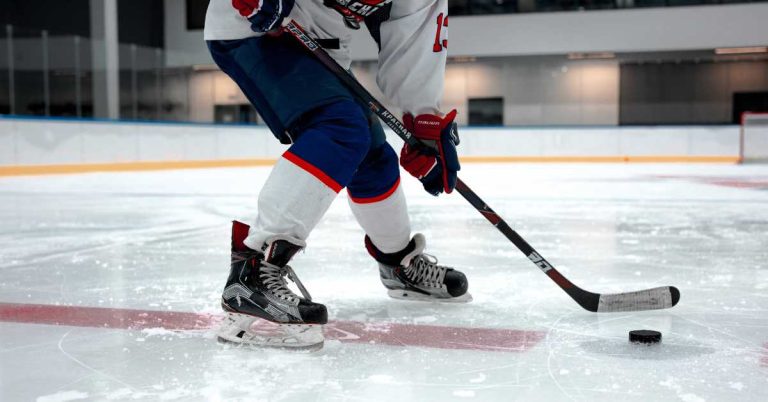
- The half stop — this is the breakthrough. At slow speed, rotate and plant only your front skate sideways on its inside edge, back foot trailing loosely for balance. This is 80% of the real thing and it’s where the fear breaks.
- The full stop. Add the back skate on its outside edge, sink your weight, and spray someone. You’re doing what the ladder was building toward.
A realistic timeline for an adult skating two or three times a week: the half stop inside two weeks, a real two-footed stop within a month. Adults learn this as fast as kids do — they simply fear it more, which slows the commitment step, not the learning.
The full stop, phase by phase
| Phase | What your body does | What goes wrong |
|---|---|---|
| Approach | Moderate speed, knees bent, chest up, eyes ahead | Going too slow — blades catch instead of skidding |
| Unweight | Rise slightly to free the blades from the ice | Skipping it and forcing the turn against gripping edges |
| Rotate | Hips and both skates snap 90° together | Turning shoulders only while the skates stay pointed forward |
| Sink & dig | Bend deep, weight roughly 60% on the lead skate | Leaning back — the classic way to land on your tailbone |
| Recover | Weight centred, ready to push off again | Standing up and admiring the spray |
⚠️ Going too slowly is more dangerous than going too fast. This is counter-intuitive and it’s why cautious beginners fall more. Below a certain speed your edges bite instead of shave — the ice grabs, your skates stop, and your body doesn’t. You need enough momentum to skid. Moderate speed, committed weight, is safer than a timid crawl.
The lean, and why it’s the whole trick
When you turn sideways and dig in, your body wants to keep going in the original direction. The counter is to lean slightly back into your direction of travel — not backwards relative to the ice, but away from the stop. Think of how a skier leans into a hockey stop on snow. Get it right and the friction holds you up; get it wrong and you either slide out (too much lean) or fall forward over your edges (too little).
This is the piece you cannot read your way into. It’s a feel that arrives after maybe fifty attempts, and then it never leaves.
Both sides, from day one
⚠️ Every player develops a favourite side. Every coach spots it in three seconds. Your weak-side stop will feel genuinely alien for about two weeks — like learning it from scratch, because you are: your lead and trail feet swap edges and neither knows the job.
Skipping it caps your game permanently. A player who can only stop one way defends in half-circles, gets beaten on their weak shoulder every time, and can’t reverse direction under pressure. Alternate deliberately — five stops left, five stops right, every session, forever. The weak side never fully catches up, but it gets close enough to be invisible in a game.
The stops you’ll actually use in a game
The two-footed hockey stop is the one everyone learns, but it’s not the only one — and in a real game you’ll use several without thinking about it. Knowing they exist helps, because beginners often try to force the full two-footed stop into situations that call for something else, then wonder why it feels wrong.
The one-foot inside-edge stop is the workhorse of actual play. You plant your lead skate on its inside edge and let the trail leg float. It’s quicker to initiate than the full stop, it leaves your trail leg free to immediately push off in a new direction, and it’s what you’ll see players use fifty times a game while chasing pucks. If the two-footed stop is the showpiece, this is the tool.
The outside-edge stop (sometimes called an L-stop or a heel drag) uses the trailing foot alone, dragged behind on its outside edge. It’s slower to bite, but it lets you keep gliding forward while shedding speed — useful for adjusting your position rather than fully stopping, like closing on a puck carrier without committing.
The pivot-and-go isn’t really a stop at all: you rotate your body 180° while still moving, transitioning from forwards to backwards without shedding much speed. Defencemen live on this. It’s built on the same edge control the hockey stop teaches, which is why the stop comes first — it’s the foundation the rest of your skating stands on.
Learn the two-footed stop properly and every one of these becomes available to you, because they’re all the same skill — turning your blades across your direction of travel and trusting an edge — applied at different intensities.
What good stopping actually unlocks
It’s worth understanding why coaches obsess over this, because ‘learn to stop’ sounds like a safety instruction rather than a skill worth a month of your life.
A player who can’t stop confidently plays the whole game in wide circles. They can’t check hard because they can’t kill their momentum. They can’t change direction on a turnover, so they’re always a beat late in transition. They avoid the boards and the corners — which is where hockey is actually played. And they can’t take a hard pass while moving, because everything they do is a compromise with the speed they can’t shed.
A player who can stop on both sides plays a completely different game: they arrive, stop, and are instantly ready to move again in any direction. Every other skill — the checking, the puck battles, the defensive gaps — sits on top of that ability. It’s why stopping, not shooting, is what youth coaches drill first, and why adult beginners who skip it plateau within a season.
There’s a psychological piece too. Once you can stop reliably at speed, you stop being afraid of speed. Players who fear stopping unconsciously skate slower than they’re able to — the fear is a governor on their entire game, and removing it makes them faster without a single fitness session. That’s the real payoff of the month you’ll spend on it.
Your edges are the equipment that matters
Sharp blades make stops easier, not scarier. This is the opposite of what beginners assume. Dull edges skid unpredictably — they slip when you want bite and catch when you don’t, which is exactly the unpredictability that makes people afraid.
| Factor | Effect on stopping | What to do |
|---|---|---|
| Sharpness | Sharp = predictable shave. Dull = random | Sharpen every 3–5 hours of ice — see our sharpening guide |
| Hollow depth | Deeper hollow = more bite, harder to skid | Beginners: a shallower hollow (e.g. 5/8″) is more forgiving |
| Fit | Loose boots = no edge control at all | Snug heel lock — our sizing guide covers the fit test |
| Lacing | Too loose at the ankle = your edges do nothing | Tight through the ankle, looser at the toes — tying guide |
| Ice quality | Late-session chewed-up ice makes everything harder | Don’t judge your progress on bad ice |
If your stops suddenly got worse and nothing else changed, check your edges before you question your technique. It’s the most common false alarm in skating.
On falling (because you will)
You’ll fall learning this. Everyone does. What matters is falling well:
- Wear a helmet, always, even for practice. Backward falls on ice are the ones that hurt permanently.
- Don’t put your hands down flat to catch yourself — that’s how wrists break. Try to land on your hip and side, arms tucked.
- Bent knees are protective. The lower you are, the shorter the fall and the more control you have on the way down.
- Padded shorts are worth every penny while you’re learning. Nobody sees them; your tailbone thanks you for years.
The counter-intuitive safety note bears repeating: the falls happen mostly when people are too tentative, not too aggressive. Half-committing is what catches an edge. Once you decide to stop, stop.
Practice plan
| Session | Focus | Reps |
|---|---|---|
| 1–2 | Edge feel: one-foot glides on each edge, both feet | 5 min, then snowplow stops |
| 3–4 | One-foot drag, both sides | 20 each side |
| 5–8 | Half stop at slow speed, both sides | 20 each, building speed |
| 9–12 | Full two-footed stop | 10 each side per session, forever |
| Ongoing | Stop at the boards from a hard sprint | The confidence test |
The last one is the graduation: skate hard at the boards and stop before them. It’s terrifying, it’s the exact thing you’ll do a hundred times a game, and once you can do it without thinking you’re a hockey player. Then start on backward skating and speed.
Frequently asked questions
How long does it take to learn a hockey stop?
With the progression above and two or three sessions a week: the half stop in about two weeks, a full stop within a month. The weak side takes a few weeks longer.
Why do I turn instead of stopping?
Your weight is on the wrong part of the edges — you’re carving, not shaving. Exaggerate the sink after you rotate; the skid needs commitment and depth.
Should I learn to skate backwards first?
No. Stop first — it’s your safety net for everything else you’ll try, including backwards skating.
Why can I only stop on one side?
Because your two feet are learning different jobs and you’ve only practised one arrangement. The fix is boring and reliable: deliberate weak-side reps every session.
Do sharper skates make stopping harder?
The opposite. Sharp edges shave predictably; dull ones slip and catch at random. If your stops became unreliable, get them sharpened before you rebuild your technique.
Is the snowplow stop a real stop?
It’s a real stop and a legitimate tool — but it’s slow and it doesn’t let you change direction. Use it while learning; don’t stay there.