
‘H’o’w’ ‘t’o’ ‘S’t’r’i’n’g’ ‘a’ ‘B’r’a’n’d’-‘N’e’w’ ‘L’a’c’r’o’s’s’e’ ‘H’e’a’d’ ‘F’r’o’m’ ‘S’c’r’a’t’c’h’

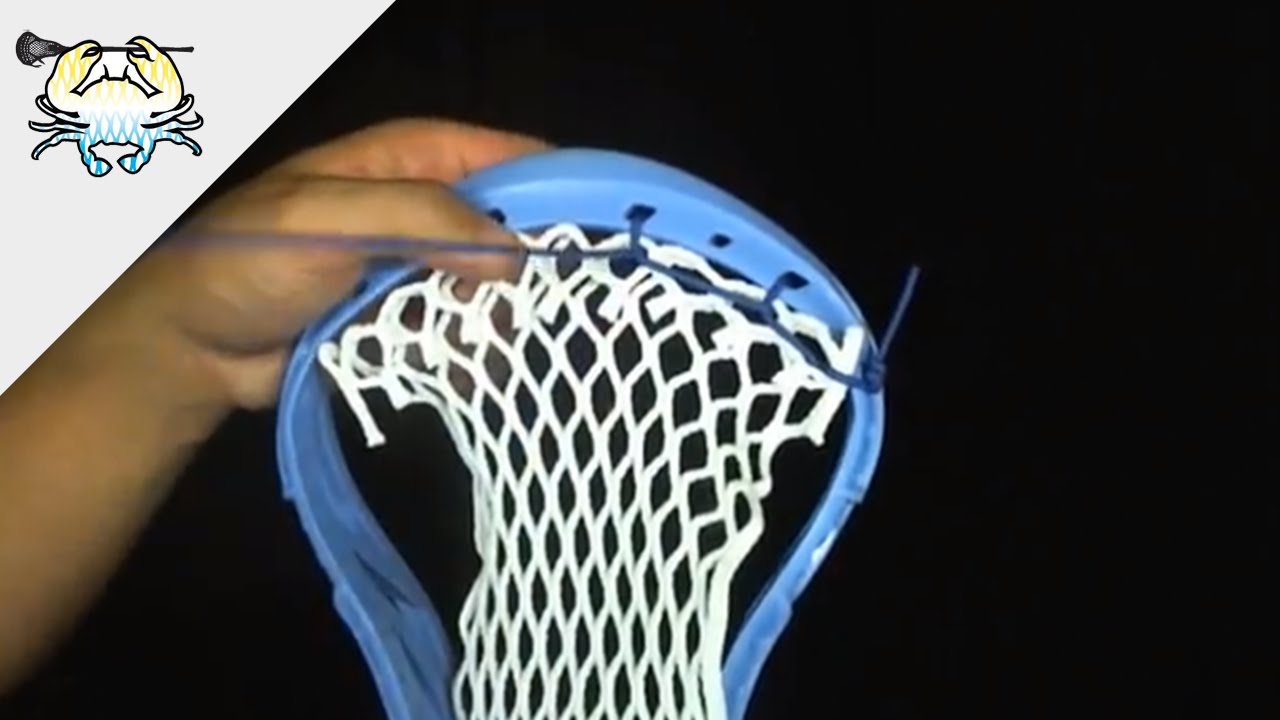
Stringing a brand-new lacrosse head means installing five parts in order: the top string, two sidewall strings, the bottom string, and two or three shooting strings, all threaded through a mesh or leather pocket. Budget 45 to 90 minutes for a first attempt. This guide covers a completely empty head, start to finish. If you already have a strung head and just want to swap the mesh style or fix a problem, see stringing a mesh pocket, hard mesh versus soft mesh, stringing a traditional leather and nylon pocket, adjusting pocket depth and shooting strings, or troubleshooting a lacrosse pocket that will not release or fails the legal check instead.
🥍 Lacrosse Hub: Explore all 32 gear reviews, stick stringing guides, and skill tutorials in our Complete Lacrosse Resource Hub.
A brand-new lacrosse head arrives with nothing on it: no mesh, no string, just molded plastic with rows of holes along the top, sides, and bottom. Before you can play with it, you have to build the entire pocket from an empty frame. That is a different job from restringing an old head, where half the structure is already in place and you are only replacing worn pieces.
This is the guide for that first build. We will go through the five components in the order you actually install them, explain what each one does, and point out the mistakes that cost people the most time on their first attempt. Once your head is strung, two more steps still matter: fine-tuning the pocket for your position and playing style, and knowing how to fix it if something is off. Those get their own detailed guides linked throughout this one, because tuning and troubleshooting are different skills from the initial build and deserve more room than a sidebar.

Credit: stringerssociety.com
Table of Contents
What This Guide Covers, and What It Does Not
This article is specifically about taking an unstrung head and building a complete pocket on it for the first time. It assumes a mesh pocket, since that is what the overwhelming majority of new heads ship with or get strung with today. If you want the older, more hand-tied approach instead, stringing a traditional leather and nylon pocket walks through that separately, since leather and nylon runners are strung with a different pattern and different knots than mesh. And if you already know mesh but want to compare hard mesh against soft mesh before you buy, stringing a mesh pocket, hard mesh versus soft mesh covers that choice in detail.
Two things this guide will not do: it will not tell you exactly how deep to make your pocket for your position, or how to fix a stick that throws wrong. Those are covered in adjusting pocket depth and shooting strings and troubleshooting a lacrosse pocket that will not release or fails the legal check. Trying to cram initial stringing, style comparison, fine-tuning, and diagnostics into one article means none of them get done properly, so this one sticks to the build.
Tools and Materials
Before you start, lay everything out so you are not hunting for a lighter halfway through a knot.
💡 Pro tip: A full stringing kit with mesh, sidewalls, a top string, a bottom string, and shooters included usually runs $20 to $35, and covers everything on this list in one purchase.
The Five Components, at a Glance
Step 1: Attach the Top String and Set the Channel
Lay the mesh over the head and center it. Count diamonds from the middle out to both edges to confirm it is even, since a mesh piece that starts off-center will throw the whole pocket out of alignment later.
Thread the top string through the first hole at one end of the scoop, then through the corresponding diamond in the mesh, then back through the next hole. Pull each pass tight as you go rather than leaving it loose to fix at the end. The first couple of diamonds on each side should be pulled down firmly against the head. That tight strip is called the channel, and it is what keeps the ball running in a straight line down the middle of the pocket instead of wandering to one side during a shot or pass.
💡 Pro tip: Work from the center of the scoop outward in both directions rather than starting at one end and running straight across. It is much easier to keep the mesh symmetrical that way.
Step 2: String the Sidewalls, Diamond by Diamond
Tie off one sidewall string to the first hole just below where the top string ended, then settle into a repeating pattern: skip a sidewall hole, hook the string through a mesh diamond with a simple locking knot, pull it snug, then move to the next hole down. Repeat that all the way to the bottom of the head, then do the same on the other side with the second sidewall string.
The first two diamonds on each side continue the tight channel you started with the top string. Below that, you have room to make choices. Stringing the lower diamonds tighter keeps the pocket shallow with a quicker release, which many attackers and middies prefer. Leaving more slack in the lower diamonds lets the mesh sag into a deeper pocket that holds the ball longer, which defenders and some goalies tend to favor for ball control under pressure. This first pass does not have to be perfect. Once the head is fully strung, adjusting pocket depth and shooting strings covers how to go back and adjust that depth without restringing from scratch.
⚠️ Watch out: Keep tension roughly even down each side as you go. A sidewall that gets progressively tighter or looser without you meaning it to is the single most common reason a first-time pocket comes out lopsided.
Step 3: Anchor the Bottom String
Once both sidewalls reach the bottom of the head, thread the bottom string through the last row of holes and weave it through the final row of mesh diamonds, pulling it snug but not stretched tight. This row locks the bottom of the pocket in place so it holds its shape under repeated catching and throwing instead of gradually working itself loose. Tie off both ends with a secure knot, trim the excess, and lightly melt the cut ends with a lighter so they do not fray.
Step 4: Add the Shooting Strings
Shooting strings run horizontally across the face of the pocket and are what most directly shapes how the ball comes out on a shot or pass. Both NCAA and NFHS rules require every shooting string to sit within the top four inches of the head, measured from the top of the scoop, so do not place any of them lower than that.
A common beginner setup uses two shooting strings. Weave the lower one through the mesh a bit more loosely, and tension the upper one somewhat tighter. That loose-to-tight order from bottom to top is deliberate: a shooting string that is tightest closest to the ball tends to create excess whip, which troubleshooting a lacrosse pocket that will not release or fails the legal check covers in more detail if your finished stick ends up throwing the ball down or hooking unexpectedly.
Breaking In a New Pocket
A freshly strung mesh pocket, especially with hard mesh, will feel stiff for the first few sessions. Play catch against a wall, cradle it while walking around, and throw it a few dozen times before judging the final feel. The mesh needs to relax into the shape your stringing created, and a pocket that seems slightly off on day one often settles into something usable by day three or four of light use.
- ✓Pull each knot fully tight before moving to the next one
- ✓Keep the first two diamonds on the top string and sidewalls tight to hold the channel
- ✓Check that shooting strings sit within the top four inches before you play with it
- ✓Give a new mesh pocket a few sessions of wall ball before judging the feel
- ✕Leave knots loose to “fix later”, since later rarely comes
- ✕String one side noticeably tighter than the other
- ✕Skip trimming and melting the cut ends, since raw string frays fast
- ✕Judge a brand-new pocket’s release on the very first throw
Choosing a Stringing Style Before You Commit
Everything above assumes a standard mesh pocket, which is what most players use today. But it is worth deciding on a style before you buy materials, not after you have already strung the head once.
After the Build: Tuning and Fixing
Getting mesh onto the head is only the first half of having a stick that performs the way you want. Most players adjust depth and shooting-string tension at least once after the initial build, and it is common to hit a snag the first few times, whether that is a pocket that is technically too deep to be legal or a release that whips the ball down instead of flat.
Frequently Asked Questions
How long does it take to string a brand-new lacrosse head?
A first attempt usually takes 45 to 90 minutes. Experienced stringers who have done it many times can finish a full mesh pocket in 20 to 30 minutes.
Do I need a stringing tool, or can I use my fingers?
Fingers work fine for most of the process. A stringing tool or a pair of pliers just makes it easier to pull the final inch of a tight knot without cutting into your skin.
What is the channel, and why does it matter?
The channel is the tight, flat strip created by the top few diamonds on the top string and sidewalls. It keeps the ball rolling straight down the middle of the pocket instead of drifting to one side during a shot.
Can I restring a head myself, or should I pay a shop?
Most players can learn this themselves with a kit and some patience. Shops typically charge $35 to $60 to string a head, which is worth it if you would rather not learn the knots, but it is not required.
My new pocket looks uneven after I finished. Did I do something wrong?
Probably, but it is fixable. Uneven tension between the two sidewalls is the most common first-timer mistake. Check adjusting pocket depth and shooting strings for how to go back in and even out the depth without cutting everything out and starting over.
- →A brand-new head needs five components strung in order: top string, two sidewalls, bottom string, and shooting strings.
- →The first two diamonds on the top string and each sidewall create the channel that keeps ball release straight.
- →Shooting strings must stay within the top four inches of the head under NCAA and NFHS rules.
- →A new mesh pocket needs a few sessions of light use to break in before you judge the final feel.
- →Depth tuning and troubleshooting are separate skills from the initial build, covered in their own guides.
- →Comparing mesh types before you string: stringing a mesh pocket, hard mesh versus soft mesh
- →Want the traditional look instead of mesh: stringing a traditional leather and nylon pocket
- →Already strung and want to adjust the feel: adjusting pocket depth and shooting strings
- →Something is wrong with the release or depth: troubleshooting a lacrosse pocket that will not release or fails the legal check