Core Exercises for Horseback Riders: A Simple Weekly Plan

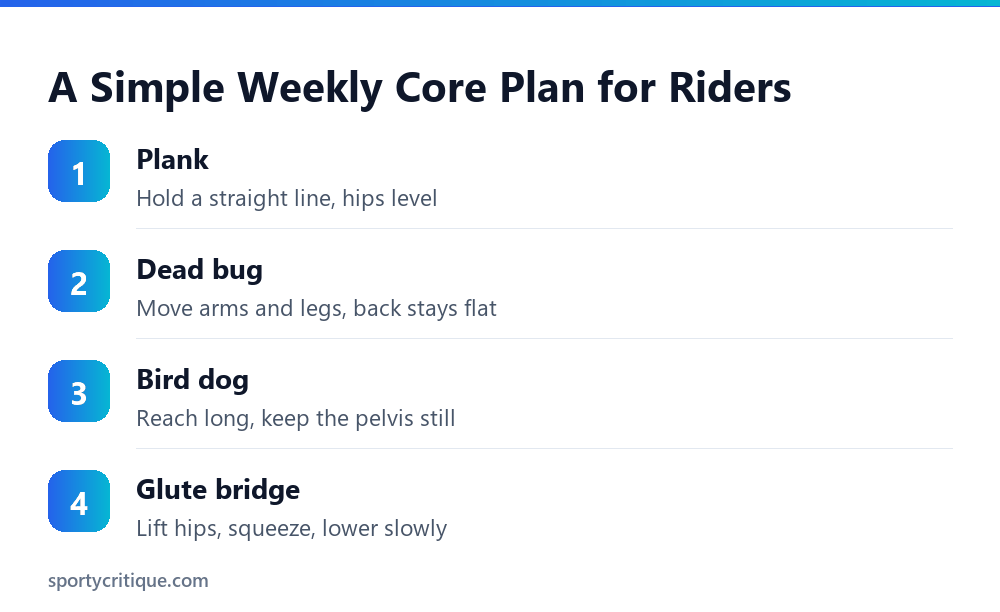
The best core exercises for horseback riders train your trunk to stay steady while your arms and legs move, which is exactly what riding asks of you. Four moves cover most of it: the plank, the dead bug, the bird dog, and the glute bridge. Do them two or three times a week on a mat, focus on keeping your pelvis level and your back neutral, and add time or reps slowly. Stop any move that causes pain, and talk to a doctor or physiotherapist first if you have a back injury.
Riders are often told to sit up straight, soften their back, and keep their legs still while the horse moves underneath them. That is a lot to ask of a body that spends most of the week in a chair. A stronger, better-coordinated core will not turn you into a better rider on its own, but it makes the position easier to hold, so your attention can go to the horse instead.
Table of Contents
Biomechanical Loading Calculator
Evaluate posture load and core stability factors.
- →Riding rewards a trunk that stays stable while your limbs move independently
- →Four basic moves, done two or three times a week, are enough to start
- →Quality beats quantity: a level pelvis and a neutral back matter more than extra reps
- →Stop if you feel pain, and get medical advice first if you have an existing back problem
- →Core work supports your riding but does not replace time in the saddle
What the Core Does in the Saddle
Your core is more than the muscles you can see at the front of your stomach. It is the whole ring of muscle around your trunk, including the deep abdominals, the muscles along your spine, your hips, and your glutes. Together they hold your rib cage over your pelvis.
On a horse, that matters because the animal’s motion travels up through your seat. A trunk that can absorb and follow that motion lets your hands stay quiet and your legs stay long. A trunk that cannot tends to bounce, brace, or collapse to one side, and the horse feels every bit of it.
The exercises below are built around that goal: a trunk that can stay stable and even from side to side while your arms and legs do their jobs, so you stay centered if the horse changes pace or hesitates.
Before You Start
You do not need a gym. A clear patch of floor and an exercise mat are enough. A 10mm thick exercise mat with a carry strap ($21.23, checked October 7, 2026) cushions your hips, spine, and elbows on hard floors, which makes it more comfortable to stay on the exercises long enough for them to work. Any mat that keeps you from sliding will do.
⚠️ Watch out: If you have back pain, a recent injury, are pregnant, or have a medical condition, check with a doctor or physiotherapist before starting. These exercises are general fitness guidance, not medical advice, and pain is a reason to stop.
Warm up first with a few minutes of walking or easy movement. Breathe steadily through every exercise, because holding your breath makes the trunk tense and hides weak spots. If a move feels easy, make it longer or slower rather than rushing.
Exercise 1: The Plank
The plank teaches the trunk to hold one shape against gravity. Lie face down, then lift onto your forearms and toes, with your elbows under your shoulders. Your body should make one straight line from your head to your heels.
Keep your hips level, not sagging and not piked up. Squeeze your glutes gently, draw your stomach in slightly, and look at the floor just ahead of your hands so your neck stays long.
Start with short holds, such as 15 to 20 seconds, and rest between them. Build toward longer holds only while your form stays clean. If your lower back aches, drop to your knees or shorten the hold instead of pushing through.
Exercise 2: The Dead Bug
The dead bug trains your core to stay still while your arms and legs move, which is the closest match to riding on this list. Lie on your back with your arms pointing at the ceiling and your hips and knees bent to 90 degrees, shins parallel to the floor.
Slowly lower your right arm overhead and your left leg toward the floor, keeping your lower back flat against the mat. Return to the start, then switch sides. If your back arches off the floor, you have gone too far, so shorten the movement.
Try eight slow reps per side, and treat it as a coordination exercise, not a race. The slower you go, the harder the deep abdominals have to work.
Exercise 3: The Bird Dog
The bird dog builds the same skill from a different position. Start on your hands and knees with your wrists under your shoulders and your knees under your hips. Reach one arm forward and the opposite leg back, keeping your hips and shoulders square to the floor.
Imagine balancing a glass of water on your lower back. If it would spill, your pelvis is rotating. Hold for a couple of seconds, return, and switch sides. Eight reps per side is a good starting point.
💡 Pro tip: Reach long instead of high. Lifting your leg far above hip height tends to arch the lower back, which takes the work away from the muscles you are trying to train.
Exercise 4: The Glute Bridge
Strong glutes help a rider stay deep in the saddle and keep the pelvis steady, and the bridge is a simple way to train them. Lie on your back with your knees bent and your feet flat on the floor, hip width apart.
Press through your heels and lift your hips until your body makes a line from shoulders to knees. Squeeze at the top for a second, then lower slowly. Ten to twelve reps is a sensible start, and a slow lowering phase does more than a fast one.
A Simple Weekly Plan
Do the full circuit two or three times a week, with a rest day between sessions. Each session takes about ten to fifteen minutes, which fits around a riding schedule. After a few weeks, lengthen the holds or add a round, one change at a time.
Bringing It Into the Saddle
Floor exercises only pay off if they change how you sit. After a session, ride a few minutes at the walk and notice whether your trunk feels steadier, whether your hips move evenly with the horse, and whether your hands are quieter.
Use the same cues from the floor: a level pelvis, an even weight on both seat bones, and ribs stacked over hips. If you are still working on the basics of the seat, our guide to developing an independent seat covers the position itself, and the guide to sitting the trot without bouncing shows how a steadier core helps at the faster gait.
Ask an instructor to watch you for a few strides and point out where you tense, collapse, or tip to one side. That feedback tells you which of the four exercises to emphasize.
Training Habits That Help
- ✓Move slowly and breathe steadily through every rep
- ✓Keep the pelvis level and the lower back neutral
- ✓Add time or reps gradually, one change at a time
- ✓Mix core work with stretching for the hips and hamstrings
- ✕Hold your breath or tense your neck and shoulders
- ✕Push through back pain to finish a set
- ✕Do hundreds of fast crunches and call it core training
- ✕Skip rest days because the exercises feel easy
Making the Exercises Harder Over Time
Once the four moves feel steady, progress one variable at a time. Lengthen the plank hold, slow the dead bug down to a count of four in each direction, pause for three seconds at the end of each bird dog reach, or lift one foot during the bridge. Changing only one thing at a time makes it easy to tell what helped and what caused strain.
Side planks are a sensible next addition, because riders so often collapse to one side. Compare your two sides honestly. If one side holds for a shorter time or wobbles more, give it an extra set, and mention it to your instructor if it seems to match a side where your riding feels less secure.
Mobility Work Alongside Strength
Strength without mobility can leave a rider stiff. Spend a couple of minutes after each session on gentle hip flexor and hamstring stretches, and on slow cat-and-cow movements for the spine. Tight hips pull the pelvis out of line, and a pelvis that cannot move freely cannot follow the horse.
Keep stretches comfortable rather than forced, and never bounce into them. The goal is a trunk that is strong where it needs to hold and loose where it needs to move.
Common Mistakes
The most common mistake is letting the lower back arch or sag during a plank or a dead bug. It feels like holding on longer, but it shifts the load onto the spine and off the muscles you are trying to train. Shorten the hold or the range and keep the position clean.
Another is rushing. Fast, jerky reps let momentum do the work, and momentum is not available when a horse spooks. Slow, controlled movement builds the kind of strength a rider can actually use.
A third is doing core work only and ignoring the hips. Tight hips and weak glutes make it hard to sit evenly, so pairing these exercises with gentle hip stretching and the glute bridge keeps the whole system working together.
How Often and How Long
Two or three short sessions a week are a reasonable starting point, and you can judge the effect after a month or two. Consistency matters more than long workouts, so a regular ten-minute habit beats an occasional hour.
Listen to your body around heavy riding days. If you are sore from a lesson or a long hack, keep the core session light, and save longer holds for a day when you are fresh.
When to Get Professional Help
Persistent back pain, pain that travels down a leg, numbness, or discomfort that gets worse with riding are reasons to see a doctor or physiotherapist rather than keep training through it. A physiotherapist who works with riders can check your posture and give you a plan that fits your body.
Riders recovering from a fall or injury should get clearance before returning to core work. A professional can adjust the exercises so they build strength safely.
Frequently Asked Questions
How often should riders do core exercises?
Two or three short sessions a week is a sensible starting point, with a rest day between them.
Are planks good for horseback riding?
Yes. A plank trains the trunk to hold a steady line, which supports a stable seat. Keep your hips level and shorten the hold if your lower back aches.
Do I need equipment for core exercises?
No. A clear floor space is enough, and an exercise mat makes the floor more comfortable.
Will core work fix my bouncing in the trot?
It can help, because a steadier trunk absorbs motion better, but timing and balance in the saddle matter too, so keep riding and ask an instructor for feedback.
Are crunches good for riders?
They are not the best choice. Exercises that teach the core to stay stable, like dead bugs and bird dogs, match what riding asks for.
What if an exercise hurts my back?
Stop, shorten the movement, or skip it. If pain continues, see a doctor or physiotherapist.
A steadier core will not replace good instruction or time in the saddle, but it makes the position easier to find and hold. Start with four simple moves, keep the form clean, build slowly, and let your next ride show you what changed.
As an Amazon Associate, we earn from qualifying purchases through links on this page.