How to Build a Foosball Table Out of Wood: Step-by-Step Guide
Building a foosball table out of wood is a rewarding project. It combines creativity and craftsmanship in a fun way.
Creating your own foosball table can be a thrilling challenge. It lets you customize every detail and make a piece that stands out. Whether you’re a seasoned woodworker or a beginner, this project is both enjoyable and educational. You’ll learn valuable skills and get a unique foosball table to enjoy with friends and family.
Plus, homemade foosball tables add a personal touch to any game room. Ready to start? Let’s explore how you can build your own wooden foosball table from scratch.

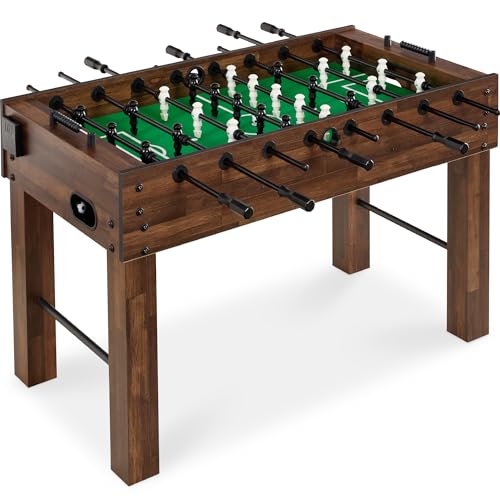
Credit: www.youtube.com
Designing The Table
Designing the table is a crucial step in building your foosball table. It sets the foundation for the entire project. A well-thought-out design ensures that the table is functional and enjoyable. This section covers the key aspects of designing your foosball table.
Choosing The Right Dimensions
The first step in designing your foosball table is choosing the right dimensions. The standard size for a foosball table is 56 inches long, 30 inches wide, and 36 inches high. These measurements offer a balanced playing experience. If space is an issue, consider a smaller table. Mini tables can be as small as 40 inches long. This will still provide a fun experience. Ensure the table fits comfortably in your play area. Measure your space before deciding on the dimensions.
Creating The Blueprint
After deciding on the dimensions, the next step is creating the blueprint. A detailed blueprint serves as a guide during construction. Start by sketching the table’s outline on paper. Include the dimensions and key features. Mark where the rods and players will go. Indicate the placement of goals and ball return systems. Consider using software for a more precise blueprint. There are many free tools available online. An accurate blueprint helps avoid mistakes during construction. It ensures all parts fit together perfectly.

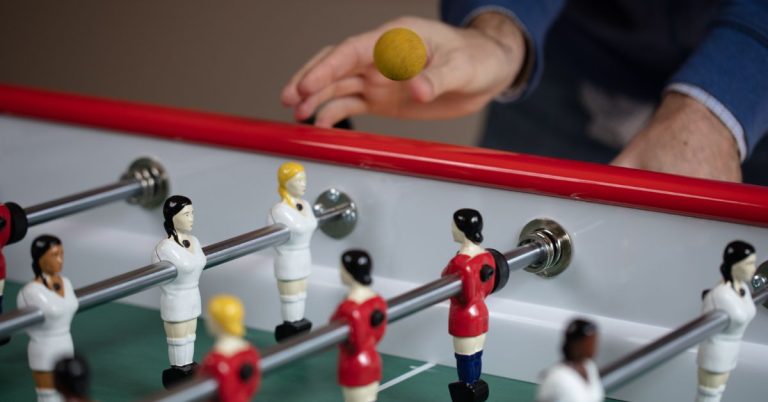
Credit: m.youtube.com
Cutting The Wood
Cutting the wood is a crucial step in building your foosball table. It requires precision and safety. With the right tools and techniques, you can ensure each piece fits perfectly. Follow these steps to cut the wood accurately and safely.
Measuring And Marking
First, measure each piece of wood. Use a tape measure for accuracy. Write down the dimensions for each part. This includes the table frame, legs, and playing surface. Double-check your measurements to avoid mistakes.
Next, mark the wood. Use a pencil to draw cutting lines. A ruler or straight edge helps make straight lines. Clear markings ensure clean cuts. This step makes assembly easier later.
Using The Saw Safely
Before you start cutting, wear safety gear. Safety glasses and gloves protect you from injuries. Ensure your saw is in good condition. Check the blade and power source.
Begin cutting along the marked lines. Keep a steady hand. Move the saw slowly for precise cuts. Always keep your hands away from the blade. Take breaks if needed to maintain focus.
After cutting, sand the edges. Smooth edges prevent splinters. Properly cut and smooth wood pieces fit together well. This ensures a sturdy foosball table.
Assembling The Frame
Building a foosball table from wood is a fun and rewarding project. The first step in this process is assembling the frame. This will form the foundation of your foosball table. A well-assembled frame ensures stability and durability. Let’s dive into the steps involved in this crucial phase.
Joining The Pieces
Start by gathering all the wooden pieces that will form the frame. These pieces need to be cut to precise measurements. A standard foosball table frame includes:
- Two long side pieces
- Two shorter end pieces
- Four corner supports
Align the side and end pieces on a flat surface. Ensure the edges are flush. Use wood glue to join the pieces where they meet. This provides initial stability.
Next, reinforce these joints with screws. Drill pilot holes first to prevent the wood from splitting. Insert the screws and tighten them securely. Follow this step for all corners.
Securing The Structure
After joining the pieces, it’s time to secure the structure. This step involves adding corner supports. These supports provide additional strength and prevent wobbling.
- Place a corner support inside each corner of the frame.
- Apply wood glue to the edges of the corner supports.
- Press the supports firmly into place.
- Use screws to secure the supports. Drill pilot holes first.
Once the corner supports are in place, let the glue dry completely. This usually takes a few hours. After the glue is dry, check the frame for stability. Make sure there are no loose joints.
Now, your foosball table frame is assembled and secure. It’s ready for the next steps in the building process. A strong frame is essential for a long-lasting and enjoyable foosball table.
Building The Playfield
Creating the playfield is a crucial part of building a foosball table. It needs to be smooth and durable to ensure a fair and enjoyable game. Follow these steps to lay out and paint the field lines.
Laying Out The Field
First, cut a piece of plywood to the size of your foosball table. Make sure the surface is even and smooth. Sand it if necessary. Next, measure and mark the centerline of the board. This line will divide the two sides of the playfield.
Use a ruler or a straight edge to draw the centerline. It should run from one end of the board to the other. Then, mark the goal areas on each end of the playfield. These areas should be rectangular and centered on the shorter sides of the board. Draw the goal lines to define these areas.
Next, mark the positions for the players. Usually, there are two sets of players on each side. Each set consists of a goalkeeper, defenders, midfielders, and forwards. Make sure to measure equal distances between each player’s position. Draw small circles where each player will be placed.
Painting The Field Lines
Once the layout is complete, it’s time to paint the field lines. Use white paint for the lines to make them stand out. Start with the centerline. Use painter’s tape to ensure a straight and clean line. Paint over the tape and let it dry. Remove the tape carefully.
Next, paint the goal areas. Use the same technique with painter’s tape to ensure straight lines. Let the paint dry completely before removing the tape. For the player positions, you can use a small brush to paint the circles. Make sure they are visible but not too large.
Finally, you can add extra details to the playfield. Some people prefer to add team logos or other decorations. Just make sure the surface remains smooth. Once the paint is dry, apply a clear coat to protect the playfield. This will ensure the paint lasts longer and the surface stays smooth.
Attaching The Rods
Attaching the rods to your foosball table is an important step. This process involves precision and careful measurements. Properly installed rods ensure smooth gameplay. Follow these steps to attach the rods correctly.
Drilling Holes
First, you need to drill holes for the rods. Measure the width of the table. Mark the spots where the rods will go. Ensure the marks are even. Use a drill to create holes at the marks. Make sure the holes are straight and clean. This helps the rods move smoothly.
Installing The Rods
Next, insert the rods into the drilled holes. Slide each rod through its respective hole. Ensure the rods are aligned properly. Secure the rods using washers and screws. Tighten the screws to hold the rods in place. Check if the rods rotate freely. This ensures smooth gameplay.
Adding The Players
Building a foosball table is a fun project. One key step is adding the players. This is where the game comes to life. Players need to be positioned correctly and secured well. Let’s dive into the details.
Positioning The Players
Proper positioning of the players is crucial. Players should be evenly spaced. This ensures fair play. A standard foosball table has 11 players per team. Arrange them in a 1-2-5-3 formation.
| Rod | Number of Players |
|---|---|
| Goalie Rod | 1 Player |
| Defense Rod | 2 Players |
| Midfield Rod | 5 Players |
| Forward Rod | 3 Players |
Mark the positions on the rods. Use a measuring tape for accuracy. Mark the center of each rod first. Then measure equal distances from the center. This keeps the players evenly spaced.
Securing The Players
Securing the players is the next step. Players should be fixed firmly to the rods. This prevents them from moving during play. Use screws or bolts to attach the players.
- Drill small holes in the rods at marked positions.
- Align the holes on the players with the rod holes.
- Insert screws or bolts through the holes.
- Tighten the screws or bolts securely.
Make sure the players are facing the right direction. Double-check their positions before tightening. This ensures a smooth game experience.
Finishing Touches
Add the final touches by sanding and painting your foosball table. Attach handles, rods, and players securely. Enjoy your homemade foosball table!
The final steps in building your foosball table are crucial. These finishing touches ensure that your table is not only functional but also looks great. Each detail matters. Let’s dive into the last steps.Adding Handles And Bumpers
Handles and bumpers are essential. They provide a good grip and prevent damage. Start by selecting sturdy handles. Choose ones that fit comfortably in your hand. Attach them to the rods. Make sure they are secure. This will give you better control during play. Next, add bumpers to the rods. Bumpers keep the rods from hitting the sides. This protects the table and improves gameplay. Slide the bumpers onto the rods. Position them at both ends. Secure them tightly. Your table is now ready for some action.Applying The Final Coat
The final coat adds a polished look. It also protects the wood. Choose a high-quality varnish. Apply it evenly with a brush. Ensure you cover all surfaces. Allow it to dry completely. This may take several hours. Once dry, check for any missed spots. Apply a second coat if needed. This ensures a smooth finish. Your foosball table will look professional. Plus, the wood will be protected from wear and tear. By adding these final touches, your foosball table is complete. It is ready for many exciting games. Enjoy!
Credit: www.wwgoa.com
Frequently Asked Questions
What Materials Do I Need To Build A Foosball Table?
To build a foosball table, you’ll need wood, screws, foosball men, rods, handles, and a ball. You will also need tools like a saw, drill, and screwdriver.
How Long Does It Take To Build A Foosball Table?
Building a foosball table can take anywhere from a weekend to a few days. This depends on your skill level and the complexity of your design.
Is It Difficult To Build A Foosball Table?
Building a foosball table is moderately challenging. Basic woodworking skills and tools are required. Follow a detailed plan to simplify the process.
What Type Of Wood Is Best For A Foosball Table?
Plywood or MDF are commonly used for foosball tables. They are durable and easy to work with. Choose high-quality wood to ensure longevity.
Conclusion
Building a foosball table out of wood is a rewarding project. It adds fun to your home and sharpens woodworking skills. Follow the steps carefully, and enjoy the process. Invite friends and family to play. They will appreciate your effort and creativity.
A homemade foosball table brings joy and pride. Plus, it’s an excellent conversation starter. Dive into this project today. Happy building and playing!