How to Make a Shuffleboard Table: DIY Guide for Beginners
Want to craft your own shuffleboard table? It’s easier than you think.
With some basic tools and a bit of patience, you can build a professional-looking table at home. Building a shuffleboard table is a rewarding project. It combines woodworking skills with a bit of creativity. Not only will you save money, but you’ll also have a unique piece for your game room.
This guide walks you through the steps, from choosing materials to finishing touches. Whether you’re a seasoned woodworker or a beginner, you’ll find this project both fun and challenging. Let’s get started on making your very own shuffleboard table!

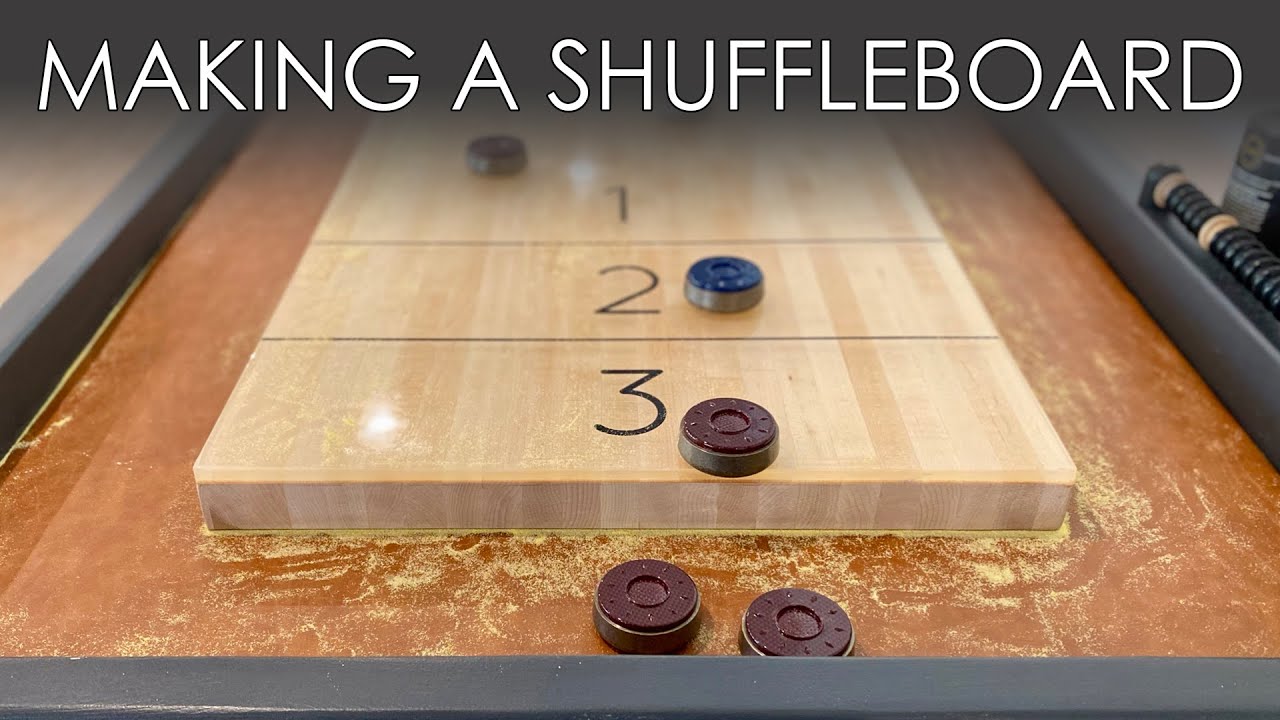
Credit: www.youtube.com
Materials And Tools Needed
Creating your own shuffleboard table is a rewarding project. To start, you need specific materials and tools. This section will guide you on what you need.
Essential Supplies
First, gather all the essential supplies. You will need wood for the table frame. Good choices include hardwood or plywood. Select a smooth wood for the playing surface. Maple is a popular option. You also need wood glue, screws, and nails. For the finish, choose varnish or polyurethane. This protects the wood and provides a smooth play area. Sandpaper of various grits is also necessary. It helps in smoothing the wood surfaces.
Recommended Tools
Next, collect the recommended tools. A circular saw is needed for cutting the wood. A drill is essential for making holes and driving screws. A sander or sandpaper is necessary for smoothing surfaces. Use a measuring tape for precise measurements. Clamps hold the wood pieces together while the glue dries. A brush or roller applies the finish evenly. A level ensures the table is flat and even.
Having these materials and tools will make the process easier. They ensure your shuffleboard table is sturdy and smooth. Happy building!

Credit: www.wikihow.com
Choosing The Right Wood
Building a shuffleboard table is a rewarding project. The first step is to choose the right wood. This decision impacts the table’s durability and performance. You want your shuffleboard table to last for years. So, selecting the best wood is crucial.
Types Of Wood
Several types of wood are suitable for a shuffleboard table. Each type has its benefits. Here are some popular choices:
- Hard Maple: Known for its strength and smooth surface.
- White Oak: Offers excellent durability and a classic look.
- Birch: Affordable and easy to work with.
- Mahogany: Provides a rich color and strong build.
Hard maple is a top choice for many. It’s dense and resistant to wear. White oak is another great option. It has a beautiful grain and is very sturdy. Birch is a good budget-friendly option. It’s easy to shape and finish. Mahogany is ideal for a luxurious look. It is strong and has a deep color.
Wood Quality
Quality matters as much as the type of wood. You need wood that is straight and free from defects. Look for the following qualities:
| Quality | Description |
|---|---|
| Grain | Choose wood with a tight and even grain. |
| Moisture Content | Wood should be properly dried to avoid warping. |
| Knots | Avoid wood with large knots. |
| Surface | The wood should be smooth with no cracks. |
The grain of the wood affects the table’s appearance and performance. Tight and even grains are best. Check the moisture content. Wood should be dry to prevent warping. Avoid large knots as they can weaken the wood. Ensure the surface is smooth. No cracks or splits should be present.
Choosing the right wood sets the foundation for a great shuffleboard table. Pay attention to type and quality. Your table will be both beautiful and durable.
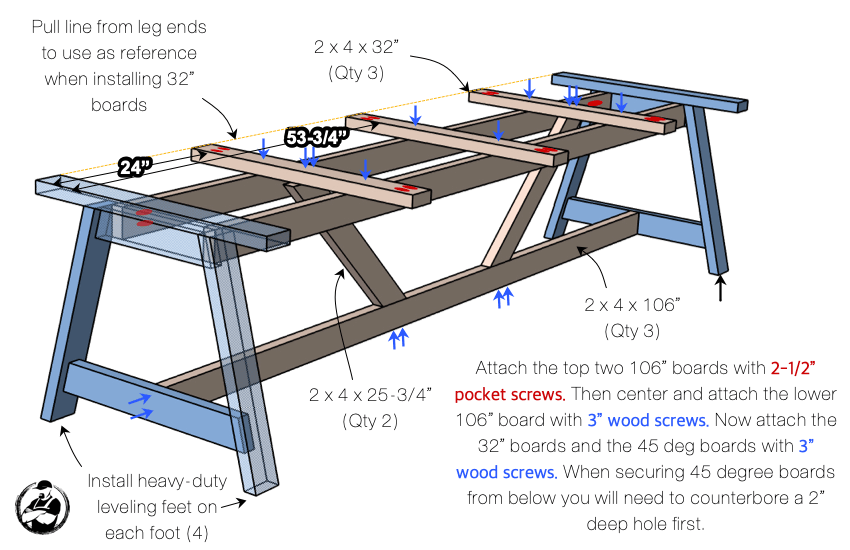
Creating The Table Base
Creating the Table Base is a crucial step in making a shuffleboard table. A sturdy base ensures the table’s durability and stability. Let’s explore how to measure, cut, and assemble the base.
Measuring And Cutting
Begin by measuring the dimensions of your shuffleboard table. Use a measuring tape to determine the length and width. Write these measurements down.
Next, gather your materials. You will need:
- Wood planks
- Measuring tape
- Saw
- Pencil
Mark the wood planks according to your measurements. Double-check your markings to ensure accuracy. Use a saw to cut the wood planks along the marked lines.
Assembling The Base
Once you have your cut pieces, it’s time to assemble the base. Lay out the pieces on a flat surface. Arrange them to form a rectangular frame.
Use screws or nails to join the corners. Ensure the frame is square by measuring diagonally from corner to corner. Both diagonals should be equal.
Next, add cross supports for extra stability. Cut additional wood planks to fit within the frame. Secure these supports with screws or nails.
Now, your base is ready. Ensure it is level and sturdy before proceeding to the next step of your shuffleboard table construction.
Building The Playing Surface
Creating the playing surface is a crucial part of making a shuffleboard table. This section will guide you through the steps to build and attach the surface. Follow along to ensure your table provides a smooth and enjoyable game experience.
Surface Dimensions
First, determine the dimensions of the playing surface. For a standard shuffleboard table, the surface should be 20 inches wide and 2.5 inches thick. The length varies, but 12 to 22 feet is common.
Here is a quick reference table for standard sizes:
| Table Length | Surface Length | Surface Width | Surface Thickness |
|---|---|---|---|
| 12 feet | 10 feet | 20 inches | 2.5 inches |
| 14 feet | 12 feet | 20 inches | 2.5 inches |
| 16 feet | 14 feet | 20 inches | 2.5 inches |
Attaching The Surface
Once you have the dimensions, it’s time to attach the surface. Follow these steps:
- Prepare the Base: Ensure the base is level and sturdy. Use a spirit level to check.
- Position the Surface: Place the surface on the base. Align it properly with the edges.
- Secure the Surface: Use screws and wood glue to attach the surface. Ensure it is firmly in place.
- Check Alignment: Recheck the alignment and level. Adjust if necessary.
Properly attaching the surface ensures a smooth and even playing field. This step is vital for gameplay quality.
Adding The Rails And Gutters
Adding the rails and gutters to your shuffleboard table is crucial. These elements ensure the pucks stay on the table during play. They also enhance the table’s appearance and functionality. Let’s dive into the process step by step.
Rail Installation
First, gather your materials. You’ll need wooden rails, screws, and a drill. Measure the length and width of the table. Cut the rails to fit these dimensions. Smooth the edges with sandpaper. This ensures a clean look and safe handling.
Next, position the rails along the table’s edges. Use clamps to hold them in place. Pre-drill holes to prevent the wood from splitting. Secure the rails with screws. Check for alignment as you go. The rails should be level with the playing surface.
Gutter Placement
Gutters catch any pucks that fall off the table. Measure the area around the table. Cut the gutter pieces to match these dimensions. Sand the edges for a smooth finish. Position the gutters below the rails.
Secure the gutters using brackets or screws. Make sure they are firmly attached. This prevents any accidents during play. The gutters should be slightly lower than the rails. This allows pucks to fall into them easily.
Test the setup by sliding a puck. Ensure it falls into the gutter when it leaves the table. Adjust the gutters if needed. Proper placement is key for smooth gameplay.
Finishing Touches
Once the main structure of your shuffleboard table is complete, it’s time to focus on the finishing touches. These final steps ensure your table is smooth, durable, and ready for play. In this section, we’ll cover two important steps: sanding and sealing, and applying the finish.
Sanding And Sealing
Begin with sanding the surface. Use a fine-grit sandpaper, around 220-grit. This smooths out any rough edges and prepares the wood for sealing. Sand in the direction of the wood grain to avoid scratches.
After sanding, clean the surface. Use a tack cloth or a damp rag to remove dust. This step is crucial for a smooth finish.
Next, apply a wood sealer. Sealer helps protect the wood and provides a base for the finish. Use a brush or a clean cloth to apply the sealer evenly. Allow it to dry for the recommended time, usually a few hours.
Applying Finish
Once the sealer is dry, it’s time to apply the finish. You have several options for finishing your shuffleboard table. Polyurethane is a popular choice because it is durable and easy to apply.
Start by stirring the polyurethane gently. Avoid shaking it to prevent bubbles. Use a high-quality brush to apply a thin coat. Brush in long, even strokes along the wood grain.
Allow the first coat to dry completely. This usually takes about 24 hours. Once dry, lightly sand the surface with fine-grit sandpaper. This step removes any imperfections and prepares the surface for the next coat.
Clean off the dust with a tack cloth and apply a second coat of polyurethane. Repeat the process until you have applied at least three coats. Each coat adds durability and enhances the shine.
Optional: For an ultra-smooth finish, you can wet sand the final coat. Use 600-grit sandpaper and water. Sand lightly and then buff with a soft cloth.
These finishing touches ensure your shuffleboard table is both beautiful and functional. Enjoy your handcrafted creation!
Painting And Design
Painting and design play a critical role in making a shuffleboard table unique. The right paint and design can transform a simple table into a piece of art. This section will guide you through choosing paint and exploring design ideas.
Choosing Paint
Pick a durable paint that can withstand wear and tear. Acrylic paint is a good choice. It dries quickly and is easy to work with. For the best results, use a primer before painting. This will help the paint stick better. Make sure the paint is non-toxic. This ensures safety if children use the table.
Design Ideas
Consider a classic wood grain finish. This gives a traditional look and is timeless. Use stencils to create patterns. They can add a personal touch. Another idea is to use bright colors. They make the table stand out and add fun. You can also paint team logos or family crests. This makes the table unique and special.
Setting Up The Table
Setting up a shuffleboard table is a crucial step. A well-set table ensures smooth gameplay and prolongs its lifespan. Follow these steps to get your shuffleboard table ready for action.
Leveling The Table
First, place your shuffleboard table where you want it. Ensure the area is spacious enough. Use a carpenter’s level to check the table’s balance. Adjust the legs until the table is perfectly level. This step is vital. An uneven table can ruin the game.
Final Adjustments
After leveling, make final adjustments. Ensure the surface is smooth and clean. Remove any debris or dust. Check the climatic adjusters if your table has them. These adjusters control the table’s shape. Adjust them to keep the surface flat.
Now, apply shuffleboard wax to the surface. This wax reduces friction. It allows pucks to glide effortlessly. Your table is now set up. Enjoy your game!
Maintaining Your Shuffleboard Table
Maintaining your shuffleboard table is essential for longevity and performance. Regular care keeps it looking new and ensures smooth play. Neglect can lead to damage and costly repairs. Follow these tips to keep your table in top shape.
Cleaning Tips
Clean your shuffleboard table regularly. Dust and debris can affect gameplay. Use a soft cloth to wipe the surface. Avoid abrasive cleaners that can damage the finish. A little effort goes a long way in maintaining the table’s shine.
Apply a shuffleboard-specific cleaner. These cleaners are designed for the table’s surface. Spray it lightly and wipe it evenly. This helps maintain a smooth and slick playing surface.
Regular Maintenance
Regular maintenance is key to a long-lasting shuffleboard table. Wax the surface every month. This keeps the table smooth and fast. Use shuffleboard wax designed for your table type. Apply a thin, even layer and let it set.
Check the table’s climate. Shuffleboard tables can warp in extreme temperatures. Keep your table in a stable environment. Avoid placing it near heat sources or in direct sunlight.
Inspect the legs and frame. Ensure they are sturdy and level. Tighten any loose screws or bolts. A stable table ensures fair play and prevents damage.
Credit: rogueengineer.com
Frequently Asked Questions
What Materials Are Needed For A Shuffleboard Table?
To make a shuffleboard table, you need wood, epoxy resin, sandpaper, varnish, and shuffleboard wax.
How Long Does It Take To Build A Shuffleboard Table?
Building a shuffleboard table can take around 30-40 hours, depending on skill level and design complexity.
What Is The Best Wood For A Shuffleboard Table?
Hardwood like maple or birch is best for durability and a smooth playing surface.
How Do You Finish A Shuffleboard Table?
Finish a shuffleboard table with epoxy resin for smoothness, and then varnish to protect the surface.
Conclusion
Building a shuffleboard table is easier than you think. Just follow these steps. You can enjoy hours of fun with friends and family. Remember, patience is key. Measure carefully, and use quality materials. Your homemade table will last for years.
Now, gather your tools and start building. Soon, you’ll have a beautiful shuffleboard table. Share your project with others. Inspire them to create their own. Enjoy the game and the satisfaction of your handiwork. Happy building!