How to Break Down and Clean a Two-Piece Pool Cue


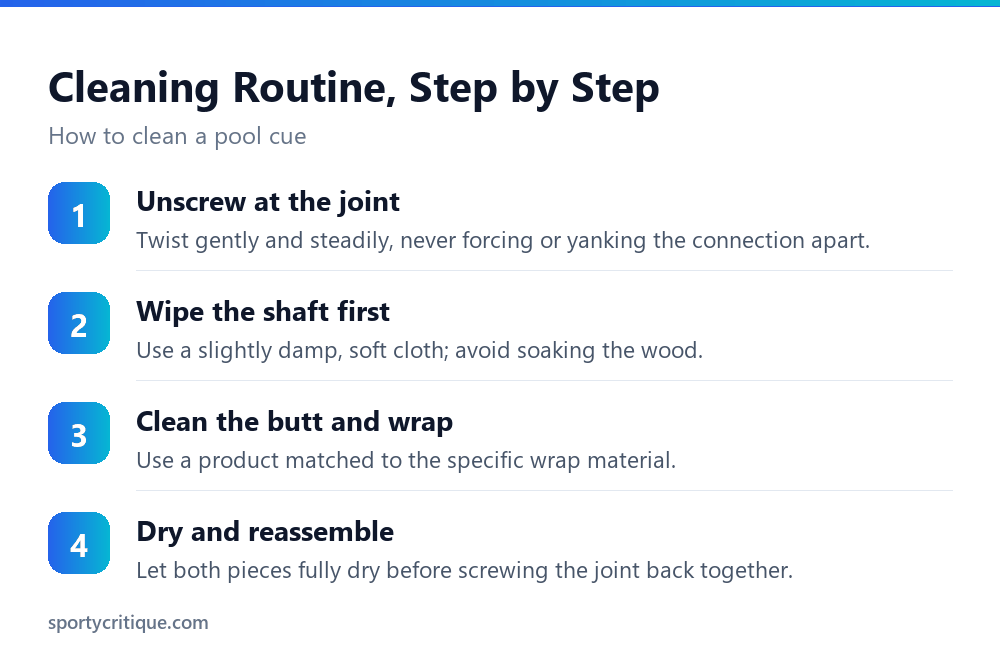
Learning how to clean a pool cue the right way starts with unscrewing it gently at the joint, then wiping the shaft with a slightly damp, soft cloth rather than soaking it, and cleaning the butt and wrap with a product matched to that specific wrap material, whether Irish linen, leather, or a smooth wood finish. Letting both pieces dry fully before screwing the joint back together prevents moisture from being trapped inside the connection, which can affect fit and feel over time.
Regular cleaning keeps a cue’s shaft gliding smoothly through the bridge hand and prevents grime buildup that gradually affects both feel and appearance, but doing it incorrectly, using the wrong products or excessive moisture, can damage a cue faster than the dirt it’s meant to remove. Understanding the right approach for each part of the cue matters more than cleaning frequently but carelessly.
- →Always unscrew the joint gently, never forcing or yanking the two pieces apart
- →The shaft needs only a slightly damp cloth, never a fully soaked or dripping one
- →Wrap material determines the correct cleaning product; one approach doesn’t fit all wraps
- →Full drying before reassembly prevents trapped moisture from affecting the joint over time
- →Harsh household cleaners and excessive water are common causes of avoidable cue damage
Table of Contents
Breaking Down the Cue Safely
Unscrewing a two-piece cue at the joint should always be a gentle, steady twisting motion, never a forced yank or an attempt to break a stuck joint free with excessive torque. A joint that feels unusually stuck often just needs a slightly firmer, still-controlled twist rather than sudden force that risks damaging the threads.
⚠️ Watch out: Forcing a stuck joint apart aggressively can strip or damage the internal threading, an expensive repair that’s entirely avoidable with a patient, gentle approach to separating the two halves. If a joint consistently feels stuck, checking for debris in the threads before assuming force is the answer usually resolves the issue safely.
Cleaning the Shaft
The shaft should be wiped with a soft cloth that’s only slightly damp, never fully wet or dripping, since wood absorbs excess moisture in a way that can cause warping or finish damage over repeated exposure. A microfiber cloth works well for this purpose, picking up chalk residue and hand oils without leaving lint or scratching the surface.
For shafts with a slightly sticky or grimy feel that a simple wipe-down doesn’t fully resolve, a product specifically formulated for cue shaft cleaning, rather than a generic household cleaner, removes buildup without stripping or damaging the shaft’s finish. These specialized products are worth the modest extra cost compared to risking a generic cleaner not designed for this specific material and use case.
💡 Pro tip: A slightly abrasive cue conditioning pad, used sparingly and specifically on the shaft rather than the whole cue, can restore smoothness to a shaft that feels rough or sticky from chalk buildup, without the moisture exposure a liquid cleaner introduces.
Cleaning the Butt and Wrap
The correct cleaning approach for the butt section depends heavily on wrap material. Irish linen wraps tolerate a slightly damp cloth wipe reasonably well, leather wraps benefit from a leather-specific cleaning and conditioning product rather than water alone, and cork wraps should generally be cleaned with minimal moisture given cork’s tendency to absorb and hold water.
A smooth, unwrapped wood grip section should be treated similarly to the shaft, a slightly damp cloth rather than any soaking, with attention to preserving whatever finish or sealant the manufacturer applied to that specific section of the cue.
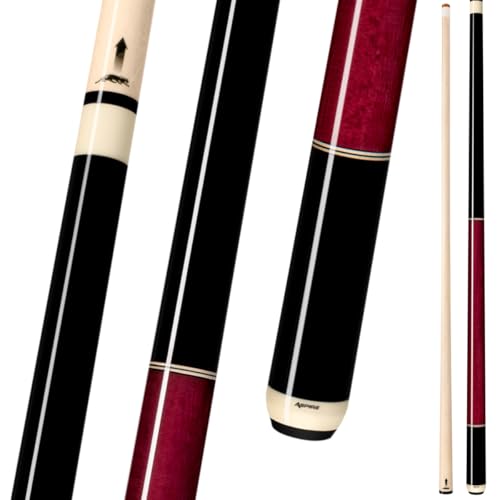
📊 Note: Forearm and butt sections with decorative inlays or points deserve extra care during cleaning, since aggressive scrubbing or harsh chemicals can affect these decorative materials differently than the surrounding wood, potentially causing discoloration or separation over time.
Products to Avoid
- ✓Use products specifically formulated for cue care, not generic household cleaners
- ✓Keep cloths only slightly damp, never soaking wet, on any wood surface
- ✓Match cleaning approach to specific wrap material rather than a one-size-fits-all method
- ✓Let both pieces fully dry before screwing the joint back together
- ✕Using harsh household cleaners, solvents, or abrasive scouring products on wood or wraps
- ✕Soaking a cloth and applying excessive moisture to any part of the cue
- ✕Applying the same cleaning method to leather, linen, and cork wraps interchangeably
- ✕Reassembling a cue’s joint before both pieces have fully dried
Cleaning the Joint and Pin
The joint area, including the threaded pin, benefits from occasional light cleaning to remove dust and debris that can accumulate in the threads over time, since this buildup is a common cause of a joint feeling stiffer or harder to screw together smoothly than it should.
A dry cloth or a small brush works well for this specific area, since introducing moisture directly into the joint threading risks corrosion on metal pins or general degradation of the connection over repeated exposure. Keeping this area dry while still clearing debris protects the joint’s long-term function.
How Often to Clean a Cue
A quick wipe-down after every playing session, removing chalk dust and hand oils before they have a chance to build up, takes only a minute or two and prevents the kind of accumulated grime that eventually requires a more involved deep cleaning to remove.
A more thorough cleaning, including the specific wrap-material-appropriate treatment discussed above, makes sense on a less frequent schedule, perhaps monthly for a regularly used cue, rather than attempting this deeper clean after every single session, which risks introducing more moisture and product exposure than the cue actually needs.
Storing a Cue After Cleaning
Storing a cue in a proper case rather than leaning it against a wall or leaving it loose protects a freshly cleaned finish from dust and incidental scratches that would otherwise undermine the cleaning effort almost immediately after it’s completed.
Ensuring both cue sections are completely dry before placing them in a case, particularly a soft-sided or partially enclosed case without much airflow, avoids trapping residual moisture against the cue in an enclosed space, which can cause problems over time that wouldn’t occur with proper drying beforehand.
Checking the Ferrule and Tip While Cleaning
Cleaning time is a natural opportunity to inspect the ferrule for cracks and the tip for wear or flattening, since these components need to be checked periodically anyway and combining that inspection with a regular cleaning routine avoids a separate, easily forgotten maintenance step.
A light wipe around the ferrule and tip area removes accumulated chalk dust without soaking the tip itself, which needs to stay dry to hold chalk effectively during play. Excess moisture on the tip specifically can affect its ability to grip chalk and, by extension, its performance on the next shot after cleaning.
A Basic Cue Cleaning Kit
A basic cleaning kit covering the essentials, a few soft microfiber cloths, a cue-specific shaft cleaning product, a wrap-appropriate cleaner matched to the specific cue’s material, and a small brush for the joint area, handles the large majority of routine cleaning needs without requiring an extensive or expensive product collection.
Keeping this small kit together in a dedicated pouch or section of a cue case makes regular cleaning more likely to actually happen consistently, compared to needing to search for scattered supplies each time before starting the process. Convenience meaningfully affects whether a good maintenance habit actually sticks over time.
Mistakes Beyond Just Using the Wrong Product
Cleaning a cue while still assembled, rather than breaking it down first, makes it harder to reach the joint area properly and increases the risk of moisture working its way into the connection point during cleaning rather than being kept away from it entirely.
Rushing through the process to get back to playing quickly is another common mistake, since proper cleaning and, more importantly, proper drying afterward takes a few minutes that shouldn’t be skipped just because a game or practice session is waiting. A cue reassembled while still slightly damp risks the moisture-related joint issues discussed earlier in this guide.
When to Seek Professional Cue Service
Routine cleaning, the focus of this guide, is different from more involved cue maintenance like refinishing a damaged section, repairing a cracked ferrule, or addressing a joint that’s become genuinely loose rather than simply needing a light cleaning of accumulated debris.
A local pool hall or cue specialist can typically handle these more involved repairs, and attempting significant repair work without proper tools and experience risks turning a fixable problem into a more serious one. Routine cleaning is safe and appropriate for any cue owner to handle themselves; deeper repair work generally isn’t.
Cleaning a Used or Inherited Cue
A cue acquired secondhand or inherited from a family member sometimes carries years of accumulated grime, old wax residue, or a wrap material that’s harder to identify at a glance than a cue purchased new with clear manufacturer documentation about its specific materials.
Testing any cleaning product on a small, less visible area first, rather than applying it broadly across an unfamiliar cue’s full surface, catches an unexpected reaction to a specific finish or material before it affects the entire cue. This cautious approach matters more for a used cue with unknown history than for a new cue with documented, known materials.
Frequently Asked Questions
Can I use rubbing alcohol to clean my pool cue?
It’s generally not recommended for wood or finished surfaces, since it can strip finish and dry out wood over repeated use. Products specifically formulated for cue care are a safer choice.
How do I clean a leather-wrapped cue grip?
Use a leather-specific cleaning and conditioning product rather than water alone, since plain water doesn’t clean or maintain leather as effectively and can lead to drying or cracking over time.
Why does my joint feel stiff when screwing the cue together?
Debris buildup in the threads is a common cause. Light dry cleaning of the joint and pin area, rather than forcing the connection, usually resolves this.
How often should I deep clean my pool cue?
A quick wipe-down after every session, with a more thorough wrap-appropriate cleaning on a less frequent schedule, roughly monthly for regular use, balances cleanliness against unnecessary moisture exposure.
Is it safe to use a wet cloth on the shaft?
Only slightly damp, never soaking wet. Excess moisture can cause warping or finish damage to the wood over repeated exposure.
Should I clean my cue before storing it in a case?
Yes, and make sure both pieces are completely dry first, since trapping residual moisture in an enclosed case can cause problems over time that proper drying beforehand avoids.
None of this is complicated once it becomes a habit, and the payoff, a cue that always feels reliable and looks well cared for, is worth the small handful of minutes it costs after each session.
A little care and the right products, matched specifically to each part of the cue rather than one generic approach applied everywhere, keeps a cue feeling and performing like new for years longer than neglect or careless cleaning habits ever would.
Building this routine into the natural end of a playing session, rather than treating it as a separate chore scheduled for another time, is the single most reliable way to keep a cue consistently clean without the maintenance feeling like an extra burden layered onto simply enjoying the game the cue was actually bought to help someone play well in the first place.
As an Amazon Associate, we earn from qualifying purchases through links on this page.