Badminton Jump Smash: Timing the Takeoff for More Angle

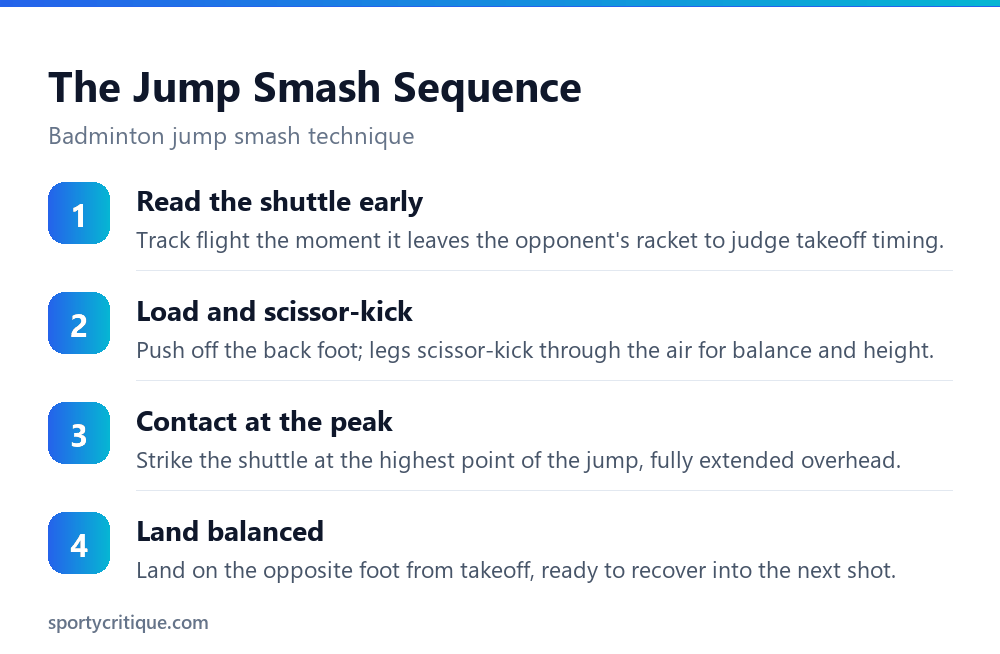
Badminton jump smash technique gets its extra angle from contact height, not extra arm speed. Reading the shuttle’s flight early lets a player time a takeoff that reaches its peak just as the shuttle arrives, contacting it fully extended overhead at the highest possible point. The legs scissor-kick through the jump for balance, and landing on the opposite foot from takeoff keeps the player ready to recover immediately into the next shot.
The jump smash is one of the more visually dramatic shots in badminton, but its real advantage isn’t raw power, a grounded smash from a strong player can generate comparable racket-head speed. What the jump adds is contact height, which steepens the angle the shuttle travels downward into the opponent’s court, making it harder to return regardless of pure velocity.
- →The jump smash’s advantage is contact height and steeper angle, not necessarily more raw power
- →Reading the shuttle’s flight early is what makes takeoff timing possible in the first place
- →The scissor-kick leg action provides balance and rotation, not the source of power itself
- →Contact should happen at the peak of the jump, fully extended, not on the way up or down
- →Landing on the opposite foot from takeoff keeps the player balanced and ready to recover
Table of Contents
Reading the Shuttle Early
Timing a jump smash starts well before the jump itself, with reading the shuttle’s trajectory the moment it leaves the opponent’s racket. A player who waits until the shuttle is already close before deciding to jump has left too little time to load properly and time the takeoff so the jump’s peak lines up with the shuttle’s arrival.
This early read is a genuine skill built through repetition and match experience, not something that can be taught purely through verbal instruction. Players newer to the shot often jump too late, reacting to the shuttle rather than anticipating it, which forces contact on the way down from the jump instead of at the true peak.
The Takeoff and Load
Loading into the jump means bending the legs and pushing off the back foot with enough force to reach full extension at the moment of contact, not simply hopping upward without a real coiled load beforehand. The push-off should feel explosive and come from the legs and hips, similar to a vertical jump in other sports, rather than a small, timid hop that barely leaves the ground.
⚠️ Watch out: A common mistake is jumping straight up without any forward or lateral adjustment toward where the shuttle will actually arrive. The takeoff needs to account for the shuttle’s landing spot, not just maximum jump height, or the player ends up perfectly elevated but out of position to make clean contact.
The Scissor-Kick Leg Action
Once airborne, the legs scissor-kick, the lead leg that pushed off swings forward while the trail leg swings back, a motion that helps maintain balance and body rotation through the jump rather than generating the smash’s power directly. This leg action is what gives the jump smash its recognizable silhouette, but it’s a stabilizing mechanism, not the power source.
The actual power for the smash still comes from the same kinetic chain used in a grounded smash: legs into hips, hips into torso rotation, torso into the arm and wrist snap at contact. The jump adds height and angle on top of that existing power chain; it doesn’t replace or increase the power generation mechanism itself.
Contact at the Peak
Making contact at the exact peak of the jump, fully extended overhead, is what actually delivers the steeper downward angle that makes the jump smash effective. Contact made too early, on the way up, or too late, already descending, sacrifices both the height advantage and often throws off the timing of the arm and wrist snap that generates racket-head speed.
💡 Pro tip: Practicing the jump and swing separately before combining them, first drilling the jump and landing alone, then adding a shadow swing at the peak without a shuttle, helps isolate and fix timing issues before adding the complexity of a real, moving shuttle to time against.
Common Jump Smash Mistakes
- ✓Read the shuttle’s flight early to plan takeoff timing
- ✓Load explosively through the legs and hips before jumping
- ✓Contact the shuttle at the exact peak of the jump, fully extended
- ✓Land balanced on the opposite foot, ready to recover
- ✕Jumping late, reacting to the shuttle instead of anticipating it
- ✕Jumping straight up without adjusting toward the shuttle’s landing spot
- ✕Making contact on the way up or already descending from the peak
- ✕Landing off-balance with no plan to recover into the next shot
Landing and Recovery
Landing on the foot opposite the one used for takeoff, a natural result of the scissor-kick motion, keeps the body balanced and facing the court rather than twisted or off-center after the shot. A controlled landing matters as much as the jump and contact themselves, since a smash that scores a point but leaves the player scrambling to recover position invites an easy follow-up shot if the opponent manages any kind of return.
Bending the landing leg slightly to absorb impact, rather than landing stiff-legged, reduces joint stress that accumulates over a match or a season of repeated jump smashes. This detail matters more for players using the jump smash frequently as a core part of their game than for someone who reserves it for occasional, situational use.
When the Jump Smash Actually Helps
The jump smash earns its place specifically against a shuttle that arrives with enough height and time to set up the jump properly, typically a clear or a lift from the opponent’s back court. Attempting a jump smash on a fast, flat shuttle that doesn’t give enough setup time usually produces a rushed, poorly timed jump that undermines the very advantage the shot is supposed to provide.
Against a shorter or quicker exchange, a grounded smash or a different shot entirely is often the more reliable choice, since forcing a jump smash into a situation that doesn’t support proper timing tends to produce worse results than a well-executed grounded alternative.
Conditioning for a Repeatable Jump Smash
A jump smash that looks clean once in practice but breaks down by the third game of a long match usually points to a conditioning gap rather than a technical flaw. The explosive leg power needed for a proper takeoff fatigues faster than most other movements in badminton, and a player without the leg strength and stamina to repeat it consistently will see their jump height, and therefore their angle advantage, shrink as a match wears on.
Plyometric training, box jumps, depth jumps, and repeated vertical jump drills, builds the specific explosive leg power the jump smash depends on more directly than general cardio conditioning alone. Pairing this strength work with actual on-court repetition of the full movement keeps the technical timing sharp alongside the physical capacity to repeat it.
Footwork Before the Jump
The jump smash doesn’t happen in isolation; it’s the final step of a footwork pattern that gets the player into position under the shuttle in the first place. Rushed or inefficient footwork on the way to the smash leaves too little time to load properly for the jump itself, regardless of how sound the jump mechanics are once the player actually arrives at the right spot on the court.
Practicing the approach footwork and the jump together, rather than drilling the jump alone from a stationary starting position, closes the gap between how the shot looks in isolated practice and how it actually performs in a live rally where the player has to cover ground first. Split-step timing on the approach, a small hop that resets the feet just before the final push toward the shuttle, helps smooth this transition into the takeoff.
Grip and Wrist Snap at Contact
A relaxed grip through the swing that tightens only at the moment of contact generates more racket-head speed than a grip held tight throughout the entire motion. This principle applies to the jump smash the same way it applies to a grounded smash, though the added complexity of timing the jump makes it easier for players to unconsciously grip tighter earlier as a way of compensating for the less stable, airborne base.
The wrist snap itself should happen naturally as an extension of the arm’s forward motion, not as a separate, deliberately added flick layered on top. Players who consciously try to add extra wrist snap often end up early, snapping before full arm extension, which reduces rather than increases the shot’s effective power at contact.
Jump Smash Differences in Singles vs. Doubles
In singles, where the court is longer and narrower, a jump smash often needs to travel a steeper angle to land inside the sideline rather than relying purely on raw speed, since the opponent has more time to react across the longer court. The height advantage the jump provides matters proportionally more in singles for exactly this reason.
In doubles, where the court is shorter but wider and a partner is positioned to cover part of the front court, a jump smash aimed at the gap between opponents or at the body of the nearer player often outperforms one aimed purely for maximum steep angle. Doubles players also typically need to recover into a covering position faster after the smash, since a fast doubles rally punishes a slow recovery more severely than the typically slower pace of singles.
Frequently Asked Questions
Why does my jump smash lack power compared to my grounded smash?
Contact timing is the most common cause. Making contact before or after the true peak of the jump throws off the kinetic chain and wastes the height advantage the jump is supposed to provide, producing a weaker result than a well-timed grounded smash.
Is a jump smash always the right choice against a lift?
Not automatically. It works best against a shuttle with enough height and time to set up proper takeoff timing. A fast, flat shuttle rarely allows enough time for a well-executed jump.
What does the scissor-kick actually do?
It provides balance and controlled rotation through the jump; it isn’t the source of the smash’s power. Power still comes from the same legs-hips-torso-arm chain used in a grounded smash.
How do I fix jumping too late?
Work on reading the shuttle’s flight the moment it leaves the opponent’s racket rather than waiting until it’s already close. Shadow practice without a shuttle, focused purely on timing the jump to an imagined trajectory, helps build this earlier read.
Does landing technique really matter for the jump smash?
Yes. A poorly balanced landing leaves a player unable to recover quickly into the next shot, which can undo the advantage gained from a well-executed smash if the opponent gets any kind of return back.
What kind of training improves jump smash consistency?
Plyometric work like box jumps and depth jumps builds the explosive leg power the shot depends on, while combining that strength training with repeated on-court practice keeps the timing sharp under fatigue.
The jump smash rewards timing and reading the shuttle far more than raw athleticism alone. A player who nails the early read, an explosive but well-aimed takeoff, and contact at the true peak will out-perform a more athletic player who jumps higher but mistimes the contact point consistently.
None of these pieces work in isolation. Footwork sets up the jump, the jump sets up contact height, and contact height is what finally delivers the steep angle the shot is known for. Treating jump smash technique as one connected sequence, rather than a single dramatic moment in the air, is what actually makes it reliable under real match pressure.
As an Amazon Associate, we earn from qualifying purchases through links on this page.