Best Pool Cue Tip Replacement Kit: What’s Inside, How to Use It

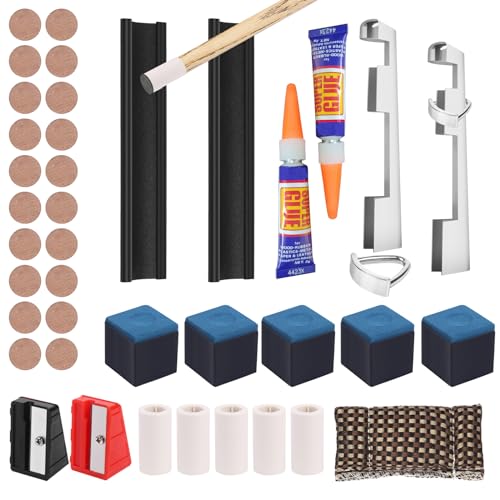
A real cue tip replacement kit needs five things to finish the job start to finish. Here’s what belongs in one, what’s commonly missing, and how to actually use it.

A complete pool cue tip replacement kit needs five things to actually finish the job: a tip pick or knife to remove the old tip, a sander or scuffer to true the ferrule, replacement tips in the right diameter, cement or glue, and a clamp to hold the bond while it cures. Kits in the $10 to $26 range, such as a 5-in-1 or 11-in-1 tool set, usually cover the tools and tips but skip the cement, so budget for a separate tube of tip glue unless the listing explicitly says it’s included.
Replacing a cue tip yourself is a fifteen-minute job once you’ve done it twice, and it costs a few dollars in materials instead of the ten to fifteen a shop typically charges for the same work. The catch is that “kit” gets used loosely in cue-tip listings. Some truly include everything you need in one box. Others are really just a shaping tool with a couple of tips thrown in, and you’ll still need to buy cement separately before you can finish a real replacement. This guide breaks down what a full kit actually contains, which pieces are commonly missing, and walks through the replacement process itself step by step.
- →A fully complete kit needs: removal tool, sander/scuffer, tips, cement, and a clamp
- →Many budget “repair kits” cover the tools and tips but leave out cement, check the listing carefully
- →The 11-in-1 and 5-in-1 tool sets below are verified in stock and cover the shaping side well
- →Tweeten’s cement is the industry-standard glue if your kit doesn’t include one
- →Full cure time before trimming matters more than any other single step in the process
Table of Contents
What a complete kit actually includes
Strip away the marketing copy and every real cue tip replacement job needs the same five components, regardless of which kit you buy. A removal tool (often a flat pick or the back edge of a trimmer) gets the old tip off without gouging the ferrule. A sander or scuffer trues up the ferrule face so the new tip sits flat rather than at an angle. The replacement tip itself needs to match your ferrule’s diameter, almost always 12mm, 12.5mm, or 13mm on a pool cue. Cement or cue tip glue bonds the new tip to the ferrule. And a clamp holds steady pressure on that bond while it cures, which matters more than people expect.
⚠️ Watch out: Read the bullet points on any “replacement kit” listing closely before buying. A surprising number of budget kits are really shaping and trimming tool sets with a couple of spare tips bundled in, and no cement at all. If cement isn’t mentioned by name in the listing, assume you’ll need to buy it separately and add it to your order.
Two verified tool kits, and the glue most kits skip
The CUS 11-in-1 Pool Cue Tip Repair Kit covers the shaping side of the job well: a scuffer, trimmer, and shaper in one compact tool, priced at $25.99 with real stock available at the time of writing. It’s built for repeated use rather than a single repair, which makes sense if you’re maintaining more than one cue or replacing tips for a whole table’s worth of house cues.
The 5-in-1 Snooker Pool Cue Repair Kit is the budget option at $10.00, with limited stock at the time of writing (worth grabbing sooner rather than later if the price holds). It covers shaping, scuffing, and aerating the tip surface, which is the same core function as the pricier kit at less than half the cost, though the trimming edge on tools at this price tends to dull faster with heavy use.
Neither of those two includes cement. For that, Tweeten Cement Glue for Cue Tip Repair (Double Size) is the industry-standard choice most cue repair guides point to, priced at $21.99 for the double-size tube and in stock at the time of writing. A little goes a long way: one tube covers dozens of tip replacements, so it’s a one-time purchase that outlasts several kits’ worth of tips.
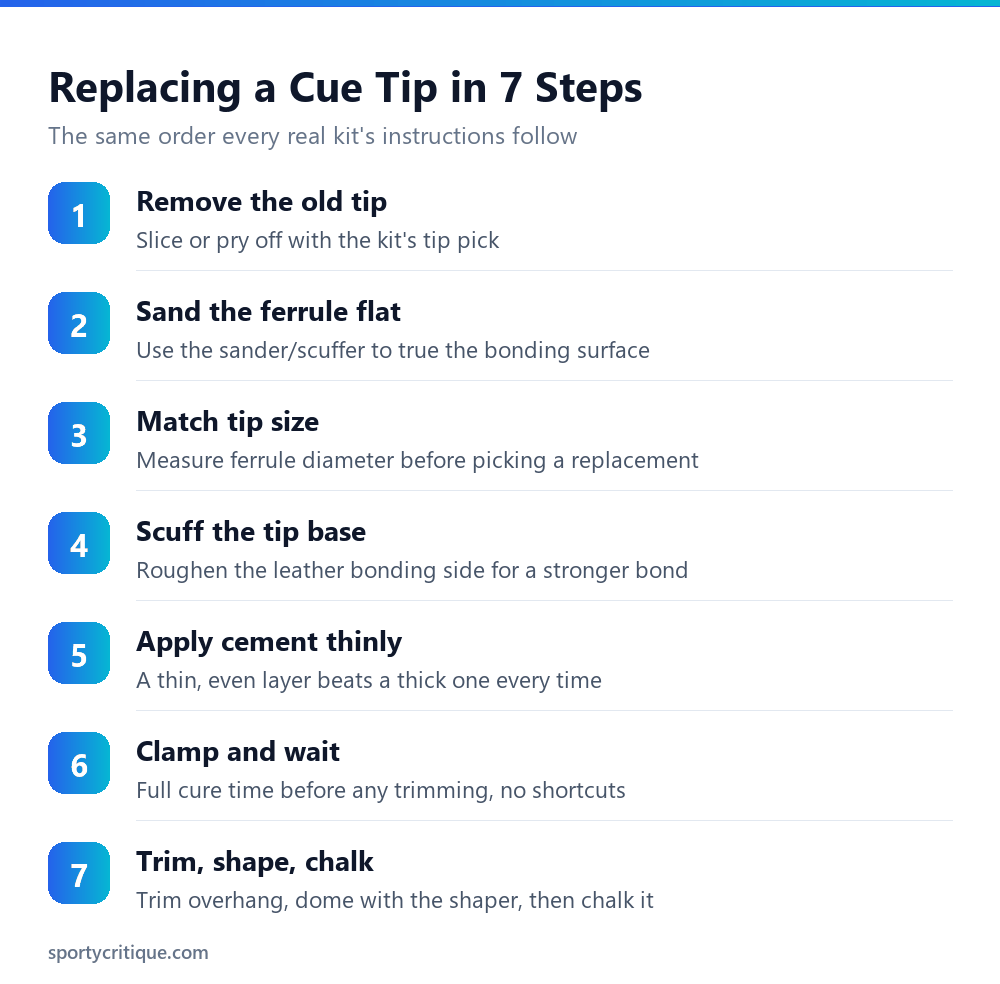
How to actually replace a pool cue tip: step by step
💡 Pro tip: Don’t rush the clamp step. The single most common reason a fresh tip pops off within the first few games isn’t bad cement, it’s cutting the clamp time short because the cue “felt” set after a few minutes. Set a timer for the full duration your cement calls for and walk away from the cue until it goes off.
Kit versus buying the pieces separately
- ✓Buy a bundled kit if this is your first tip replacement, so nothing is missing mid-job
- ✓Buy components separately once you know exactly what you use and don’t
- ✓Keep a spare tube of cement on hand even after a kit’s supply runs low
- ✓Check listing photos for a visible cement tube before assuming one is included
- ✕Assume every kit labeled “complete” or “all-in-one” actually includes cement
- ✕Buy the cheapest possible kit if you’re maintaining multiple cues regularly, tool durability matters
- ✕Mix cement brands mid-repair if you’re not sure they’re compatible
- ✕Skip measuring your ferrule diameter just because a kit came with pre-sized tips
📊 Note: If you’re shopping for the tip material itself rather than the kit, our dedicated guide to tips built for applying english covers tip shape and how it affects side spin, which is a different question from what’s covered here.
How often you’ll actually need this kit
A well-maintained tip on a cue that sees regular play typically needs reshaping (not replacing) every few weeks, and a full replacement somewhere in the range of six months to two years depending on how often the cue is used and how hard the player strokes. House cues in a bar or rec room setting wear faster because of shared, less careful use. If you’re replacing tips more than once every couple of months on a personal cue with normal play, that’s usually a sign the tip material itself, not your technique, is the problem, and it’s worth trying a different tip brand next time rather than blaming the kit.
A note on ferrule material before you start
Most pool cue ferrules are made from either phenolic resin or a linen-based composite, and the material changes how forgiving the sanding step is. Phenolic ferrules are harder and more chip-resistant under the sander, tolerating a slightly heavier hand while flattening the surface. Linen ferrules are softer and sand down faster, so it’s easy to remove more material than intended if you keep sanding past the point where the surface looks flat. If you’re not sure which material your cue uses, sand in short passes and check flatness often rather than running the sander continuously.
This matters more on a shaft you plan to keep for years than on a cheap house cue, since repeated over-sanding on a linen ferrule will eventually shorten it enough to need professional shaft work. For a single tip swap, a light touch on the sander is the safer default regardless of which material you have.
When it’s worth paying a shop instead
Self-replacing a tip makes sense for a standard flat ferrule in good condition. It stops making sense the moment the ferrule itself is cracked, chipped, or separating from the shaft, since gluing a new tip onto a damaged ferrule just wastes a tip and doesn’t fix the underlying problem. It’s also worth paying a shop if your cue has an unusual or oversized ferrule, a piloted tip system, or a shaft material like carbon fiber where the manufacturer specifically warns against sanding. In those cases, the fifteen minutes and few dollars this kit saves isn’t worth risking a shaft that costs far more than the repair.
Bottom line
A genuinely complete pool cue tip replacement kit needs a removal tool, a sander or scuffer, correctly sized tips, cement, and a clamp. The two tool kits above cover the shaping and trimming side reliably; pair either one with a tube of Tweeten cement if your kit doesn’t include it, and you have everything needed to replace a tip yourself in about fifteen minutes for a few dollars in materials.
What’s the difference between a cue tip repair kit and a replacement kit?
A repair kit usually focuses on reshaping and maintaining an existing tip (scuffing, trimming, burnishing) without replacing it. A replacement kit is meant to remove a worn-out tip entirely and install a new one, which requires cement and a clamp in addition to the shaping tools.
Do I need a clamp, or can I just hold pressure by hand?
A clamp is strongly recommended. Cement needs steady, even pressure for the full cure time, often 10 minutes or longer, and holding a cue by hand that whole time rarely stays perfectly still. An off-center or shifted tip usually traces back to a skipped clamp step.
How do I know what size tip my cue needs?
Measure the ferrule’s diameter with calipers, or compare the old tip you’re removing against a ruler. Pool cues most commonly use 12mm, 12.5mm, or 13mm tips. Buying a tip that’s the wrong size by even half a millimeter will overhang the ferrule or leave a visible gap.
Can I use regular super glue instead of cue tip cement?
It’s not recommended. Purpose-made cue tip cement is formulated to stay slightly flexible after curing, which matches how a tip flexes on impact. Standard cyanoacrylate super glue cures rigid and is more prone to cracking at the bond line under repeated impact.
As an Amazon Associate, we earn from qualifying purchases through links on this page.