How to Replace Pool Table Felt Yourself


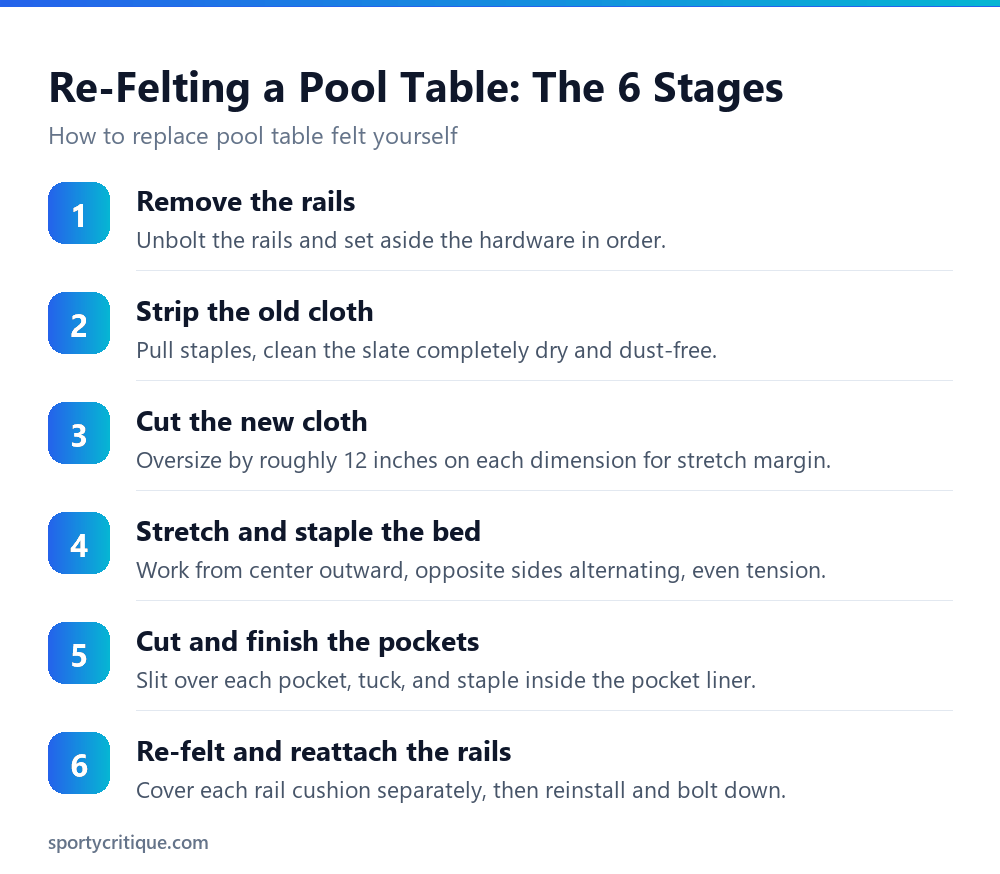
To replace pool table felt yourself: remove the rails, strip and clean the old cloth off the slate, cut the new cloth oversized by about 12 inches per dimension, then staple it down working from the center outward with even tension, cutting and tucking the pocket openings as you go before refelting and reattaching the rails last. It’s a genuinely doable weekend project with basic tools, but it rewards patience: rushed stretching is the single most common cause of a wrinkled or uneven finished job.
Re-felting isn’t technically difficult in the way, say, refinishing furniture with specialized skills can be. Every step is mechanically simple: pull staples, stretch fabric, staple it back down. What makes it a genuinely intermediate DIY project instead of a trivial one is patience and consistency, since an uneven stretch or a rushed corner shows up as a visible wrinkle or a loose spot that affects how the table actually plays, not just how it looks.
- →Budget a full afternoon to a full day; rushing the stretch step is the most common cause of a bad result
- →Cut the new cloth oversized by roughly 12 inches per dimension to leave stretch margin
- →Staple from the center of each side outward, alternating opposite sides to keep tension even
- →Pockets get slit, tucked, and stapled separately after the main bed is secured
- →Rails need their own cloth and staple job, done as a separate step from the main bed
Table of Contents
Tools You’ll Actually Need
💡 Pro tip: A basic staple gun works, but a genuinely heavy-duty one, something like the Arrow T50 Heavy-Duty Staple Gun ($19.95), makes a real difference over the course of a full table. Pool table cloth is thick enough that a weak or worn stapler struggles to drive staples flush, which leaves rough spots that catch on a cue or a hand.
Removing the Rails and Old Cloth
Start by removing the rails with a socket wrench, keeping the bolts and any hardware organized by which rail they came from, since rails aren’t always perfectly interchangeable on every table. With the rails off, pull the old bed cloth’s staples; a firm pull on the cloth itself often pops most staples loose, with a pliers or staple remover cleaning up whatever’s left behind.
Cleaning the slate completely before laying new cloth matters more than it might seem. Dust, old adhesive residue, or leftover staple fragments create small bumps under the new cloth that show up as inconsistent roll once the table’s back in play. A dry towel wipe, followed by a careful visual and hand check across the whole slate, catches most of what a quick glance misses.
Cutting and Stretching the New Cloth
Cut the new cloth with roughly 12 inches of extra material on each dimension beyond the table’s actual playing surface, giving enough margin to grip, pull, and staple without running out of fabric mid-stretch. Lay it over the slate before cutting the final shape, since the excess gets trimmed only after the cloth is correctly positioned and at least partially secured.
Stapling starts at the center of one long side, pulling the cloth taut before the first staple goes in, then moves to the center of the directly opposite side with the same tension applied. Working outward from those two center points toward the corners, alternating sides as you go, is what keeps tension even across the whole bed instead of dragging wrinkles toward whichever corner got stapled last.
⚠️ Watch out: Stapling one entire side before starting the opposite side is the most common technique mistake, since it locks in tension unevenly before the rest of the cloth has a chance to stretch to match. Always alternate between opposite sides and work outward from the center on both, not one side at a time front to back.
Pockets and Rails
Once the main bed cloth is secured, cut three slits in the cloth directly over each pocket opening, then fold the loose material down into the pocket and staple it to the inside of the pocket liner before trimming the excess. This step happens after the bed cloth is fully stapled, not before, since cutting the pocket openings too early makes it harder to keep even tension across the rest of the bed.
Rails need their own separate re-felting, since rail cushions use a different, smaller piece of cloth than the main bed. Remove the old rail cloth and staples the same way as the bed, apply a thin layer of adhesive to help the new cloth sit smoothly over the cushion’s curve, then stretch and staple it before trimming the excess and reattaching the rail to the table.
📊 Note: Take a clear photo of each rail’s hardware layout before disassembly if the table’s rail bolts and cushion attachments aren’t obviously identical on every side. It’s a small step that saves real frustration during reassembly on tables where the rails aren’t fully symmetric, and it costs nothing but a few seconds with a phone camera before the first bolt comes out.
Sealing the Slate Joints
Multi-piece slate beds, common on full-size tables, have visible seams where the slate sections meet, and those joints need filler before the new cloth goes down, not after. A gap left unfilled under the cloth creates a slight ridge that a rolling ball can catch on, showing up as an unpredictable bounce or deflection at that exact spot on the table for as long as the cloth stays installed.
Standard slate seam filler, applied with a putty knife or worked in by hand, gets pushed into the gap and leveled flush with the surrounding slate surface, then wiped clean of excess before it fully sets. This step happens during slate cleaning, before the new cloth is laid, since there’s no way to access the joints once the cloth is down.
What the Full Project Actually Costs
Cloth is the largest line item, ranging from roughly $100 to $150 for a woolen cloth kit up to $300 to $500 or more for premium worsted cloth depending on table size. Tools, if not already on hand, add somewhere in the $30 to $60 range for a decent staple gun, staple remover, and basic supplies, most of which get reused for future re-felting jobs rather than being a one-time expense.
Professional installation typically adds a separate labor charge on top of the cloth cost, often comparable to or exceeding the cloth price itself depending on the installer and region. A DIY install, tools included, generally lands well under half of what a fully professional job costs, which is the main financial argument for taking on the project rather than hiring it out.
Signs It’s Actually Time to Re-Felt
Visible pilling, a felt surface that’s gone noticeably fuzzy or matted in high-traffic spots, chalk buildup that no longer brushes out, and pucks or balls rolling inconsistently across different parts of the table are the clearest signals that a cloth has reached the end of its useful life rather than just needing a cleaning.
A cloth that’s merely dusty or lightly stained doesn’t need full replacement; a proper cleaning and brushing routine handles that. Re-felting is worth the time and cost specifically when the cloth’s actual playing characteristics, speed, roll consistency, spin response, have degraded, not just when it looks a little worn.
Common Re-Felting Mistakes
- ✓Clean the slate completely before laying new cloth
- ✓Staple from the center outward, alternating opposite sides
- ✓Cut pocket slits only after the bed cloth is fully secured
- ✓Keep rail hardware organized and labeled by which rail it came from
- ✕Rushing the stretch step to finish faster
- ✕Stapling one full side before starting the opposite side
- ✕Skipping the slate cleaning step because it looks clean enough
- ✕Mixing up rail hardware between sides on a table that isn’t fully symmetric
When to Call a Professional Instead
Premium worsted cloth costing $300 or more raises the stakes of a botched first attempt meaningfully, since a wrinkled or wasted piece of expensive cloth costs far more to redo than a budget woolen cloth would. For a first re-felting attempt on an expensive cloth, or for anyone without the time to work carefully through a full day of stretching and stapling, professional installation removes that risk for a labor fee on top of the cloth cost.
A DIY attempt on a lower-cost woolen cloth is a reasonable way to learn the process for less money at risk. If that first attempt goes reasonably well, a future re-felting on a nicer cloth becomes a much lower-risk decision with real hands-on experience already in place.
Frequently Asked Questions
How long does re-felting a pool table take?
Budget a full afternoon at minimum for a first attempt, and a full day is realistic if you’re being careful and it’s your first time. Experienced installers move faster, but rushing a first attempt is exactly what produces wrinkles and uneven tension.
Can I re-felt a pool table without removing the rails?
Not properly. The rails need to come off to access the full slate bed and to re-felt the rail cushions themselves, which use their own separate piece of cloth. Skipping rail removal leaves the job incomplete.
What glue should I use for the rail cushions?
A thin, even layer of spray adhesive or contact cement made for upholstery work is standard for helping the rail cloth sit smoothly over the cushion’s curve before stapling. Follow the specific adhesive’s dry-time instructions, since applying cloth too early or too late both cause poor adhesion.
Is it cheaper to re-felt myself than hire a professional?
Usually, yes, since you’re only paying for the cloth and basic tools rather than a labor fee on top of the material cost. The trade-off is time and the real risk of a wasted piece of cloth on a first attempt, which matters more on expensive worsted cloth than budget woolen cloth.
Do I need to fill the slate seams every time I re-felt?
Check the existing filler condition before assuming it needs redoing. If the old filler is still flush and intact when the cloth comes off, it may not need replacing; if it’s cracked, sunken, or missing in spots, refill it before laying the new cloth.
Can two people speed up a re-felting job?
Yes, having a second person hold tension on one side while the other staples makes the stretch-and-staple stage noticeably faster and more consistent, especially on a larger table where reaching across the full width alone is awkward.
A well-executed re-felting job, done carefully and without rushing the stretch stage, holds up for years of regular play. The time invested up front pays off every single time the table gets used afterward, which is a favorable trade for most owners willing to spend a weekend on the project rather than scheduling and paying for a professional installer.
As an Amazon Associate, we earn from qualifying purchases through links on this page.