
How to Refinish a Shuffleboard Table Playing Surface

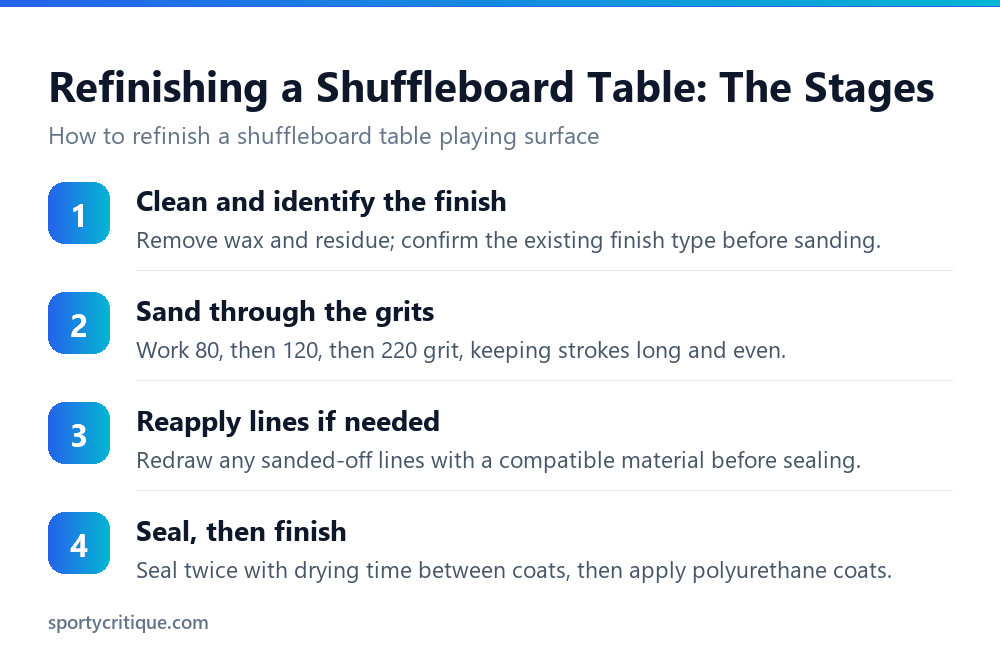
To refinish a shuffleboard table playing surface: clean the board completely, identify the existing finish type, then sand through progressively finer grits, 80, then 120, then 220, using long, even strokes to keep the surface level. Redraw any lines or numbers sanded away using a material compatible with your final finish, seal the board twice with drying time between coats, then apply several coats of polyurethane, lightly sanding between coats. This is a different, more involved job than routine cleaning or waxing; it addresses actual worn or damaged wood, not just surface speed.
Refinishing gets confused with routine cleaning and re-waxing constantly, but they solve completely different problems. Cleaning and waxing address surface speed and day-to-day playability; refinishing addresses the underlying wood finish itself once it’s worn through, scratched, discolored, or otherwise damaged in a way that cleaning alone can’t fix. Attempting to wax over a genuinely worn-out finish just wastes wax on a surface that needs actual repair.
- →Refinishing addresses worn or damaged wood finish, not the surface speed a cleaning or waxing routine handles
- →Sand through progressively finer grits (80, 120, 220), never jumping straight to fine grit on heavy old finish
- →Identify the existing finish type before choosing sealer and topcoat products for compatibility
- →Any sanded-off lines or numbers need to be redrawn with a finish-compatible material before sealing
- →Seal twice with drying time between coats, then apply multiple polyurethane coats with light sanding between each
Table of Contents
Refinishing vs. Cleaning: Knowing Which Job You Actually Need
A table that’s simply playing slow or inconsistently usually needs cleaning and fresh wax, not a full refinish. Refinishing becomes the right call when the finish itself shows real damage: deep scratches through the topcoat, discoloration or clouding that cleaning doesn’t remove, or a surface that’s gone rough and porous in patches rather than smooth throughout.
Confusing the two leads to wasted effort in both directions: waxing repeatedly over a truly worn finish never restores real playability, and refinishing a table that only needed a cleaning is far more work and cost than the actual problem required. A quick visual and hand check across the surface, feeling for roughness or looking closely for finish breakdown rather than just surface dirt, usually makes clear which job is actually needed.
Preparation: Cleaning and Identifying the Finish
Before any sanding starts, clean the board completely with a mild cleaner or mineral spirits on a microfiber cloth, removing every trace of wax, dust, and general residue. Sanding over an unclean surface can grind wax and debris into the wood grain rather than removing them cleanly, creating problems that show up later in the new finish.
Identifying the existing finish type, lacquer, varnish, acrylic, or polyurethane, matters because the sealer and topcoat products used for the new finish need to be chemically compatible. An incompatible new finish applied over or alongside old finish residue can lift and peel, undoing the entire refinishing job well after it seemed complete.
⚠️ Watch out: Never guess at finish compatibility. If the original finish type isn’t known or documented, a small test patch in an inconspicuous area, checking for lifting or poor adhesion before committing to the whole surface, catches an incompatibility problem while it’s still a minor, recoverable issue.
Sanding Through the Grits
Skipping grits, jumping straight from 80 to 220 to save time, leaves visible scratch patterns from the coarser grit that the finer grit alone can’t fully remove. Working through each step in sequence, even though it takes longer, produces a genuinely smooth final surface instead of one that looks acceptable until finish is applied and highlights every remaining scratch.
💡 Pro tip: A BLACK+DECKER Orbital Sander (5-Inch, Corded) ($39.99) makes the sanding stage dramatically faster and more consistent than sanding by hand, particularly across a full-length table surface. Long, even, overlapping strokes with the sander moving steadily, not lingering in one spot, keep the surface level rather than creating low spots from uneven pressure.
Sanding aggressively enough to remove the old finish while avoiding sanding through any painted lines or numbers on the surface takes some care, especially near those areas. If lines do get sanded away, redrawing them with a carpenter’s pencil or a finish-compatible paint before sealing keeps the board’s scoring markers intact for the new finish.
Sealing and Applying the Finish
Seal the sanded surface twice, allowing several hours of drying time between coats per the specific sealer’s instructions. Sealing isn’t optional or skippable to save a step; it creates the base layer the topcoat actually bonds to, and skipping it risks poor adhesion for the finish coats that follow.
After sealing, apply polyurethane in multiple coats, lightly sanding with fine (320 to 400) grit between each coat to keep the buildup smooth rather than letting brush marks or dust nibs accumulate layer over layer. A finished surface typically gets several coats total, with full drying time observed between each one rather than rushing the schedule to finish faster.
📊 Note: Roughly 24 hours after the final finish coat, buffing with a paste or liquid wax specifically made for the finish type used gives the surface its final smooth, playable sheen. This step comes after the refinishing work is otherwise complete, not as a substitute for any of the sanding or sealing stages above.
Common Refinishing Mistakes
- ✓Clean completely and identify the existing finish before sanding
- ✓Work through the grit sequence in order, without skipping steps
- ✓Redraw any sanded-off lines with a finish-compatible material
- ✓Allow full drying time between sealer and topcoat coats
- ✕Sanding over an unclean surface with leftover wax and residue
- ✕Jumping straight to fine grit on heavy old finish to save time
- ✕Applying a new finish that’s chemically incompatible with old finish residue
- ✕Rushing coat-to-coat drying times to finish the project faster
Climate Conditions During the Project
Humidity and temperature affect how sealer and polyurethane cure just as much as they affect wax and playing speed on a finished table. Working in a space that’s too humid can slow curing time significantly and sometimes causes a cloudy or hazy finish, while a space that’s too cold can prevent the finish from curing to full hardness at all, leaving a soft, easily damaged surface even after it appears dry.
Most finish products list an ideal temperature and humidity range on their packaging or technical data sheet, and checking that range against actual working conditions before starting avoids a frustrating result after days of careful sanding and sealing work. A garage or basement workspace, common for a project this size, sometimes needs supplemental heating or dehumidifying to hit that range reliably, particularly during humid summer months or cold winter ones.
💡 Pro tip: Test the finish on a scrap piece of similar wood under the actual working conditions before committing to the full table, if there’s any doubt about whether the space is within a reasonable range for proper curing. A failed test patch costs a few dollars in finish product; a failed full table costs the entire project’s worth of time and material.
Refinishing Older or Vintage Tables
A significantly older table, particularly one manufactured decades ago and still holding real or potential collectible value, deserves extra caution before sanding begins. Aggressive refinishing can remove original manufacturer markings, alter the table’s original character in a way that affects resale or collector value, or reveal underlying wood damage that a more conservative approach might have avoided disturbing.
Researching a specific table’s history and, where real value is a possibility, consulting with someone experienced in vintage game table restoration before starting is worth the extra time. Once original finish and markings are sanded away, that decision can’t be undone, unlike most other steps in a standard maintenance routine that leave more room for correction along the way.
When to Call a Professional Instead
A table with significant structural damage, deep gouges through multiple layers of wood, warping, or an unknown and undocumented finish history with signs of previous incompatible repairs, is a reasonable candidate for professional refinishing rather than a DIY attempt. The cost of a botched refinish, redone sanding, wasted finish product, potential further surface damage, can exceed the price difference between DIY materials and professional labor.
For a table with straightforward, surface-level wear and a known finish history, DIY refinishing following the sequence above is a realistic weekend project for someone comfortable with basic woodworking tools and willing to work through each stage carefully rather than rushing to finish.
Getting a second opinion from a local refinisher, even without hiring them for the full job, is a reasonable middle-ground option for a table that falls somewhere between clearly DIY-friendly and clearly requiring professional help. A brief consultation costs little and can clarify which category a specific table actually falls into before committing time and materials to a full weekend project, and it can also flag any structural concerns worth addressing before sanding starts rather than discovering them partway through the job.
Frequently Asked Questions
How do I know if my table needs refinishing instead of just cleaning?
Deep scratches through the topcoat, discoloration that cleaning doesn’t remove, or a surface that feels rough or porous rather than smooth all point to a genuine finish problem needing refinishing. Simple slow or inconsistent play without visible finish damage usually just needs cleaning and fresh wax.
What sanding grit should I start with?
80 grit for removing old, damaged finish, then progressing to 120 and finally 220 before sealing. Skipping grits leaves visible scratch patterns that the final finish will highlight rather than hide.
Can I use any polyurethane, or does it need to match the old finish?
The new finish needs to be chemically compatible with the old finish and any sealer used underneath it, not necessarily an identical product. A small test patch confirms compatibility before committing to the full surface if there’s any doubt.
How long does a full refinishing project take?
Realistically a full weekend or more, accounting for sanding time, sealer drying time between coats, and multiple polyurethane coats each needing their own drying period. Rushing the drying schedule to finish faster is one of the more common causes of a disappointing result.
Does humidity actually affect how the new finish turns out?
Yes. High humidity can slow curing and cause a cloudy or hazy finish, while cold temperatures can prevent the finish from curing to full hardness. Checking the finish product’s recommended temperature and humidity range against actual working conditions before starting avoids this.
Should I refinish an older or potentially valuable table myself?
Proceed with extra caution. Aggressive sanding can remove original markings or affect collector value in ways that can’t be undone. Researching the table’s history and consulting an experienced restorer first is worth the extra time for anything with real age or potential value.
Done carefully and in the right sequence, a full refinish restores a table’s playing surface to genuinely new condition, not just a temporary cosmetic improvement. That result is worth the extra day or two the project takes compared to rushing straight through it.
Patience through each stage, not raw skill, is what separates a refinishing project that turns out well from one that needs to be redone within a season of regular play.
As an Amazon Associate, we earn from qualifying purchases through links on this page.