How to Serve a Volleyball: Underhand, Float, and Topspin Techniques (Plus Where to Aim)

SportyCritique is reader-supported. When you purchase through links on our site, we may earn an affiliate commission at no extra cost to you. As an Amazon Associate, we earn from qualifying purchases.
Every other contact in volleyball is a reaction. Your pass depends on the serve, your set depends on the pass, and your offensive attack depends on the set. The serve depends on nothing except you, a stationary ball in your hand, and the opponent’s floor 30 feet away.
That independence makes the serve the most psychologically demanding contact in the sport. A shanked pass can be attributed to nasty late float. A missed serve is an unforced gift—a free point and a side-out handed to your opponent without them having to swing a single arm. Developing a dependable, aggressive serve transforms you from a defensive liability into an offensive weapon who can run off 4 to 6 unanswered points in a rotation.
This comprehensive guide details the mechanics of all five competitive serves—underhand, standing float, jump float, standing topspin, and jump topspin—alongside tactical court targeting, official service rules, diagnostic troubleshooting, and structured solo practice drills. To explore how serving connects to offensive rotations and team strategies, visit our central Volleyball Guide.
Table of Contents
The Five Volleyball Serves: When to Use Each
Volleyball features five distinct serve types. They form a deliberate mechanical progression: master the mechanics of ball contact and weight transfer at lower speeds before attempting high-velocity jumping approaches.
| Serve Type | Difficulty Rating | Aerodynamic Flight Path | Primary Strategic Purpose | When to Deploy |
|---|---|---|---|---|
| Underhand Serve | Novice / Easiest | High, predictable parabolic arc; slow descent | 100% in-court consistency; zero toss variance | First weeks of play, youth leagues (under 12), or recovering from shoulder injury |
| Standing Float Serve | Intermediate / Standard | Zero spin; erratic knuckleball wobble; late dropping break | Attacking passer seams and forcing out-of-system passes | High school, club, and collegiate competition (the primary workhorse serve) |
| Jump Float Serve | Advanced | Flat trajectory, launched from 9–10 ft height; rapid knuckleball dip | Steeper downward angle that cuts passing reaction time to under 0.6 seconds | Competitive club, collegiate, and international levels |
| Standing Topspin Serve | Intermediate-Advanced | Heavy forward rotation; aggressive downward dive into deep corners | Driving deep balls past back-row passers pinned to the endline | Strong high school and adult competitive leagues |
| Jump Topspin Serve | Elite / Hardest | 60–75+ mph missile; violent topspin Magnus dive | Sheer raw power to blow through receiving platforms for direct aces | Men’s collegiate, high-level women’s club, and Olympic national teams |
The underhand serve is not something to be embarrassed about, and the jump topspin serve should never be an immediate goal for a novice. At competitive levels, an erratic jump serve that misses 30% of the time loses matches. A controlled standing float served at 75% power that wobbles directly into the seam between two passers generates far more transition points than a wild, out-of-bounds power blast.
1. The Underhand Serve: Step-by-Step Fundamentals
If you are stepping onto a volleyball court for the first time, begin with the underhand serve. It eliminates the single hardest variable in serving: the toss. Because you hit the ball directly out of your stationary guide hand, you can focus purely on weight transfer and striking the ball on its center of mass.
- Stagger your stance: Stand comfortably behind the endline, facing the net. Place your non-dominant foot forward (left foot for right-handed servers, right foot for lefties). Point your front toe directly at your target. Your back foot sits at a 45-degree angle for balance, with 70% of your weight resting on your back leg.
- Hold the ball waist-high: Cradle the volleyball in your non-dominant hand at belly-button height, slightly to the right side of your torso (for right-handers). Keep your arm slightly bent and firm. Do not throw or flip the ball upward.
- Form your hitting hand: Make a firm fist with your dominant hand, keeping your thumb resting flat against the outside of your curled fingers—never tucked inside. Alternatively, you can use the flat, firm heel of an open palm.
- The pendulum swing: Draw your hitting arm straight back behind your hip like a bowling ball pendulum. Keep your hitting elbow locked straight throughout the swing.
- Weight shift and contact: Step forward onto your front foot, shifting your center of mass through the shot. Swing your hitting arm forward in a smooth, rhythmic arc. Strike the lower-back center of the ball cleanly off your stationary hand.
- Follow through low: Let your arm continue upward naturally toward the top tape of the net. Do not twist your torso or jerk your shoulders.
Common Rule Fault: Do not throw the ball high into the air before hitting an underhand serve. Tossing makes timing erratic, and if you flip the ball upward with spin, referees can call an illegal service action. Simply drop your holding hand a split second before your hitting fist arrives, striking the ball out of the air.
2. The Overhand Float Serve: Knuckleball Physics
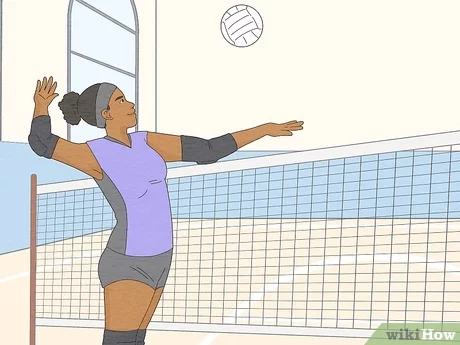
The overhand float serve is the foundational serve of modern competitive volleyball. When struck cleanly with zero rotation, the seams of the volleyball catch passing air currents, causing the ball to wobble unpredictably like a baseball knuckleball. A passer expecting the ball at chest height will suddenly see it drop 12 inches to their knees or veer two feet sideways. For a comprehensive drill progression, see our dedicated guide to the overhand serve in volleyball.
- The Athletic Stance: Stand behind the endline with your non-dominant foot forward, hips and shoulders squared to your serving target.
- The Consistent 18-Inch Toss: Hold the ball in your non-dominant hand at eye level. Lift the ball smoothly 12 to 18 inches above your extended reach, directly in line with your hitting shoulder. A low, controlled toss minimizes drift from gymnasium air conditioning or outdoor winds.
- The High Elbow Draw: As the ball leaves your hand, pull your hitting elbow back high, level with your ear, with your hand cocked next to your temple like drawing an archer’s bow.
- Rigid Palm Contact: Step forward with your back foot. Lead with your elbow, extending your arm fully. Strike the dead center of the ball with the hard, flat heel of your palm. Keep your fingers spread wide and rigid.
- The Abrupt Brake (Punch & Freeze): The defining technical difference of a float serve is the follow-through: there is none. Freeze your hand instantly upon contact, as if slapping a solid brick wall. Stopping your arm instantly transfers kinetic energy straight through the ball’s core without imparting rotational torque.
3. Advanced Attacks: Jump Float vs. Jump Topspin
Once you consistently put 9 out of 10 standing float serves into your chosen zone, you can advance to jumping serves. Jumping raises your contact point from roughly 7.5 feet to 9.5–10.5 feet above the floor, flattening the ball’s trajectory over the net tape.
The Jump Float Serve
The jump float uses a compact 3-step or 4-step approach (Left-Right-Left for right-handers) starting 4 to 6 feet behind the endline. Toss the ball 3 to 4 feet into the air with one or both hands, slightly forward into the court. Jump straight up off a two-foot plant, reach high, and punch the center of the ball with a flat, rigid hand. Because the ball is contacted high above the tape and driven on a downward vector with zero spin, passers have minimal reaction time.
The Jump Topspin Serve
The jump topspin serve is executed identically to a front-row offensive spike. Start 10 to 15 feet behind the endline. Throw the ball 10 to 12 feet high and several feet out into the court with heavy forward wrist spin. Accelerate through a full four-step spiking approach, launch into the air, and whip your arm through the ball at peak reach. Unlike the float serve, snap your wrist aggressively over the top of the ball. The resulting topspin utilizes the aerodynamic Magnus effect to drive the ball downward at speeds exceeding 65 mph.
Where to Serve: Tactical Placement Beats Pure Power
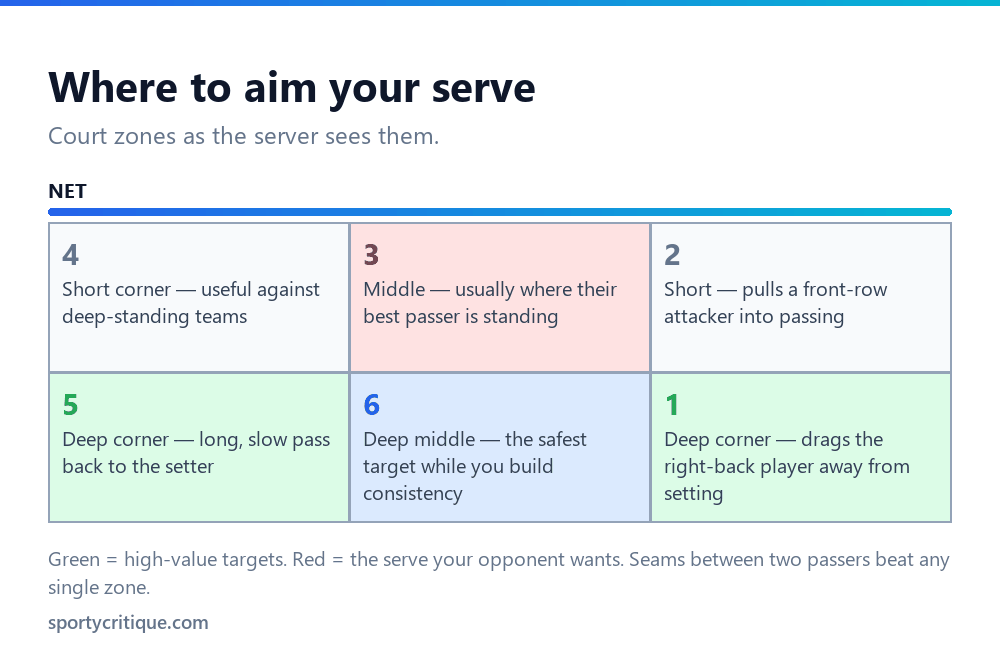
Serving the ball simply “somewhere over the net” allows the receiving team to make a clean, centered pass directly to their setter, setting up a fast kill. Top servers exploit specific tactical weaknesses across the six official court zones:
- Zone 1 to Zone 1 (Deep Corner): Serving deep into the opposing right-back corner forces the passer to dig the ball over their outside shoulder, moving away from their setter at Zone 2/3.
- The Seam Between Passers (Seam 1-6 and Seam 6-5): The seam between two primary passers is the most lucrative target on the court. Split the two passers down the middle. This induces split-second hesitation: neither player knows whether to take the ball, leading to delayed platform formation or complete miscommunication aces.
- The Short Drop (Zone 2 and Zone 4): Dropping a low, soft float serve 2 to 4 feet past the net forces a front-row attacker or deep defender to sprint forward. Even if they pass the ball, their forward momentum removes them as an attacking option for the next play.
- Targeting the Weakest Passer: Identify the opposing player who shanks balls in pre-match warm-ups or who recently committed a passing error. Direct consecutive serves at their platform until they prove they can handle the pressure.
- Targeting the Setter in Transition: If the opposing setter rotates into the back row (Zone 1, 6, or 5), serve directly at their body. If the setter is forced to pass the first ball, they cannot set, completely breaking the opponent’s offensive rhythm.
Official Serving Rules Players Commonly Misunderstand
Recreational and intermediate leagues frequently feature arguments over serving rules that were revised decades ago. Review these official FIVB and USAV standards:
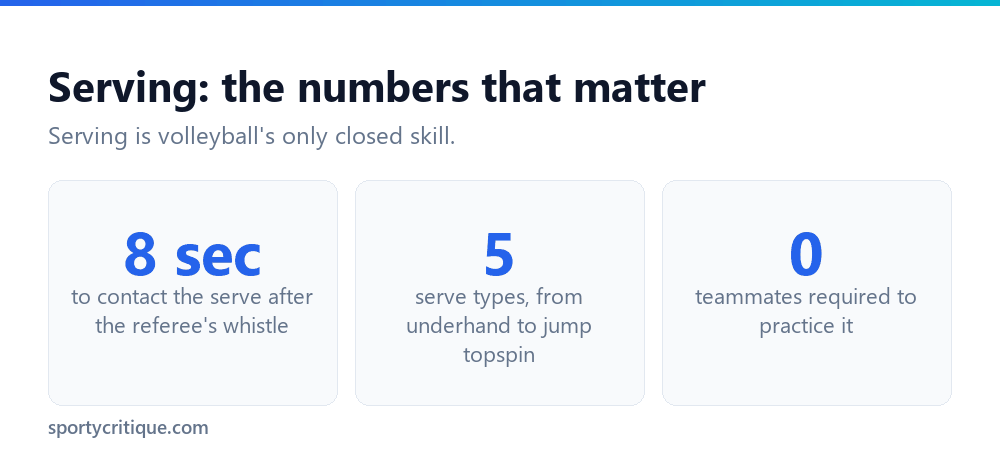
- The 8-Second Service Clock: Once the first referee blows the whistle and signals for service, you have exactly 8 seconds to contact the ball (5 seconds in NFHS high school rules). Bouncing the ball or hesitating past 8 seconds results in an immediate delay-of-game fault and loss of rally.
- The Foot Fault: At the instant of ball contact, your feet must not touch the endline or the court floor outside the service zone (the 9-meter width between the sidelines). However, on jump serves, your takeoff must be behind the line; landing inside the court after ball contact is 100% legal.
- The Let Serve is Live: A served ball that clips the top tape of the net and trickles into the opponent’s court is completely legal and in play. Play must continue immediately.
- The Toss-Drop Rule (USAV vs. FIVB): Under USAV junior and adult rules, if you execute a bad toss, you are permitted to let the ball drop to the floor without touching it once per service rotation. The referee will blow a re-serve whistle, granting a second service attempt (which must be initiated within the remaining clock). Under FIVB international rules, a toss that drops to the floor is a service fault.
- Screening is Illegal: Serving teammates cannot stand tightly together, wave arms, jump, or move laterally to obscure the receiving team’s line of sight to the server and the ball flight path.
Diagnostic Troubleshooting: 6 Common Serving Faults & Fixes
If your serve is consistently failing in games, identify your symptom in this diagnostic table to apply the proper mechanical correction:
| Observable Symptom | Biomechanical Root Cause | Immediate Correction Cue |
|---|---|---|
| Ball repeatedly hits the net tape | Toss is falling too far forward, or contact point is too low in front of the chin | Toss 12–18 inches higher directly above hitting shoulder; reach for the highest contact window |
| Ball sails long out of bounds | Hitting the underside of the ball with an upward-angled palm or following through too high | Strike the dead center with a flat palm; abruptly freeze the hand on contact to stop upward lift |
| Inconsistent float wobble (ball spins) | Fingers wrapping around the ball or snapping wrist at contact | Keep fingers spread rigid and firm; strike strictly with the heel of the palm and punch like a piston |
| Serve drifts out wide past sidelines | Hips and shoulders twisting during the toss, or hitting off the side of the ball | Square hips perpendicular to your target zone before tossing; keep non-hitting guide hand stable |
| Foot faults on the endline | Starting your stance too close to the line or taking an uncontrolled forward stumble | Step back 18 inches from the baseline; establish your pre-serve routine before the whistle blows |
| Shoulder soreness after serving | Swinging with a dropped elbow below shoulder level, straining the rotator cuff | Draw elbow back high level with your ear in the bow-and-arrow stance before beginning forward swing |
The Progressive “Walk-Back” Solo Serving Drill
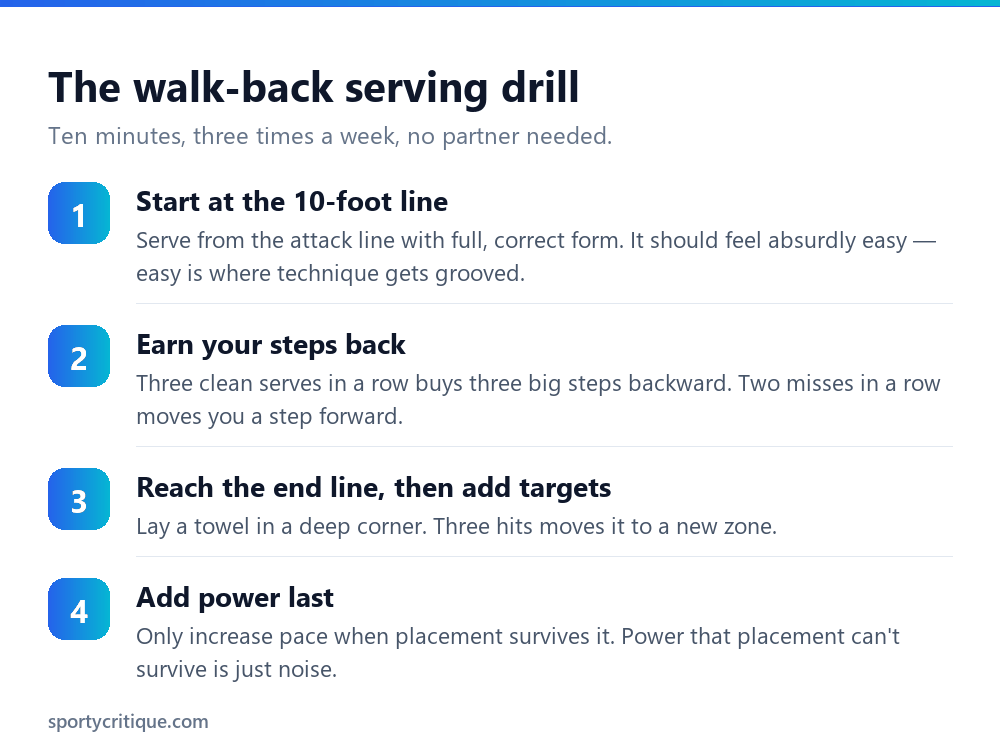
The fastest way to ruin a beginner’s serve is forcing them to serve from 30 feet away on day one. Distance causes players to strain their arms, drop their elbows, and abandon clean mechanics. Use the progressive “Walk-Back Drill” to groove proper muscle memory:
- Stage 1 (The 10-Foot Line): Stand at the 10-foot attack line (just 10 feet from the net). Execute 5 overhand float serves with full, compact mechanics. Because you are close, you do not need power; focus purely on a clean 18-inch toss and a rigid, motionless hand freeze on contact. Complete 5 in a row over the net.
- Stage 2 (Mid-Court – 20 Feet): Take three large steps backward to the mid-court mark. Serve 5 balls to a designated zone. Engage your legs slightly to provide extra upward lift without changing your arm swing speed.
- Stage 3 (The Baseline – 30 Feet): Step to the official endline. Maintain the exact same toss height and punch contact you used from 10 feet away. Allow your back leg to step through toward the court to transfer natural forward momentum.
- Stage 4 (Deep Serving – 35 Feet): Step 5 feet behind the endline. Serving from deep creates unique float trajectories that dive sharply as they cross the tape. Complete 10 serves, aiming for specific seam targets.
Essential Training Gear for Serving Practice
Repetition is the only way to build an automatic, pressure-proof serve. These essential training tools help you practice high-volume reps efficiently:
| Equipment | Category / Purpose | Key Specifications | Target Benefit | Check Price |
|---|---|---|---|---|
| Molten FLISTATEC V5M5000 | Official Match Volleyball | Hexagonal textured micro-fiber cover; premium bladder; 4.3–4.6 PSI | Raised hexagonal surface stabilizes flight paths and produces predictable float patterns | View on Amazon |
| Tandem Sport Target Challenger | Precision Serving & Passing Target | Adjustable steel frame, angled catch net with colored target ring | Provides visual feedback when aiming at specific court zones and passer seams | View on Amazon |
| Tandem Sport Solo Serve Trainer | Tethered Ball Return Trainer | Adjustable waist belt with elastic cord and durable ball pouch | Allows hundreds of toss and contact repetitions in small spaces without chasing balls | View on Amazon |
| Tachikara Pressure Gauge & Dual Action Pump | Ball Maintenance & PSI Gauge | Digital LCD readout with release valve; compact brass needle | Ensures practice balls maintain exact 4.3–4.6 regulation PSI for consistent float response | View on Amazon |
Frequently Asked Questions
Is an underhand serve legal in competitive volleyball?
Yes. The underhand serve is 100% legal at every level of volleyball, including NCAA and Olympic competition. The rulebook does not mandate an overhand swing; it only requires the ball to be hit cleanly with one hand or arm after being released. High-level players do not use underhand serves because the predictable flight arc makes them easy for skilled opponents to pass into quick kills.
Can you block or spike an opponent’s serve?
No. Under official FIVB, USAV, and NFHS rules, it is an illegal fault to block an opponent’s serve or to attack a serve while the ball is entirely higher than the top of the net. The receiving team must allow the serve to clear the net tape and make their initial touch using a forearm pass or controlled overhead dig.
What happens if a served volleyball touches the net?
If a served ball touches the top tape of the net and continues across into the opponent’s court, the ball is live and completely in play. This is known as a “let serve.” The receiving team must play the ball normally. If the served ball hits the net and falls back onto the server’s side or travels out of bounds, the serving team loses the rally and a point is awarded to the opponent.
How many seconds do you have to serve in volleyball?
Under FIVB and USAV rules, the server has exactly 8 seconds to contact the ball after the referee blows the whistle. In US high school play governed by NFHS rules, the server has 5 seconds. Exceeding this time limit results in a delay-of-service violation, turning the ball over to the opposing team.
Why does an overhand float serve wobble in mid-air?
A float serve wobbles because of the aerodynamic Karman vortex street effect. When a volleyball is struck with zero rotation, airflow separates unevenly across the ball’s raised seams as it travels through the air. These alternating low-pressure pockets push the ball unpredictably left, right, up, or down during the final 10 feet of flight.
Deepen Your Volleyball Skills:
- Volleyball Cornerstone Guide — Master rules, court dimensions, positions, and gear guides.
- How to Overhand Serve — Step-by-step float mechanics, toss drills, and seam targeting.
- How to Hit a Volleyball — Passing, setting, attacking, and defensive digging mechanics.
- How to Spike a Volleyball — In-depth vertical approach, penultimate brake, and attack timing.
- Volleyball PSI & Inflation Guide — Regulation air pressure standards for indoor and beach play.
- How to Play Volleyball — Complete beginner rules, rotations, and scoring system.
- How Volleyball Scoring Works — Rally scoring rules, side-outs, and tiebreak sets.