Volleyball Serve Receive Platform Technique: Building a Stable Passing Angle

SportyCritique is reader-supported. When you purchase through links on our site, we may earn an affiliate commission at no extra cost to you. As an Amazon Associate, we earn from qualifying purchases.
In competitive volleyball, no play happens in a vacuum. If your serve-receive passing breaks down, your setter is forced to sprint into the bleachers, your middle blockers become useless spectators, and your outside hitters are left stranded against a fully formed double block. High school and collegiate matches are rarely decided by hitting percentages; they are decided by serve-receive efficiency.
Yet novice and intermediate passers constantly sabotage their contact by swinging their arms upward like a baseball bat or waiting until the ball is two feet from their chest before attempting to assemble their hands. This technical guide breaks down the physical biomechanics of the forearm platform—from radial wrist deviation and shoulder shrugging to angle geometry, lateral shuffle footwork, passing float versus jump topspin serves, the official 3-point passing scale, and diagnostic fixes for match play. For full positional and rotation strategies, explore our central Volleyball Guide.
Table of Contents
Building the Forearm Platform: The 4-Step Anatomy
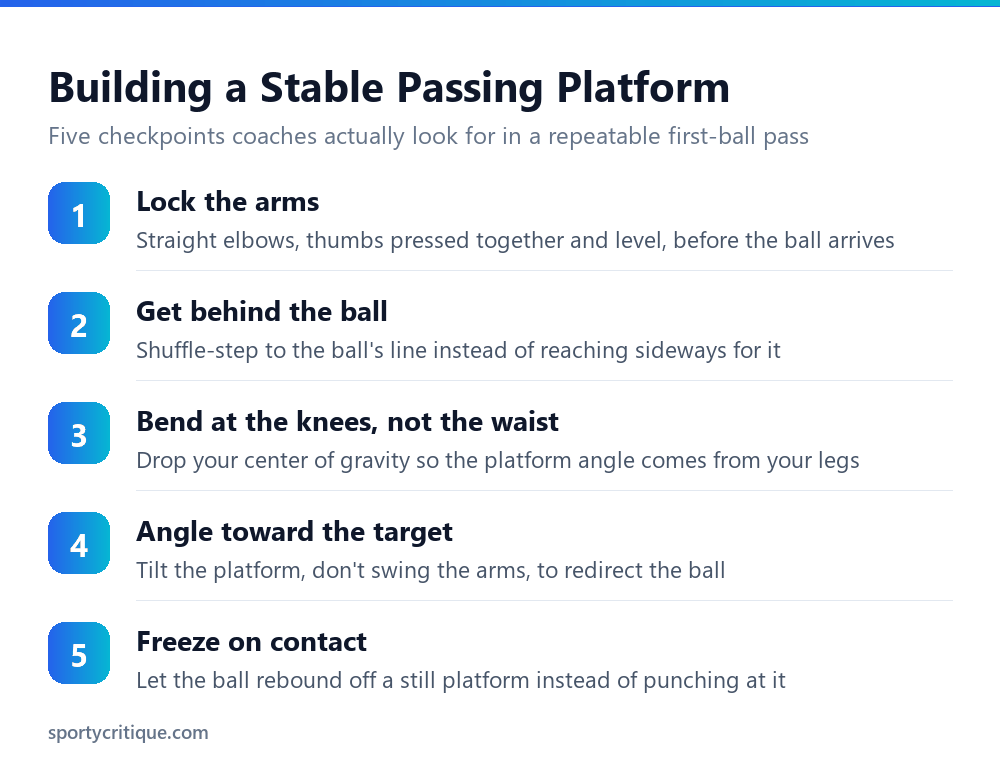
Your platform consists of the flat, fleshy radial surface of your lower inner forearms, roughly 2 to 4 inches above your wrist joint. To build a rigid, reliable rebounding surface, execute this exact mechanical sequence:
- The Hand Nest: Lay the fingers of your non-dominant hand across the palm of your dominant hand at a 45-degree angle. Fold your dominant fingers over the back of your non-dominant hand to form a secure, unified nest. Never interlock your fingers: interlocking bends your wrists, creates uneven knuckle ridges, and risks broken fingers on 65 mph jump serves.
- Thumbs Parallel and Pointing Down: Press both thumbs tightly together side by side. Point the tips of both thumbs directly down toward the floor. This downward wrist flexion forces your wrists into radial deviation, turning your inner forearms upward and exposing a wide, continuous, flat board.
- Hyperextend the Elbows: Lock your elbows straight. If there is a bend in either elbow at the moment of contact, the ball will hit an uneven trough and ricochet sideways into the stands.
- Shrug Shoulders Forward: Pull your shoulders up toward your ears and push them slightly forward. This pinches your pectoral muscles, clears your platform 12 inches away from your torso, and creates the space needed to tilt your platform without moving your feet.
Geometry Over Swinging: The Law of Platform Deflection
The single greatest flaw in recreational volleyball is swinging the arms at the ball. An opponent’s serve already carries immense kinetic energy. When a ball arrives at 40 to 60 mph, you do not need to add power; you only need to provide a stationary rebounding angle.
In physics, the angle of incidence equals the angle of reflection. If you swing your arms upward during contact, your platform angle changes continuously through the swing arc. If contact occurs a fraction of an inch early, the ball flies behind you; if contact occurs an inch late, it shanks into the net. Instead, freeze your platform early, drop your hips, and tilt your platform toward the target pin:
- Passing Balls on Your Right: Drop your right shoulder and lift your left shoulder to tilt the platform left toward Zone 2/3.
- Passing Balls on Your Left: Drop your left shoulder and raise your right shoulder to angle the platform inward toward the court center.
- Leg Drive: Let your legs provide a subtle 2-inch upward lift through your quadriceps. Your arms remain completely still upon contact.
Passing Float Serves vs. Jump Topspin Serves
Float serves and jump topspin serves require completely opposite platform dynamics. Treating a dipping float serve the same as a diving topspin missile results in immediate reception errors.
| Factor | Passing a Float Serve | Passing a Jump Topspin Serve |
|---|---|---|
| Incoming Aerodynamics | Zero spin; erratic knuckleball wobble; drops or veers late within 10 ft of contact | Heavy forward rotation; 55–75 mph velocity; steep downward Magnus dive |
| Platform Position | Held higher (waist to chest level); elbows extended early | Held lower (knee to thigh level); hands separated until final millisecond |
| Contact Action | Push through: Give a firm, controlled forward press to counteract unpredictable late wobble | Absorb and cushion: Pull the platform back slightly or drop hips to cushion heavy impact |
| Stance Width | Medium athletic base (shoulder-width); weight balanced on balls of feet | Wide base (wider than shoulder-width); deep knee flexion (past 100°) to absorb force |
| Overhead Hand Option | High viable option: take deep float serves with open finger pads above forehead | Rarely viable: heavy pace will blow through finger pads and cause sprains |
The 3-Point Passing Scale: How Coaches Grade Reception
At collegiate and professional levels, coaches do not judge passes subjectively. They use the standardized 0-to-3 Passing Scale to quantify passer efficiency:
- “3” Pass (Perfect Target): The ball arrives 12 to 15 feet high, landing exactly within 2 feet of the net in Zone 2/3. The setter does not have to move more than one step and can set any attacker (Outside, Middle quick, Opposite, or back-row Pipe).
- “2” Pass (Positive Pass): The ball lands 5 to 10 feet off the net. The setter must move slightly to get under the ball. The setter can still set the outside or right-side pin, but the middle quick attack is eliminated.
- “1” Pass (In-System Emergency): The ball travels high into the 10-foot line area or back row. The setter or a secondary player must bump-set an out-of-system high ball to an outside hitter.
- “0” Pass (Reception Error / Ace): The ball hits the floor untouched, is shanked into the net, or ricochets out of bounds, awarding an immediate ace to the serving team.
Footwork: Shuffle Steps Beat Crossovers
Your hands are only as consistent as your feet. If you are reaching sideways across your body with your arms outstretched, your platform angle breaks. To maintain a centered platform, master lateral shuffle footwork:
- The Split-Step Hop: As the server’s hand contacts the ball 30 feet away, execute a small 1-inch hop on the balls of your feet. This activates your calves, uncocks your hips, and prepares your muscles to explode in any direction.
- Lateral Shuffle: Push off your outside foot to take short, rapid shuffle steps toward the ball path. Keep your hips low and shoulders level.
- Never Cross Your Feet on Short Movements: Crossing your feet turns your hips sideways, destroying your squared angle to the net. Use crossover steps only when sprinting 15+ feet to chase down an extreme deep corner float.
- Drop-Step for Deep Serves: When a serve is driven deep, drop your target-side foot back at a 45-degree angle, open your hips, and glide backward while keeping your chest facing the incoming ball.
Diagnostic Troubleshooting: 6 Common Passing Mistakes & Fixes
If your passes are shanking into the bleachers or spraying behind you, use this diagnostic table to identify and fix your platform breakdown:
| Observable Symptom | Biomechanical Root Cause | Immediate Correction Cue |
|---|---|---|
| Ball flies backward over your head | Swinging arms upward like a bat upon contact, or standing too upright with flat shoulders | Drop your hips; shrug shoulders forward to pinch chest; freeze the platform completely on contact |
| Ball shanks wildly sideways | Contacting the ball on uneven wrists or letting elbows bend upon ball impact | Lock elbows hyperextended; point thumbs straight down to floor to flatten radial forearm surface |
| Severe forearm bruising / wrist stinging | Contacting the ball on the bony wrist joints or knuckles rather than the muscular forearm | Contact the ball 2–4 inches above the wrist joint on the fleshy inner forearm; check ball PSI (4.3–4.6 PSI) |
| Pass constantly drifts tight into the net tape | Platform angle is tilted too flat (parallel to the ceiling) rather than angled back at 45° | Tilt platform back slightly toward your chin; let the ball deflect high into the air (12–15 ft arc) |
| Caught flat-footed on late dipping floats | Resting weight on heels before the serve, or freezing hands clasped too early | Keep hands separated at chest level until ball crosses tape; rest weight on balls of feet with knees bent |
| Stuffed on top-spin jump serves | Pushing forward into a 70 mph ball instead of absorbing impact | Drop your hips on contact and allow your platform to cushion 1–2 inches back into your body |
Essential Training Equipment for Serve-Receive Passing
Developing dependable platform muscle memory requires high-volume reps without joint strain. These four training tools help passers hone their platform angles and court agility:
| Product | Category / Purpose | Key Specifications | Target Benefit | Check Price |
|---|---|---|---|---|
| Tandem Sport Passing Target Sleeves | Platform Sweet Spot Training Aid | Elastic compression sleeve with padded target markings on inner forearms | Provides visual feedback on ideal contact zones while eliminating forearm sting and bruising | View on Amazon |
| Molten FLISTATEC V5M5000 Volleyball | Official Match Reception Ball | Hexagonal micro-textured composite cover; premium butyl bladder; 4.3–4.6 PSI | Raised hexagonal surface stabilizes flight paths, providing realistic float and spin feedback | View on Amazon |
| Asics Gel-Rocket 11 Volleyball Shoes | Lateral Court Agility Footwear | Non-marking gum rubber outsole, forefoot Gel cushioning, Trusstic midfoot support | Prevents foot slipping during rapid split-step hops and lateral shuffle adjustments | View on Amazon |
| Tandem Sport Target Challenger Net | Precision Target Collection Aid | Adjustable steel frame with angled target hoop and ball collection pouch | Positions at the Zone 2/3 setter spot to quantify 3-point vs. 2-point passing accuracy | View on Amazon |
Frequently Asked Questions
Why should you never interlock your fingers when passing a volleyball?
Interlocking your fingers forces your thumbs to sit at uneven heights and tilts your wrists inward, creating an uneven, trough-like platform that causes erratic shanks. Additionally, a fast-served ball traveling 60+ mph can bend interlocked fingers backward, causing severe joint sprains or fractures. Always cup one hand inside the other with thumbs parallel.
Can you pass a volleyball serve with overhead fingers?
Yes. Passing a serve with overhead finger action (setting) is 100% legal under FIVB, USAV, and NCAA rules, provided the contact is clean without lifts or carries. Taking deep, floating serves with overhead hands is a standard strategy for back-row players pinned against the endline.
Where on the arms should a volleyball contact your passing platform?
The sweet spot for forearm passing is 2 to 4 inches above the wrist joint on the flat, muscular inner surface of your lower forearms. Contacting the ball directly on the wrist bones causes intense pain and irregular bounces, while contacting too high near the elbows eliminates directional control.
What is a good serve-receive passing average in competitive volleyball?
On the standard 0-to-3 passing scale, an elite collegiate or international passer averages between 2.2 and 2.4. A high school or club player maintaining an average of 2.0 or higher is considered a reliable in-system passer. Passing below 1.7 forces the offense into predictable out-of-system attacks.
How do you stop flinching when receiving hard-driven jump serves?
Flinching occurs when passers stand too upright and wait for the ball to reach their chest. Lower your center of gravity before the server jumps, rest your weight forward on the balls of your feet, and hold your hands separated in front of your body. Reading the server’s toss and initiating your split-step hop early gives your brain time to track the trajectory without feeling rushed.
Deepen Your Volleyball Skills:
- Volleyball Cornerstone Guide — Master rules, court dimensions, positions, and gear guides.
- Volleyball Rotation Rules Explained — 5-1 vs 6-2 systems, overlap rules, and attack lines.
- How to Set a Volleyball — Hand shape, footwork stagger, back set, and offensive set tempos.
- How to Play Volleyball — Complete beginner rules, rotations, and positions.
- How to Hit a Volleyball — Passing, setting, attacking, and defensive digging mechanics.
- How to Spike a Volleyball — In-depth vertical approach, penultimate brake, and attack timing.
- How to Block in Volleyball — Swing blocking, net penetration, and stopping the tool.
- How to Overhand Serve — Step-by-step float mechanics, toss drills, and seam targeting.
- How to Serve a Volleyball — Breakdown of underhand, float, topspin, and jump serves.
- How Volleyball Scoring Works — Rally scoring rules, side-outs, and tiebreak sets.
- Volleyball PSI & Inflation Guide — Regulation air pressure standards for indoor and beach play.